I make grilled cheese a lot. It’s simple comfort food that works as a weekday dinner, a late-night snack, or a child’s lunchbox staple. The version I use most often is straightforward: good bread, two kinds of cheese, butter on the outside, and a touch of garlic salt with parsley for a little lift. It’s fast, predictable, and always satisfying.
This post is practical. I’ll walk you through the exact ingredients and the steps I follow every single time, point out what makes this version reliable, and offer notes on equipment, common missteps, and quick variations for each season. No fluff—just what I do so you get consistent golden bread and melty cheese.
Whether you’re feeding four hungry people or making one sandwich for yourself, the technique matters more than fancy add-ins. I’ll also cover storage and reheating so leftovers don’t go to waste. Let’s get to it.
What You’ll Gather
Ingredients
- 8 bread slices (artisan, sourdough, homemade) — provides structure and crunch; plan on 2 slices per sandwich.
- 4 slices cheddar cheese — sharp flavor and good melt; one slice per sandwich.
- 4 slices provolone cheese — mild, creamy melt; one slice per sandwich to balance the cheddar.
- Butter — browns and crisps the exterior; spread on the outside of each slice.
- Garlic salt (with parsley flakes) — seasoned finish on the buttered side; adds garlic and herb notes without extra steps.
Grilled Cheese Recipe: From Prep to Plate
- Divide the ingredients to make 4 sandwiches: each sandwich will use 2 slices bread, 1 slice cheddar, and 1 slice provolone.
- Butter one side of each of the 8 bread slices.
- Lightly sprinkle garlic salt with parsley flakes onto the buttered side of each slice.
- Heat a large skillet or griddle over medium heat.
- For each sandwich, place one bread slice in the skillet buttered-side down.
- Top that slice with 1 slice cheddar and 1 slice provolone.
- Place the second bread slice on top with the buttered side facing up (buttered sides should be facing outward).
- Cook until the bottom is golden brown, about 2–4 minutes; press gently with a spatula if desired and lower the heat slightly if the bread is browning too fast.
- Carefully flip the sandwich and cook the other side until golden brown and the cheese is melted, another 2–4 minutes.
- Remove sandwiches from the skillet and let rest 1 minute before slicing and serving.
What Makes This Recipe Special
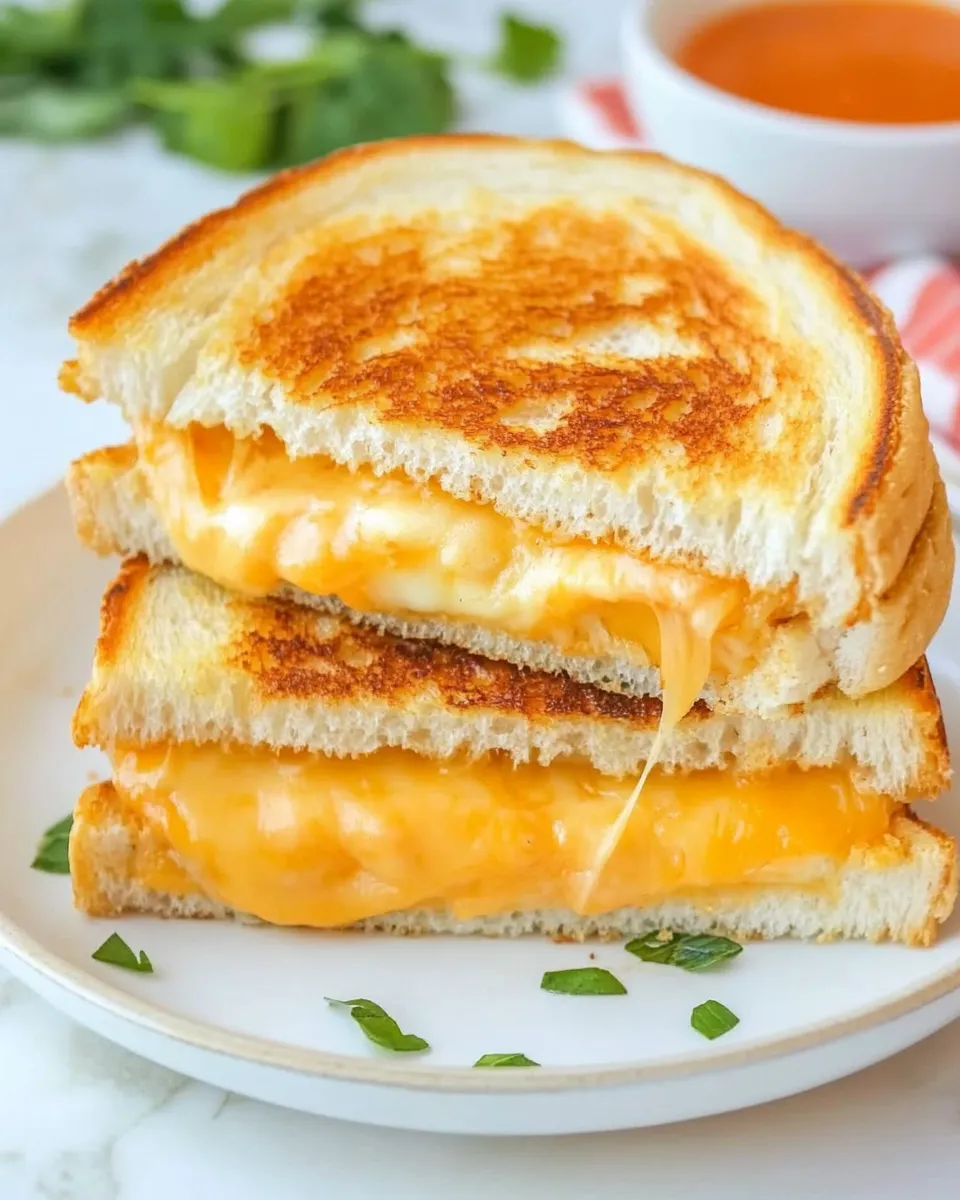
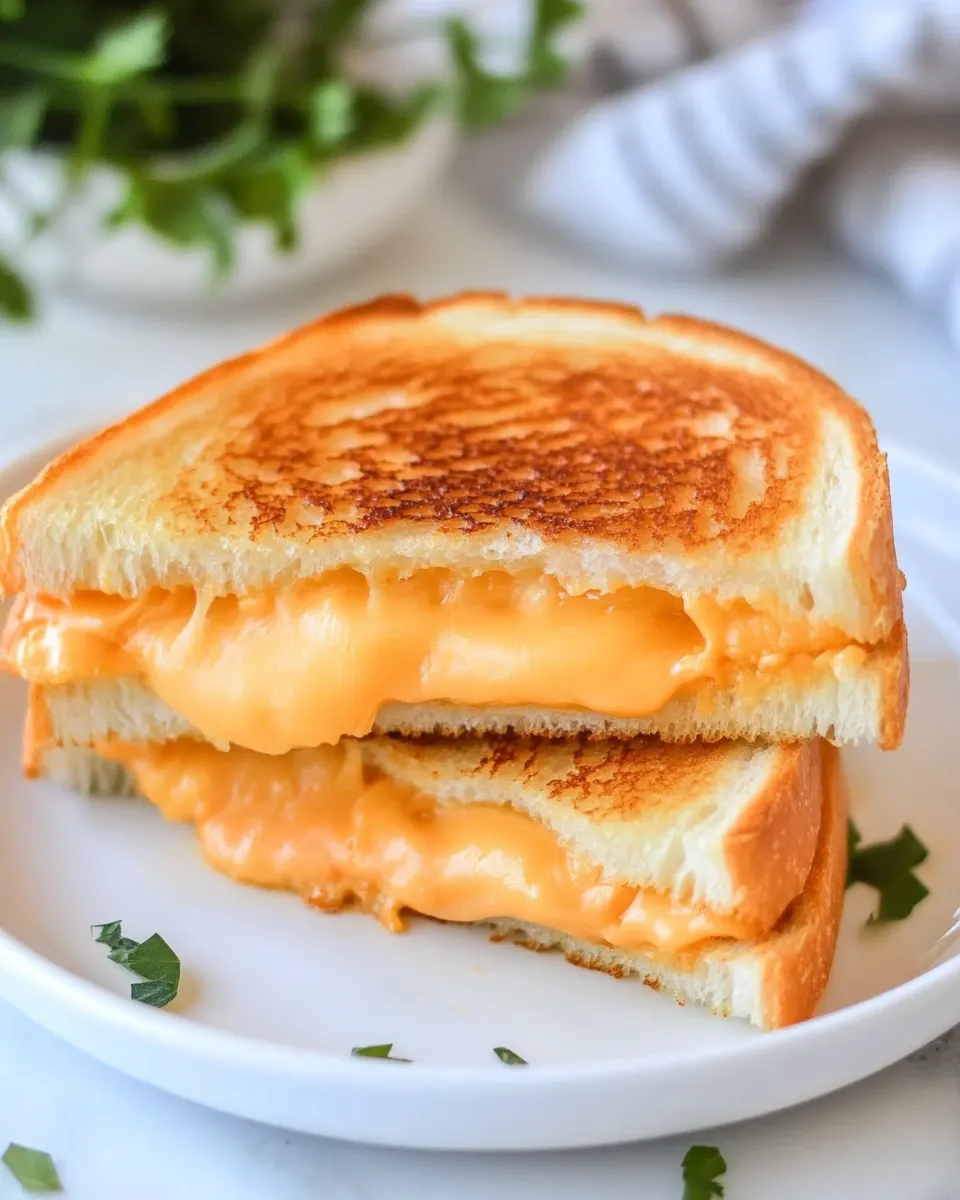
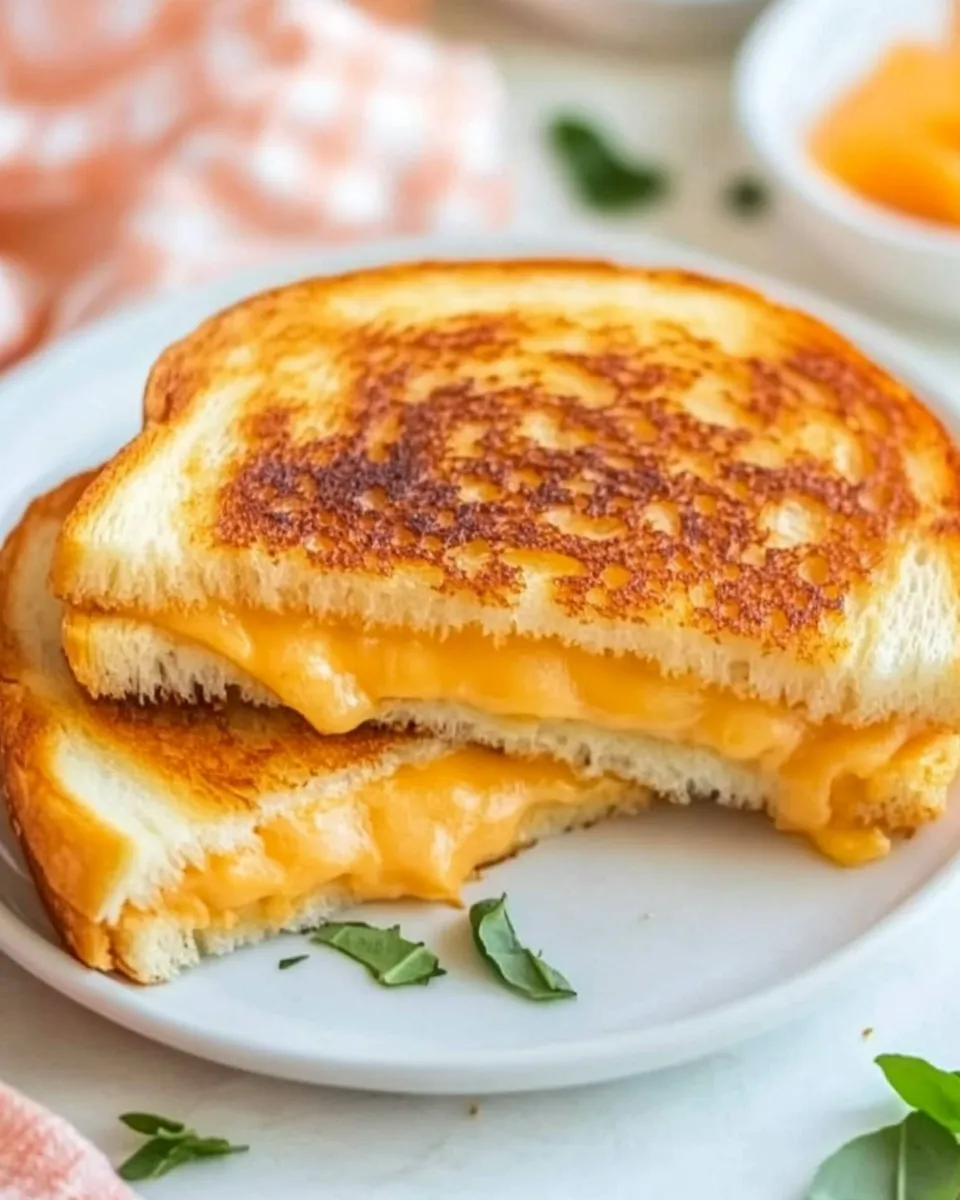
It’s the balance between simplicity and intention. There are only a few moving parts, but each has a job: the bread gives texture, the cheddar brings bite, and the provolone adds creaminess. Butter on the outside and a light sprinkle of garlic salt with parsley flakes elevate the flavor without complicating the process.
Another strength is timing. The method calls for low-to-medium heat and a patient 2–4 minute sear per side. That’s the sweet spot where the bread crisps evenly and the cheese melts without burning the exterior. If you follow the heat guidance and press gently only if needed, you end up with a sandwich that’s crisp outside and melting inside every time.
Low-Carb/Keto Alternatives
- Low-carb or keto bread — swap the artisan slices for a low-carb loaf; the technique is the same: buttered sides out, medium heat.
- Use extra cheese as a crisping layer — for a nearly carb-free outer crust, melt a thin layer of cheddar directly in the skillet until crispy, then place the buttered bread on that crisp cheese and assemble as usual.
- Butter alternatives — if you’re avoiding dairy, use a high-fat plant-based spread suitable for frying; results vary so watch heat closely.
Must-Have Equipment
- Large skillet or griddle — even heat is crucial for an even brown.
- Spatula — a thin, wide spatula helps you flip without spilling the cheese.
- Butter knife — for spreading butter thinly and evenly.
- Heatproof plate or cutting board — for resting and slicing the sandwiches.
Steer Clear of These
A few common mistakes will ruin an otherwise perfect grilled cheese:
- Too-high heat — the bread will brown before the cheese melts. If you see dark spots quickly, lower the heat a notch or two.
- Over-buttering — too much butter makes the pan greasy and soggy spots can form. Aim for an even, thin layer on each outside surface.
- Stacking too much cheese — if you double up beyond the recipe, the inside takes longer to melt and the outside can burn.
- Flipping too soon or too often — wait for the bottom to be golden before flipping. Opening and closing constantly delays even cooking.
Spring–Summer–Fall–Winter Ideas
Spring
Brighten the plate with a simple side salad: peppery arugula, lemon vinaigrette, a few cherry tomatoes. A light, crisp drink finishes the meal without weighing it down.
Summer
Serve with chilled tomato soup or a cucumber-dill salad. If you have extra fresh basil, tear a few leaves and tuck them inside before grilling for a fresh note.
Fall
Pair with roasted butternut squash soup or a warm apple compote on the side for contrast. Add a slice of smoked cheddar or a bit of caramelized onion if you want seasonal depth.
Winter
Make it cozy: mug of hearty tomato or vegetable soup and a blanket. A sprinkle of crushed red pepper or a swipe of grainy mustard inside the sandwich works well when you’re craving bold flavors.
Author’s Commentary
I return to this exact method when I want a guaranteed outcome. The buttered-side-out idea is textbook, but the garlic salt with parsley flakes is my little shortcut to flavored bread without extra steps. If you want to customize, do it inside the sandwich: a touch of mustard, a thin slice of tomato, or a few caramelized onions. Just remember the golden rule—control the heat.
One more tip: let sandwiches rest for exactly one minute after they come off the skillet. That pause lets the cheese settle so slicing yields neat halves instead of molten strings that stream everywhere.
Store, Freeze & Reheat
Short-term storage: wrap leftover sandwiches in foil and refrigerate for up to 2 days. Reheat in a skillet or oven at low heat to refresh the crust and melt the center—avoid the microwave if you want crisp bread.
Freezing: I don’t recommend freezing a fully assembled grilled cheese; the texture suffers. If you must, wrap tightly in foil and freeze up to 1 month. Reheat from frozen in a low oven (about 300°F / 150°C) wrapped in foil until heated through, then open the foil and crisp briefly in a skillet.
Reheating method (best results): place the sandwich in a cool skillet, cover, and warm over low heat. Flip once the bottom is crisp and the cheese has loosened. This controlled approach brings the sandwich back to life without burning the outside.
Quick Q&A
- Can I use one type of cheese only? Yes. Cheddar alone works fine; provolone adds melt and balance, but a single cheese is perfectly acceptable.
- Should I press the sandwich? You can press gently with a spatula to help contact between bread and cheese, but heavy pressing isn’t necessary. Light pressure is enough.
- Why garlic salt instead of garlic powder or fresh garlic? Garlic salt with parsley flakes seasons the bread evenly and doesn’t add moisture. Fresh garlic can burn when exposed to direct heat and garlic powder can clump.
- How do I know when cheese is melted without opening the sandwich? The described 2–4 minute windows per side are designed to time melt. The sandwich should slide easily on the spatula and the edges may show slight seepage of melted cheese when the interior is ready.
The Last Word
Grilled cheese shouldn’t be complicated. With good bread, reliable cheese choices, buttered outsides, and modest heat, you’ll get consistent results. Follow the simple, step-by-step method above and you’ll have four golden, melty sandwiches in about 15 minutes. That’s the kind of dependable meal I reach for again and again—quick, comforting, and always satisfying.

Best Grilled Cheese Recipe
Equipment
- Large skillet or griddle
- Spatula
Ingredients
Ingredients
- 8 bread slices artisan, sourdough, homemade
- 4 slicescheddar cheese
- 4 slicesprovolone cheese
- butter
- garlic salt with parsley flakes
Instructions
Instructions
- Divide the ingredients to make 4 sandwiches: each sandwich will use 2 slices bread, 1 slice cheddar, and 1 slice provolone.
- Butter one side of each of the 8 bread slices.
- Lightly sprinkle garlic salt with parsley flakes onto the buttered side of each slice.
- Heat a large skillet or griddle over medium heat.
- For each sandwich, place one bread slice in the skillet buttered-side down.
- Top that slice with 1 slice cheddar and 1 slice provolone.
- Place the second bread slice on top with the buttered side facing up (buttered sides should be facing outward).
- Cook until the bottom is golden brown, about 2–4 minutes; press gently with a spatula if desired and lower the heat slightly if the bread is browning too fast.
- Carefully flip the sandwich and cook the other side until golden brown and the cheese is melted, another 2–4 minutes.
- Remove sandwiches from the skillet and let rest 1 minute before slicing and serving.
Notes
Cover the pan with the lid. Place it slightly askew to avoid a build-up of steam.
Heat both sides of the sandwich until warm and the cheese is melty.