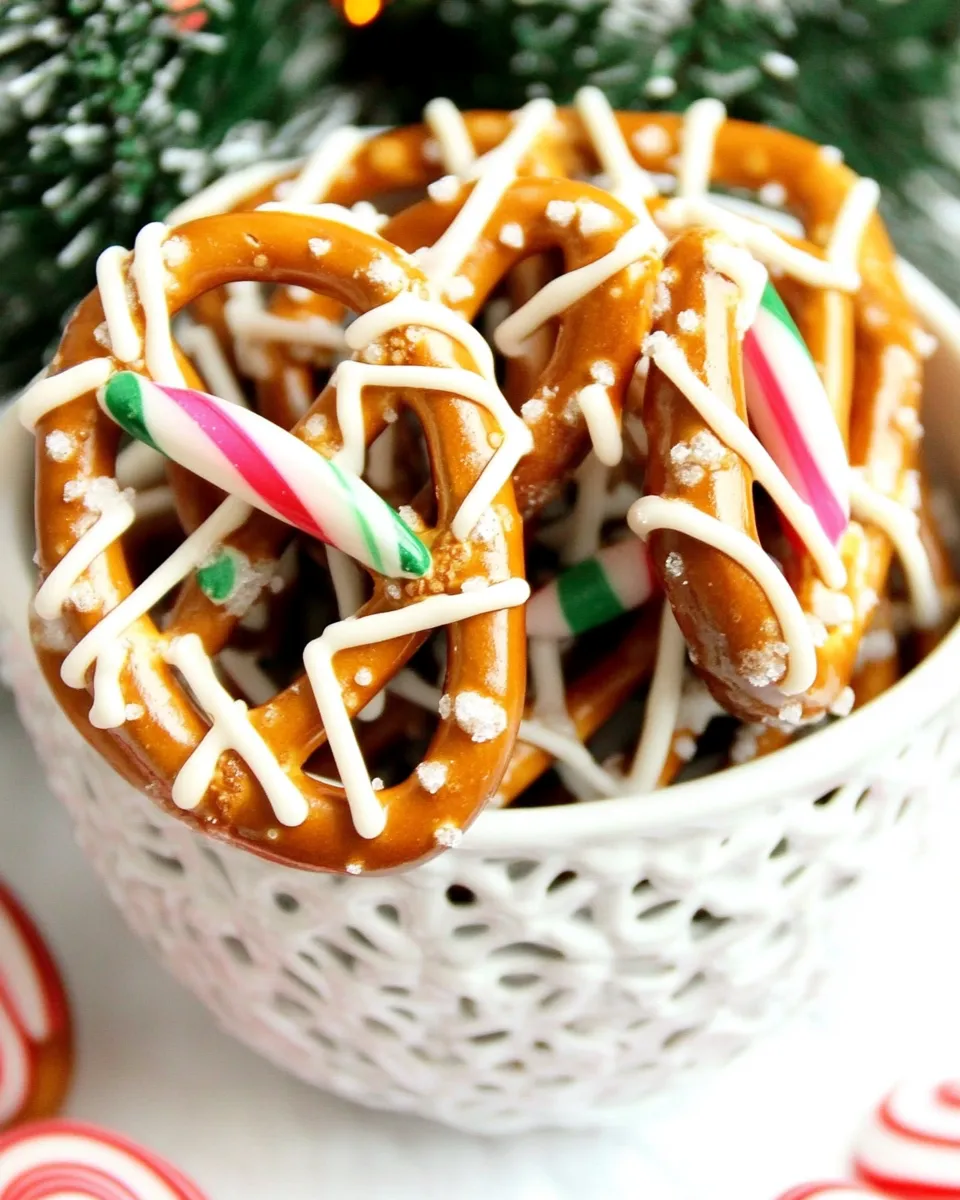
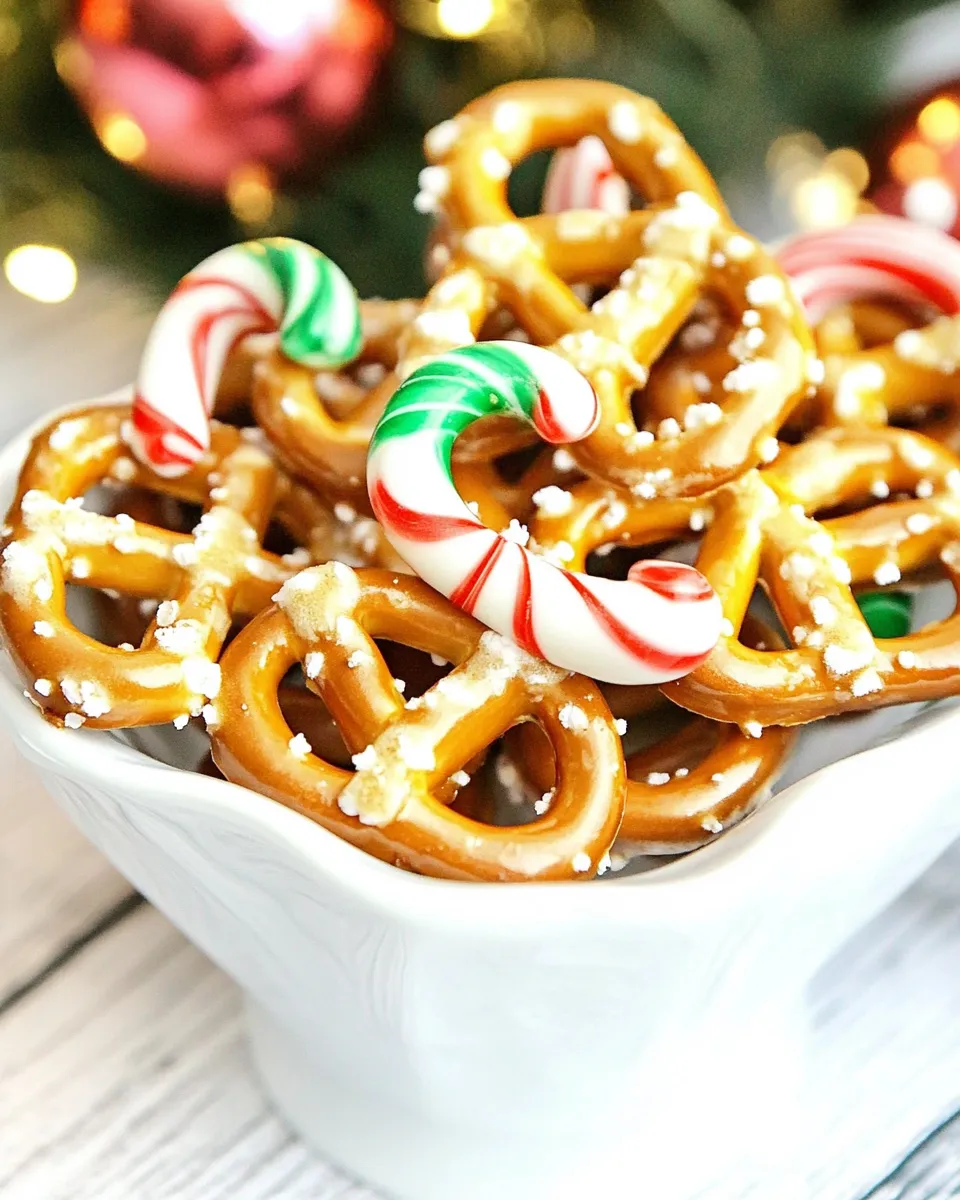
Short, sweet, and exactly the kind of holiday bite that disappears faster than you can say “more, please.” These little pretzel-and-chocolate sandwiches deliver salty crunch, glossy chocolate, and a peppermint lift when you use Candy Cane Kisses. They’re fast to make, kid-friendly, and perfect for cookie exchanges or last-minute hostess gifts.
You don’t need fancy tools or baking skill to get consistent results. The trick is timing: warm the chocolate just long enough to soften and become glossy, then sandwich and chill. I’ll walk you through the exact steps, the small gear that makes them easier, and the quick fixes if one goes slightly off.
If you want a reliable holiday staple that looks like effort but takes almost none, these are it. I make a double batch every year and always wish I’d made more.
Ingredient Checklist
- 2bags of Kisses (Candy Cane or any flavor), unwrapped — the melting center that becomes the glue for each sandwich; Candy Cane adds minty brightness, other flavors work too.
- 1(1 pound) bag of waffle-style pretzels — the crunchy shells; waffle-style gives more surface area for the Kiss to grip.
From Start to Finish: Candy Cane Pretzel Kisses
- Preheat the oven to 300°F (150°C).
- Line a large baking sheet with parchment paper. If all pretzels won’t fit without crowding, use a second baking sheet.
- Arrange the waffle-style pretzels on the prepared baking sheet about 1/2 inch apart.
- Unwrap the Kisses and place one unwrapped Kiss on top of each pretzel.
- Bake in the preheated oven for 2 to 2 1/2 minutes, watching closely, until the Kisses look glossy.
- If a Kiss still seems firm in the center, return the sheet to the oven in 20-second increments until the Kiss is soft and glossy.
- Remove the baking sheet from the oven. Immediately place a second pretzel on top of each glossy Kiss and press down gently to form a sandwich.
- Transfer the baking sheet to the refrigerator and chill for 15 minutes to set.
- Store the finished pretzel-Kiss sandwiches in an airtight container for up to 2 weeks.
Why It’s My Go-To
These are quick to assemble and require no tempering, molding, or piping. The payoff is huge relative to the effort: a festive-looking bite with contrasting textures and a pop of peppermint when Candy Cane Kisses are used. For holiday parties, I can make several dozen in under an hour and still have time to wrap them.
They travel well and hold up in containers, so they’re great for gift tins. The snackability is another reason I reach for this recipe: they’re bite-sized, individually portioned, and impossible to stop at just one. Also, they appeal to a wide range of tastes—kids love them, and adults appreciate the salty-sweet balance.
Ingredient Swaps & Substitutions

These swaps let you adapt the recipe without changing the method or bake time.
- Chocolate: If you don’t have Candy Cane Kisses, use any Kiss flavor you prefer—milk chocolate, dark chocolate, or even flavored Kisses. The melting behavior is the same, so follow the same timing.
- Pretzels: If waffle-style pretzels aren’t available, use any sturdy pretzel that has a reasonably flat surface for the Kiss to sit on—classic twists work in a pinch, but watch spacing and how they sit on the sheet.
- Alternative coatings: For a different finish, after sandwiches set, dip half of them in melted chocolate or sprinkle crushed candy cane on the glossy Kiss before topping for added texture.
- Dietary: For dairy-free options, look for dairy-free chocolate Kisses or vegan chocolate chips shaped into small mounds; melting behavior can vary, so test one first.
Gear Up: What to Grab

Minimal tools make this recipe approachable. You probably already have everything you need in the kitchen.
- Baking sheet(s) — a large rimmed sheet or two if your pretzels won’t fit without crowding.
- Parchment paper — prevents sticking and makes cleanup trivial.
- Oven — preheated to 300°F (150°C) as the recipe specifies.
- Spatula or clean cookie sheet rack — to move trays to the fridge if needed.
- Refrigerator — chilling sets the chocolate quickly so the sandwiches hold together.
- A timer — essential for watching the brief 2 to 2 1/2 minute melt window and any 20-second increments.
Watch Outs & How to Fix
There are a few small things that can go wrong, but all are easy to fix.
- Kiss didn’t soften enough in the allotted time: Return the tray to the oven and heat in 20-second increments until glossy. Don’t over-bake—if it starts to look grainy or oily, it’s overheated.
- Kiss got too soft or lost shape: Work quickly—press the top pretzel on immediately and chill right away. If the Kiss has melted too much and spreads off the pretzel, scrape and start a single Kiss on a clean pretzel to test the oven timing.
- Pretzels shifted or slid during baking: Make sure they’re spaced about 1/2 inch apart and start on a level baking sheet. If they slide, allow the Kiss to firm slightly before moving the sheet.
- Sandwiches stuck together in the container: Layer with parchment or wax paper between layers to prevent sticking when storing.
Seasonal Spins
Small touches can move these from simply festive to holiday spectacular.
- Winter: Use Candy Cane Kisses and sprinkle crushed candy cane on the glossy Kiss before placing the top pretzel for color and crunch.
- Christmas colors: Use red or green sprinkles on half the batch for a cheerful tray at parties.
- Valentine’s Day: Swap Candy Cane for red velvet or strawberry-flavored Kisses if available, and package in heart-themed boxes.
- Non-holiday: Use plain milk or dark chocolate Kisses and a flaky sea salt sprinkle for a sophisticated snack.
Chef’s Notes
Unwrapping Kisses is the most tedious part—save time by having an assembly line: one person unwraps while another arranges pretzels. Keep a small bowl or tray nearby for wrappers so they don’t get scattered.
Monitor the oven window and set a timer. That 2-to-2½-minute window is short, and Kisses can go from glossy to over-soft quickly. If you need to stack trays in the fridge, keep them single-layered and give space for cold air to circulate so they set uniformly.
If you’re making many trays, rotate them between oven racks and adjust the timing slightly based on how your oven heats. A single test tray is helpful when you start a big batch.
Best Ways to Store
Store finished pretzel-Kiss sandwiches in an airtight container at room temperature for short-term serving or in the refrigerator if your kitchen is warm. As the recipe notes, they keep for up to 2 weeks in an airtight container.
For best texture, layer them with parchment between each layer to prevent sticking. If you refrigerate, allow them to come toward room temperature for a few minutes before serving so the chocolate isn’t too hard.
FAQ
Q: Can I make these ahead?
A: Yes. They hold up well for gifting and serving. Store in an airtight container for up to 2 weeks.
Q: Do I need to temper the chocolate?
A: No. The method relies on brief oven warming to soften Kisses; tempering isn’t necessary for these sandwiches.
Q: What if I don’t have a fridge?
A: Chill time speeds setting but if you’re in a cool kitchen, you can leave them on a cool counter for 20–30 minutes. In warm environments the refrigerator is best to prevent melting.
Q: Can I double or triple the recipe?
A: Yes. Use additional baking sheets and watch oven timing; do a test pan first to confirm how long Kisses need in your oven.
Q: My Kisses bloom or get a white film—are they bad?
A: Chocolate bloom (a whitish film) affects appearance more than safety. For best look, use fresh Kisses and avoid overheating.
Wrap-Up
These Candy Cane Pretzel Kisses are the holiday quick-win: low effort, high reward, and endlessly tweakable. With a bit of planning and a short oven watch, you’ll have shiny, snap-worthy sandwiches in minutes. Make a few test ones, fine-tune your timing, then enjoy the rest—these will be the first thing gone from any cookie tray.
Pack extras into decorative tins or stack them in cellophane bags with a ribbon for instant, homemade gifts. They’re practical to make, simple to store, and always well received—exactly what I want from a holiday treat.
Candy Cane Pretzel Kisses
Equipment
- Oven
- Baking Sheet
- Parchment Paper
- Refrigerator
Ingredients
Ingredients
- 2 bags of Kisses Candy Cane or any flavor, unwrapped
- 1 1 pound bag of waffle-style pretzels
Instructions
Instructions
- Preheat the oven to 300°F (150°C).
- Line a large baking sheet with parchment paper. If all pretzels won’t fit without crowding, use a second baking sheet.
- Arrange the waffle-style pretzels on the prepared baking sheet about 1/2 inch apart.
- Unwrap the Kisses and place one unwrapped Kiss on top of each pretzel.
- Bake in the preheated oven for 2 to 2 1/2 minutes, watching closely, until the Kisses look glossy.
- If a Kiss still seems firm in the center, return the sheet to the oven in 20-second increments until the Kiss is soft and glossy.
- Remove the baking sheet from the oven. Immediately place a second pretzel on top of each glossy Kiss and press down gently to form a sandwich.
- Transfer the baking sheet to the refrigerator and chill for 15 minutes to set.
- Store the finished pretzel-Kiss sandwiches in an airtight container for up to 2 weeks.