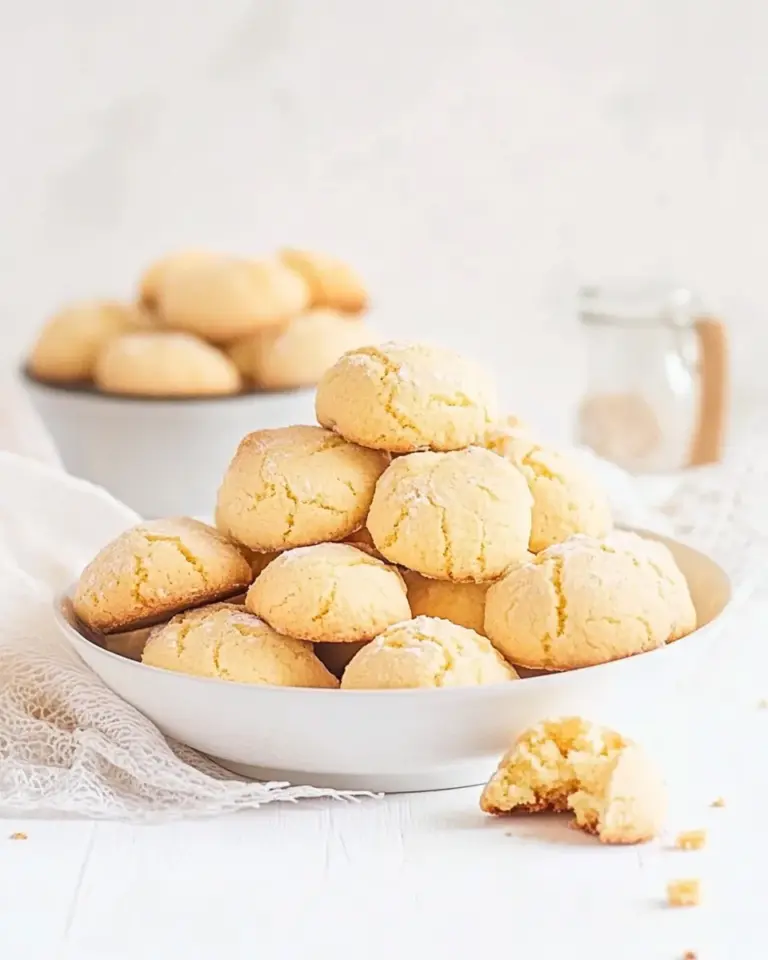
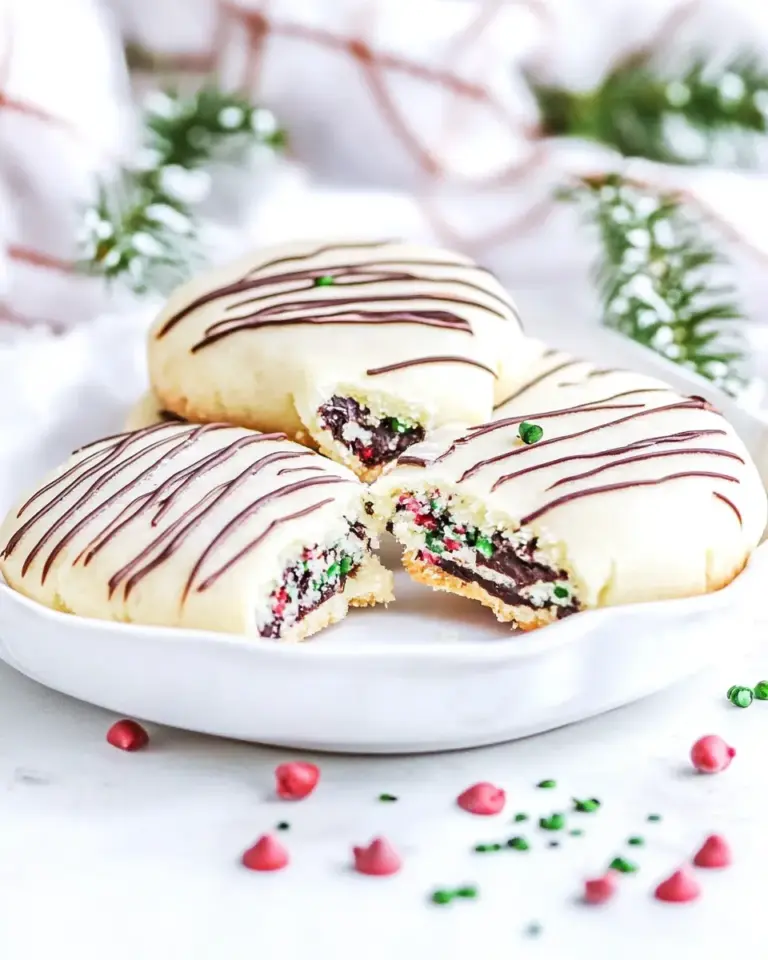
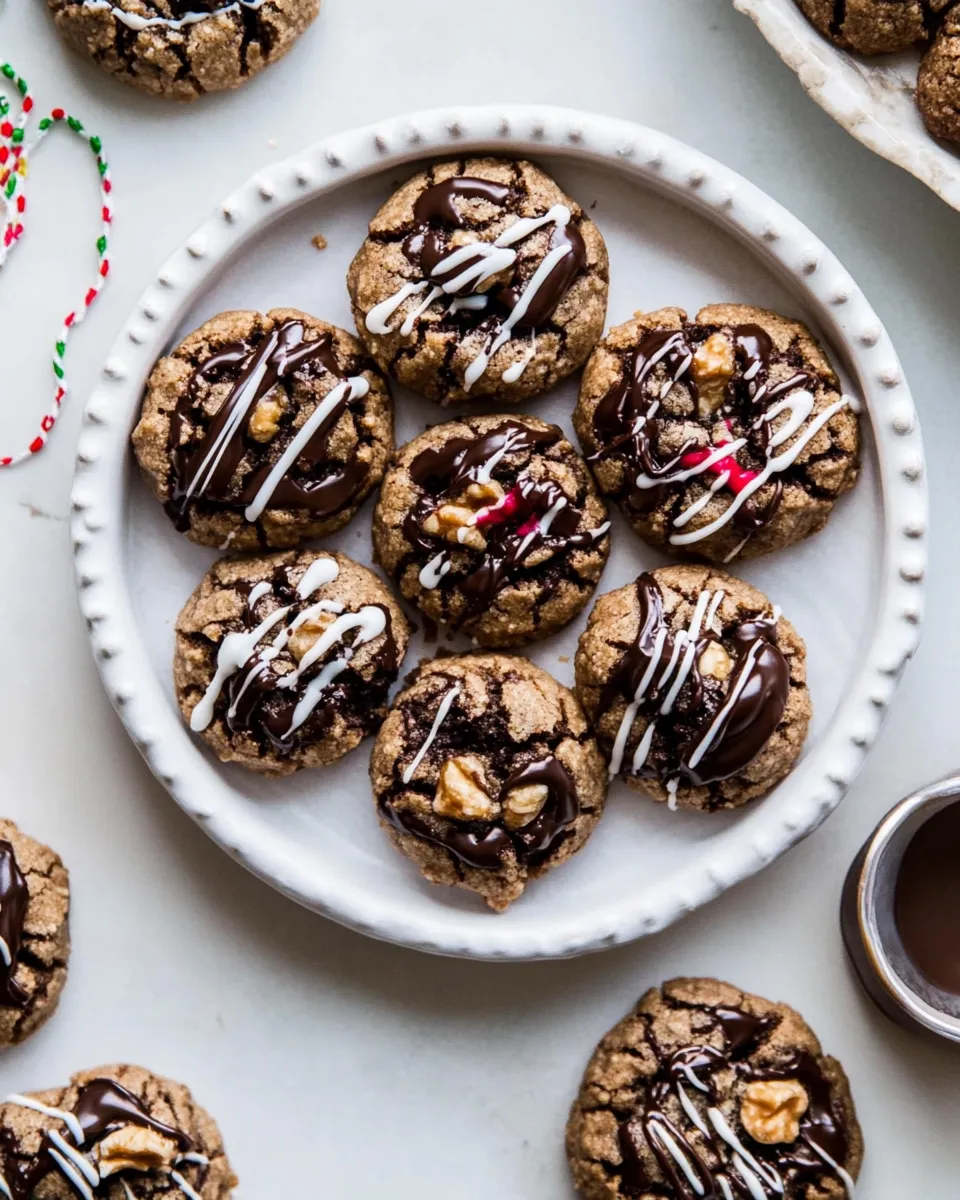
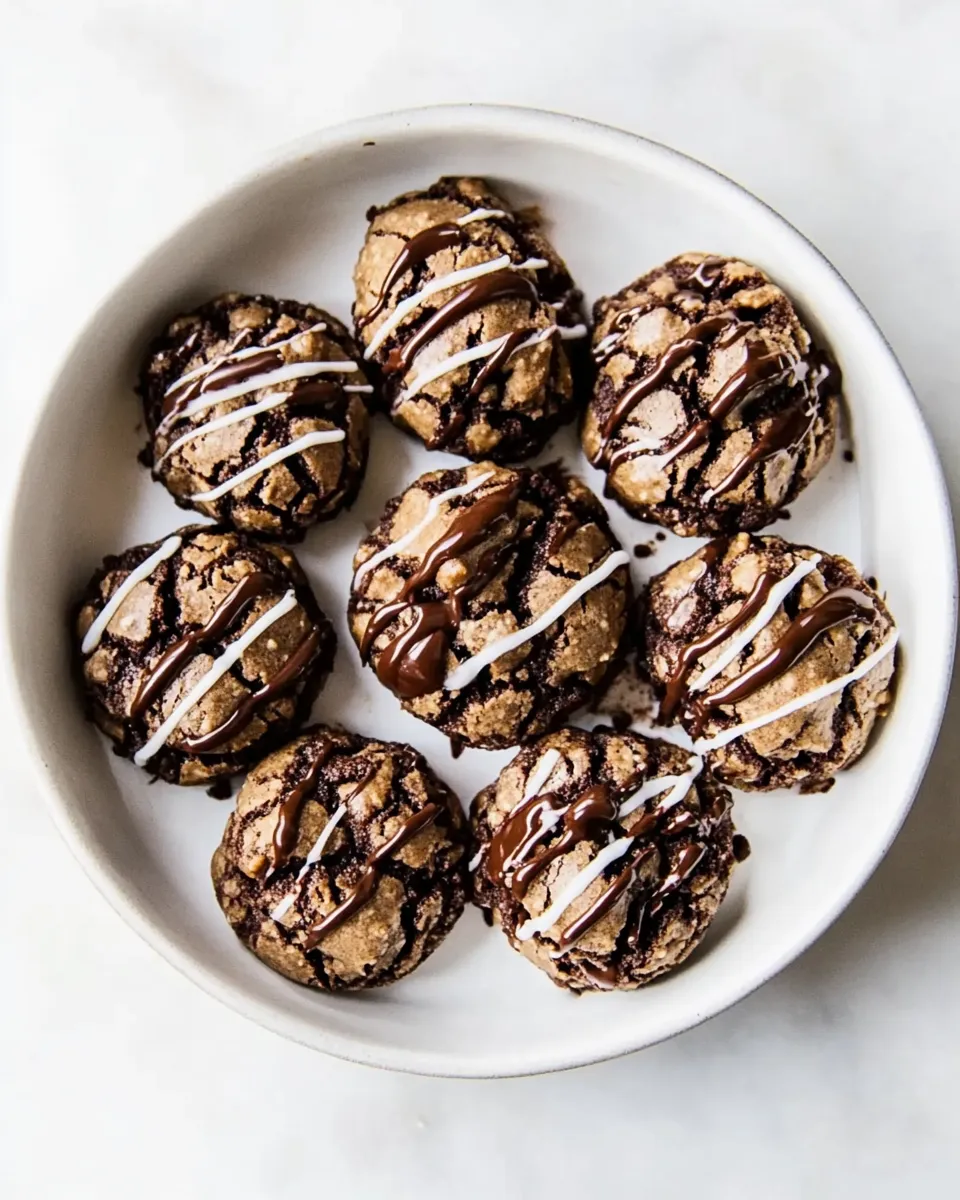
These cookies are exactly what they sound like: fudgy, peanut-buttery balls that crack and bloom with powdered sugar coating and finish with a melty chocolate kiss right in the center. They come together quickly and reward you with a soft, slightly chewy center and a crisp, barely set edge. No complicated techniques—just attention to a few small steps that make a big difference.
I bake a lot, and I keep coming back to this recipe because it’s forgiving and reliably delicious. The peanut butter-powdered sugar coating gives each cookie a rustic crinkle and a concentrated peanut flavor, while the mini chips folded into the dough and the chocolate kiss on top deliver chocolate in every bite. If you want straightforward holiday cookies or a comforting sweet to share with friends, these are it.
Gather These Ingredients

Ingredients
- 2 sticks butter (at room temperature) — provides richness and body; room temperature ensures smooth creaming with sugars and peanut butter.
- 1 cup creamy peanut butter — divided use: half in the dough for flavor and tenderness, half reserved for the coating to deliver that peanut-sugar crust.
- 1/2 cup light brown sugar — adds moisture and a subtle caramel note that keeps the cookies soft.
- 1/4 cup granulated sugar — helps with structure and browning at the edges.
- 1 egg — binds the dough and contributes to a tender interior.
- 2 teaspoons vanilla extract — rounds and lifts the chocolate and peanut butter flavors.
- 1 1/3 cups all-purpose flour — the base; measure properly (fluff, spoon, level) to avoid dry cookies.
- 3/4 teaspoon baking soda — provides gentle lift and a tender crumb.
- 1/2 teaspoon baking powder — works with the soda for balanced rise.
- 1/4 teaspoon salt — enhances sweetness and chocolate notes; don’t skip.
- 1/3 cup mini chocolate chips — dotted throughout for chocolate pockets without weighing down each bite.
- 2/3 cup powdered sugar — combined with reserved peanut butter to form the coating that creates the crinkle.
- 36-40 chocolate kisses — pressed into the hot cookies for a glossy chocolate finish; plan one per cookie.
Step-by-Step: Chocolate Peanut Butter Crinkle Cookies
- Preheat the oven to 350°F (175°C). Line two baking sheets with parchment paper.
- Measure and set aside 1/2 cup of the creamy peanut butter for the coating; use the remaining 1/2 cup in the dough.
- In a large mixing bowl, beat together 2 sticks butter (room temperature), 1/2 cup creamy peanut butter, 1/2 cup light brown sugar, and 1/4 cup granulated sugar with an electric mixer until smooth and creamy.
- Add 1 egg and 2 teaspoons vanilla extract to the butter mixture and beat until combined.
- Add 1 1/3 cups all-purpose flour, 3/4 teaspoon baking soda, 1/2 teaspoon baking powder, and 1/4 teaspoon salt. Mix on low speed (or stir by hand) until just combined—do not overmix.
- Fold in 1/3 cup mini chocolate chips until evenly distributed.
- In a medium bowl, combine the reserved 1/2 cup creamy peanut butter with 2/3 cup powdered sugar. The mixture will be clumpy and moist. Cover and refrigerate this coating mixture for at least 30 minutes (or up to 3 days).
- After the coating mixture has chilled, roll the cookie dough into balls about 2 teaspoons each. Working one at a time, roll each dough ball through the chilled peanut butter–powdered sugar coating, pressing gently so the coating adheres.
- Place the coated dough balls on the prepared baking sheets about 2 inches apart.
- Bake in the preheated oven 10–12 minutes, until the cookies are just set around the edges but still soft in the centers. Do not overbake.
- Remove the baking sheets from the oven and immediately press 1 chocolate kiss into the center of each hot cookie.
- Let the cookies cool on the baking sheets for 15 minutes, then transfer them to a wire rack to cool completely.
- Store cooled cookies in an airtight container for up to 1 week.
Why This Recipe is a Keeper
First, the texture contrast: slightly crisp edges, soft centers, and the peanut-sugared exterior deliver layers of satisfaction. The powdered sugar–peanut butter coating is a clever move — it concentrates peanut flavor on the outside and gives you a recognizable crinkle without complex handling.
Second, it’s consistent. The dough is sturdy enough to roll and hold shape, but soft enough to produce that tender interior. The final step—pressing a chocolate kiss into the warm cookie—adds a finishing touch that feels special and invites people to grab one while they’re still warm.
Finally, it’s adaptable. You can make the coating ahead, refrigerate it for convenience, and bake only when guests arrive. It’s a recipe that travels well to parties and survives a week in an airtight container, which is rare for peanut-butter-forward cookies.
If You’re Out Of…
- Mini chocolate chips — use regular chocolate chips chopped into smaller pieces so they distribute more evenly.
- Chocolate kisses — you can press a small square of chocolate or a wrapped candy of similar size into the center right out of the oven, but expect slightly different melt and presentation.
- Creamy peanut butter — smooth is preferred for texture; if you only have natural-style or crunchy, the dough will be slightly drier or chunkier—stir the peanut butter well and monitor the dough consistency when mixing.
- Powdered sugar for the coating — the powdered sugar binds with the reserved peanut butter to make that crinkly coating. If you’re out, you can roll the dough in additional granulated sugar, but the look and melt-in-your-mouth finish will differ.
Equipment at a Glance
- Electric mixer (hand or stand) — for creaming butter, peanut butter, and sugars smoothly.
- Mixing bowls — one large for the dough, one medium for the coating.
- Measuring cups and spoons — accurate dry and wet measurements help consistency.
- Baking sheets and parchment paper — parchment prevents sticking and makes cleanup easy.
- Cookie scoop or teaspoon — helps portion uniformly; the recipe calls for about 2 teaspoons per cookie.
- Wire rack — for cooling completely without sogginess.
Easy-to-Miss Gotchas
- Skipping the reserved peanut butter step: The coating is made with the reserved 1/2 cup of creamy peanut butter plus powdered sugar. If you use all the peanut butter in the dough, you’ll lose the coating’s texture and flavor punch.
- Not chilling the coating: The coating mix needs at least 30 minutes in the fridge. If you skip chilling it, it won’t adhere properly and will be messy to work with.
- Overmixing the flour: Mix the dry ingredients in on low or fold by hand and stop as soon as the flour disappears. Overmixing develops gluten and yields denser cookies.
- Overbaking: These cookies should be just set around the edges and still soft in the center at 10–12 minutes. They continue to firm as they cool.
- Pressing the kiss too late: Put the chocolate kiss into the cookie as soon as it’s out of the oven. If the cookie cools first, the chocolate won’t adhere or partially melt into the center.
- Poor portion control: Aim for uniform 2-teaspoon balls so all cookies bake evenly and the number of kisses matches the batch size.
Make It Diet-Friendly
There are a few ways to make these more compatible with dietary needs, but each change affects texture or flavor:
- Gluten-free: Use a 1:1 gluten-free baking flour that contains xanthan gum. The texture will be slightly different — often a touch crumblier — but the recipe is forgiving.
- Lower-sugar: You can reduce the granulated sugar slightly or use a sugar substitute formulated for baking for the brown and granulated sugar components. Be cautious: texture and browning will change, so test one tray first.
- Dairy-free: Swap the butter for a high-quality vegan stick butter (one-for-one). The cookies will spread and brown differently; chill times may help.
What I Learned Testing
When I first tried this, I skipped chilling the coating and regretted it. The chilled peanut butter + powdered sugar is essential — it firms up and becomes a workable paste that clings when rolled. I also found that rolling the dough balls and coating them while the coating is cold prevents the coating from smearing and keeps the crinkle effect strong.
Bake time is sensitive. Ten minutes produced a softer center I loved; twelve gave a firmer, slightly chewier bite. If you like a gooier center, err on the side of 10 minutes and allow the residual heat to finish them on the sheet for the 15-minute rest before moving to a rack.
Finally, I tried different-sized scoops. The 2-teaspoon size is ideal for yield and for matching the number of chocolate kisses (36–40). Larger scoops require larger chocolate pieces and a longer bake time; they also change the bake sheet real estate and final texture.
Cooling, Storing & Rewarming
After pressing the chocolate kisses in, let the cookies cool on the baking sheet for 15 minutes so they set and the chocolate adheres. Transfer to a wire rack to cool completely — that prevents condensation that can make the coating soggy.
Store cooled cookies in an airtight container at room temperature for up to 1 week. If you want to freeze, place cooled cookies in a single layer on a baking sheet to flash-freeze, then transfer to a labeled freezer bag or container. They’ll keep well for up to 3 months. Thaw at room temperature for about 30–60 minutes.
To rewarm, pop a cookie in the microwave for about 8–12 seconds (time varies by microwave) to soften the chocolate kiss and warm the center. For a crisper edge, reheat in a 300°F (150°C) oven for 4–6 minutes.
Quick Q&A
- Can I make the dough ahead? Yes. The dough can be chilled for up to 2 days before rolling and coating. Alternatively, roll coated dough balls and freeze on the sheet; bake from frozen, adding a minute or two to the bake time.
- What if my peanut butter is runny? Natural or very oily peanut butter can make the dough looser. Stir well, and if needed, chill the dough briefly before rolling.
- Can I skip the chocolate kiss? You can, but the kiss brings a glossy chocolate center and a nice contrast. Without it, these are still tasty — consider a small chocolate chip or dot of ganache if you want a chocolate finish.
- How many cookies does this make? With 36–40 kisses listed, expect about that many cookies at roughly 2 teaspoons each, depending on exact portioning.
The Last Word
These Chocolate Peanut Butter Crinkle Cookies are straightforward to make and reliably crowd-pleasing. Keep an eye on the small details—reserve the peanut butter for the coating, chill that coating, use a consistent scoop, and press the chocolate kiss into each cookie hot from the oven. Do those things, and you’ll have cookies with great texture and flavor every time.
Make a batch, share them warm, and notice how quickly they disappear. They’re exactly the kind of cookie I reach for when I want something that feels a little special but is absolutely doable on a weeknight.

Chocolate Peanut Butter Crinkle Cookies.
Equipment
- Mixing Bowl
- Electric Mixer
- Medium Bowl
- Baking Sheets
- Parchment Paper
- Wire Rack
Ingredients
Ingredients
- 2 sticks butterat room temperature
- 1 cupcreamy peanut butter
- 1/2 cuplight brown sugar
- 1/4 cupgranulated sugar
- 1 egg
- 2 teaspoonsvanilla extract
- 1 1/3 cupsall-purpose flour
- 3/4 teaspoonbaking soda
- 1/2 teaspoonbaking powder
- 1/4 teaspoonssalt
- 1/3 cupmini chocolate chips
- 2/3 cuppowdered sugar
- 36-40 chocolate kisses
Instructions
Instructions
- Preheat the oven to 350°F (175°C). Line two baking sheets with parchment paper.
- Measure and set aside 1/2 cup of the creamy peanut butter for the coating; use the remaining 1/2 cup in the dough.
- In a large mixing bowl, beat together 2 sticks butter (room temperature), 1/2 cup creamy peanut butter, 1/2 cup light brown sugar, and 1/4 cup granulated sugar with an electric mixer until smooth and creamy.
- Add 1 egg and 2 teaspoons vanilla extract to the butter mixture and beat until combined.
- Add 1 1/3 cups all-purpose flour, 3/4 teaspoon baking soda, 1/2 teaspoon baking powder, and 1/4 teaspoon salt. Mix on low speed (or stir by hand) until just combined—do not overmix.
- Fold in 1/3 cup mini chocolate chips until evenly distributed.
- In a medium bowl, combine the reserved 1/2 cup creamy peanut butter with 2/3 cup powdered sugar. The mixture will be clumpy and moist. Cover and refrigerate this coating mixture for at least 30 minutes (or up to 3 days).
- After the coating mixture has chilled, roll the cookie dough into balls about 2 teaspoons each. Working one at a time, roll each dough ball through the chilled peanut butter–powdered sugar coating, pressing gently so the coating adheres.
- Place the coated dough balls on the prepared baking sheets about 2 inches apart.
- Bake in the preheated oven 10–12 minutes, until the cookies are just set around the edges but still soft in the centers. Do not overbake.
- Remove the baking sheets from the oven and immediately press 1 chocolate kiss into the center of each hot cookie.
- Let the cookies cool on the baking sheets for 15 minutes, then transfer them to a wire rack to cool completely.
- Store cooled cookies in an airtight container for up to 1 week.
Notes
Store cooled cookies in an airtight container for up to 1 week.