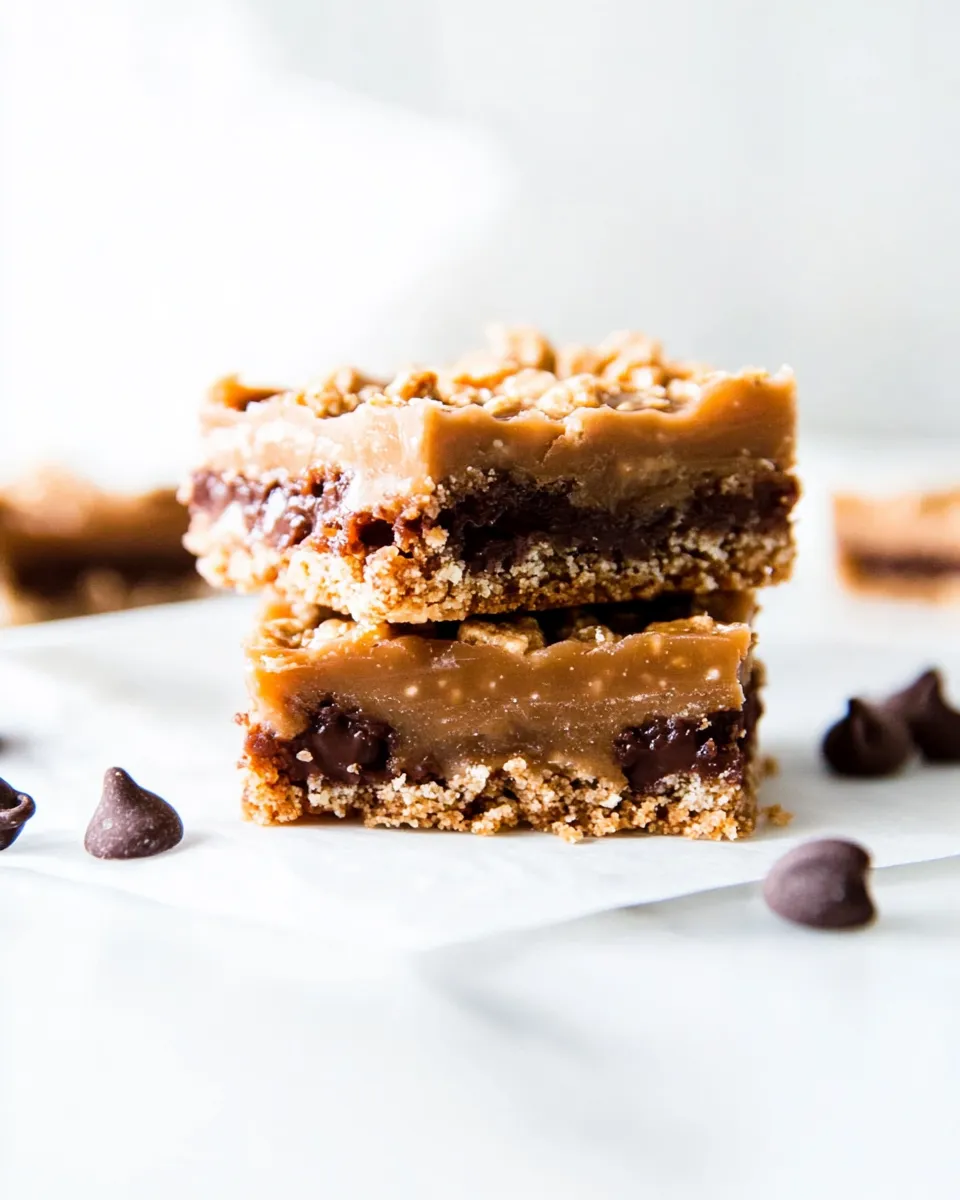
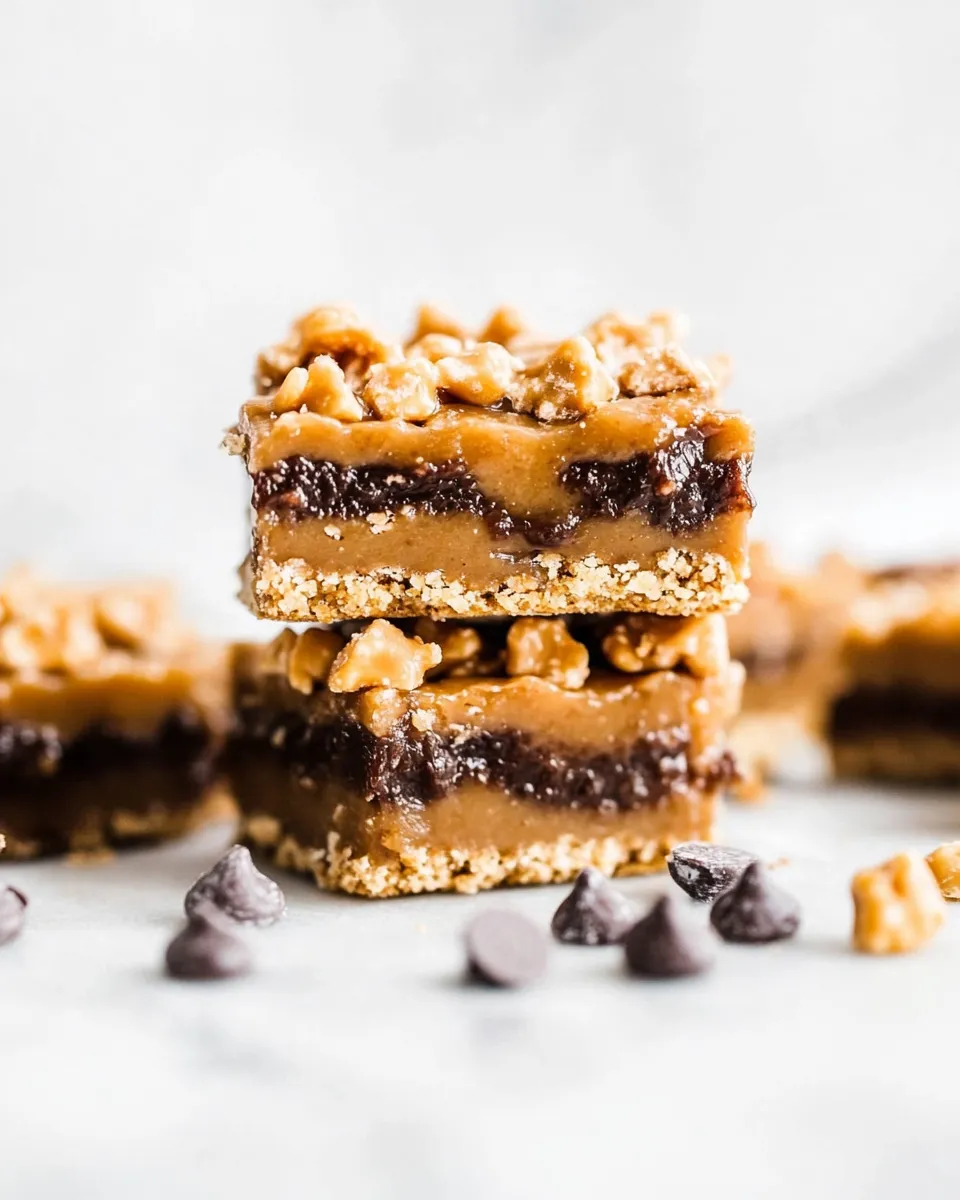
These Cookie Butter Bars are one of those reliably comforting desserts that everyone asks for when I bring a plate to a gathering. The texture is what sells it: a buttery oat shortbread base, a silky layer of warm cookie butter, a melty chocolate bridge, and a crumbled oat topping that keeps each bite interesting. No special equipment, no tempering chocolate, and a process that’s forgiving enough for busy nights or last-minute potlucks.
I started making this recipe when I wanted a twist on blondies—something with spice, depth, and that wildly addictive cookie-butter flavor. It uses pantry-friendly ingredients and a straightforward technique: cream, mix, press, layer, bake, and cool. The trickiest part is heating the cookie butter just enough to pour over the chocolate chips so they melt and bind, and the timing for the final bake so the top sets while staying tender inside.
Below you’ll find everything you need: an ingredients breakdown with quick tips, the exact step-by-step directions I follow (unchanged from the tested method), tools that make the job easier, common mistakes to avoid, seasonal variations, and storage guidance so your bars stay delicious for days. No fluff—just practical notes to help you get reliably tasty Cookie Butter Bars every time.
What You’ll Need
Ingredients
- 12 tablespoons unsalted butter (3/4 cup) — at room temperature; provides richness and the shortbread texture.
- 3/4 cup light brown sugar — firmly packed; adds moisture and a mild caramel note.
- 1 teaspoon vanilla extract — brightens flavors and rounds out the sweetness.
- 1 cup old-fashioned oats — not steel-cut or quick; for chew and structure in the crust and topping.
- 1 teaspoon baking soda — a small lift so the bars aren’t too dense.
- 1/4 teaspoon salt — balances sweetness and enhances flavor.
- 1-1/4 cups all-purpose flour — the main structure for the dough.
- 1 cup cookie butter — or Biscoff spread; the star ingredient for the gooey middle.
- 1 cup milk chocolate chips — or semi-sweet or dark, see note 2; melts between the crust and cookie butter for a cohesive layer.
Mastering Cookie Butter Bars: How-To
- Preheat oven to 350°F. Lightly grease a 9×9-inch baking pan and line it with parchment paper, leaving an overhang on two sides for easy removal.
- In a large bowl, use a hand mixer to cream together 12 tablespoons unsalted butter (3/4 cup), at room temperature, and 3/4 cup light brown sugar (firmly packed) until smooth and combined.
- Add 1 teaspoon vanilla extract and mix briefly to incorporate.
- Add 1-1/4 cups all-purpose flour, 1 cup old-fashioned oats (not steel-cut or quick), 1 teaspoon baking soda, and 1/4 teaspoon salt to the bowl. Mix on low with the hand mixer until a thick dough forms, scraping the bowl with a spatula as needed.
- Divide the dough into two equal portions. Press one portion evenly and firmly into the prepared pan to form the base.
- Measure 1 cup cookie butter (or Biscoff spread) into a microwave-safe bowl. Microwave for 15–30 seconds until warm and pourable; stir and heat an additional 5–10 seconds only if needed. (Take care not to overheat.)
- Bake the prepared base in the preheated oven for 8 minutes. Remove the pan from the oven.
- Immediately sprinkle 1 cup milk chocolate chips evenly over the hot crust.
- Pour the warmed cookie butter over the chocolate chips and use a spatula to gently spread it into an even layer so the chips are mostly covered.
- Crumble the remaining dough evenly over the cookie-butter layer without pressing it down.
- Return the pan to the oven and bake for 13–18 minutes, until the edges are lightly browned and the top is set.
- Remove from the oven and cool in the pan at room temperature for at least 1 hour. Use the parchment overhang to lift the bars from the pan and cut into squares.
- Store the bars in an airtight container; they are best enjoyed within 2–4 days.
Why I Love This Recipe
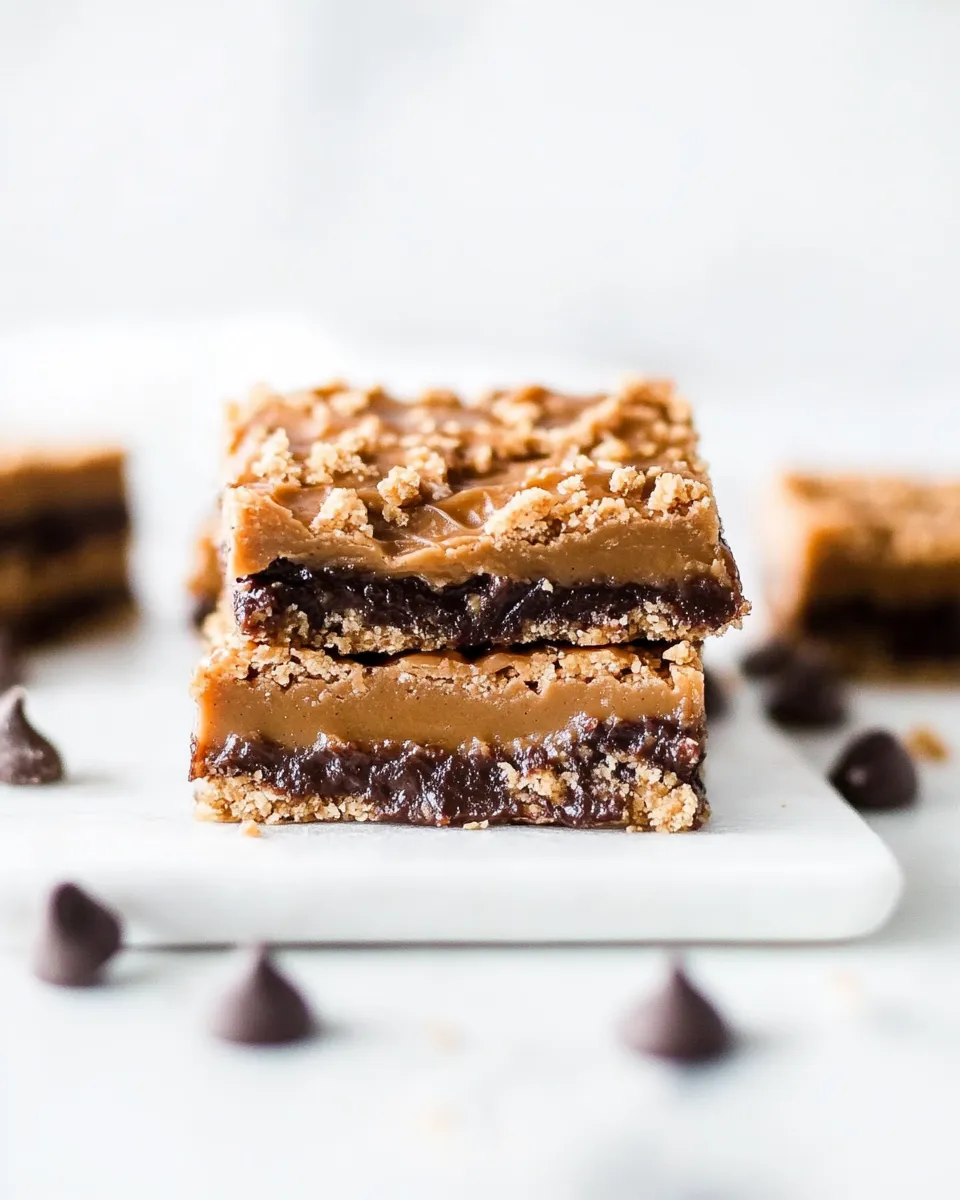
It’s the contrast of textures and the simplicity of execution. The base is a sturdy, buttery oat shortbread that holds up to a gooey middle and a crumbly top. Cookie butter adds a spiced, caramelized depth that’s both nostalgic and surprising. You get the richness of a cookie with the portability of a bar, which means these are easy to bring to brunch, school functions, or to keep on the counter for quick snacks.
I also appreciate the forgiving nature of this recipe. It’s straightforward enough for a weekday bake, and the components—oats, flour, butter, sugar, cookie butter, chocolate—are pantry staples for many home bakers. Slight timing or temperature variations won’t ruin the result; you’ll still have a tender, satisfying bar.
Flavor-Forward Alternatives

- Swap milk chocolate chips for semi-sweet or dark to reduce sweetness and let the cookie butter shine.
- Stir 1/4 teaspoon ground cinnamon or a pinch of cardamom into the dough for a warm spice lift.
- Swap half the oats for finely chopped toasted pecans to add crunch and toasty flavor.
- For a nutty twist, swirl 2 tablespoons of almond or peanut butter into the warmed cookie butter before pouring—do this sparingly to avoid thinning the layer too much.
Essential Tools for Success
- 9×9-inch baking pan — the recipe is scaled for this size; using a different size will change baking time.
- Parchment paper — makes removal and clean-up easy; leave an overhang for lifting the bars out intact.
- Hand mixer — it speeds creaming the butter and sugar; you can use a stand mixer or sturdy spatula if needed.
- Microwave-safe bowl and spatula — for warming and spreading the cookie butter.
- Offset spatula or regular spatula — helps spread the cookie butter and press the base evenly.
Errors to Dodge
- Overheating the cookie butter — heat just until pourable. Overheated cookie butter becomes too thin or grainy and won’t set properly between the chocolate and the topping.
- Pressing the top dough down — crumble it loosely; pressing will compress the texture and make the topping dense rather than crisp-tender.
- Skipping the parchment overhang — without it you risk uneven removal and cracking while cutting.
- Substituting quick oats — they’ll create a different texture. Stick to old-fashioned oats for chew and structure.
Variations by Season
Spring: Add a bright pop by folding 1/3 cup finely chopped freeze-dried strawberries into the remaining dough before crumbling on top. The fruity tartness balances the cookie-butter sweetness.
Summer: Serve slightly chilled with a dollop of whipped cream or a scoop of vanilla ice cream. Chilling firms the bars and makes them refreshingly dense.
Fall: Boost spice. Mix 1/2 teaspoon pumpkin pie spice into the dough and swap the milk chocolate for dark chocolate for a deeper flavor profile that pairs perfectly with cooler weather.
Winter: Add a sprinkle of flaky sea salt right after the bars come out of the oven, and for an elevated holiday version, fold 1/4 cup chopped crystallized ginger into the topping dough for warm, gingery bites.
Testing Timeline
- 0–10 minutes: Preheat oven and prepare pan (lining and greasing). Get ingredients measured so the dough is smooth and ready.
- 10–20 minutes: Cream butter and sugar, mix in dry ingredients, and press the base into the pan.
- 20–25 minutes: Warm the cookie butter and parbake the base (8 minutes). Add chocolate chips and cookie butter layer immediately after removing from the oven.
- 25–45 minutes: Crumble the remaining dough and bake the assembled bars for 13–18 minutes. Check at 13 minutes—edges should be lightly browned and top set.
- 45–105 minutes: Cool for at least 1 hour in the pan before removing and slicing. Longer cooling (or a short chill) makes cleaner cuts.
Save for Later: Storage Tips
These bars store well and are forgiving. Keep them in an airtight container at room temperature for short-term storage (2–4 days per the original guidance). For longer storage, place them in the refrigerator wrapped or in an airtight container for up to one week. If you want to freeze, cut into squares, layer parchment between pieces, place in a freezer-safe container, and freeze up to 3 months. Thaw overnight in the refrigerator or at room temperature for a couple of hours before serving.
If you find the cookie butter layer is firmer after refrigeration, let the bars sit at room temperature for 20–30 minutes before serving so the center softens and the flavors bloom.
Cookie Butter Bars FAQs
- Can I use crunchy cookie butter? — Yes, but it may scatter small cookie pieces through the middle layer; adjust heating slightly and stir to smooth before pouring.
- Why did my cookie butter layer separate? — Overheating or over-thinning the cookie butter can cause it to separate. Heat just until pourable and stir gently.
- Can I make this gluten-free? — Use a 1:1 gluten-free flour blend and ensure oats are labeled gluten-free. Texture will be slightly different but should work.
- Do I have to use chocolate chips? — Chocolate chips help create a melty bridge between base and cookie butter. You can omit them, but expect a slightly different texture and appearance.
- How should I cut clean squares? — Chill briefly or allow a full hour of cooling. Use the parchment overhang to lift the slab, then cut with a sharp knife, wiping the blade between cuts.
Save & Share
These Cookie Butter Bars have become my go-to for sharing because they’re simple, transportable, and crowd-pleasing. If you try the recipe, let me know how you adapted it—what chocolate you used, whether you added nuts or spice—and snap a photo if you can. Tiny adjustments often lead to new favorites, and I love hearing which version becomes yours.
Cookie Butter Bars
Equipment
- 9 x 9-inch baking pan
- Parchment Paper
- Hand Mixer
Ingredients
Ingredients
- 12 tablespoonsunsalted butter3/4 cup at toom temp
- 3/4 cuplight brown sugarfirmly packed
- 1 teaspoonvanilla extract
- 1 cupold-fashioned oatsnot steel cut or quick oats!
- 1 teaspoonbaking soda
- 1/4 teaspoonsalt
- 1-1/4 cupsall-purpose flour
- 1 cupcookie butterorBiscoffspread
- 1 cupmilk chocolate chipsor semi-sweet or dark see note 2
Instructions
Instructions
- Preheat oven to 350°F. Lightly grease a 9×9-inch baking pan and line it with parchment paper, leaving an overhang on two sides for easy removal.
- In a large bowl, use a hand mixer to cream together 12 tablespoons unsalted butter (3/4 cup), at room temperature, and 3/4 cup light brown sugar (firmly packed) until smooth and combined.
- Add 1 teaspoon vanilla extract and mix briefly to incorporate.
- Add 1-1/4 cups all-purpose flour, 1 cup old-fashioned oats (not steel-cut or quick), 1 teaspoon baking soda, and 1/4 teaspoon salt to the bowl. Mix on low with the hand mixer until a thick dough forms, scraping the bowl with a spatula as needed.
- Divide the dough into two equal portions. Press one portion evenly and firmly into the prepared pan to form the base.
- Measure 1 cup cookie butter (or Biscoff spread) into a microwave-safe bowl. Microwave for 15–30 seconds until warm and pourable; stir and heat an additional 5–10 seconds only if needed. (Take care not to overheat.)
- Bake the prepared base in the preheated oven for 8 minutes. Remove the pan from the oven.
- Immediately sprinkle 1 cup milk chocolate chips evenly over the hot crust.
- Pour the warmed cookie butter over the chocolate chips and use a spatula to gently spread it into an even layer so the chips are mostly covered.
- Crumble the remaining dough evenly over the cookie-butter layer without pressing it down.
- Return the pan to the oven and bake for 13–18 minutes, until the edges are lightly browned and the top is set.
- Remove from the oven and cool in the pan at room temperature for at least 1 hour. Use the parchment overhang to lift the bars from the pan and cut into squares.
- Store the bars in an airtight container; they are best enjoyed within 2–4 days.
Notes
Note 1
: You can find cookie butter at Trader Joe’s and Biscoff spread at most grocery stores—look by the nut butter!
Note 2
: I love milk chocolate chips, but if you prefer less sweetness or like dark chocolate more, go for semi-sweet or dark chocolate chips instead.
Storage
: Store t
hese bars in an airtight container; best enjoyed within 2–4 days.