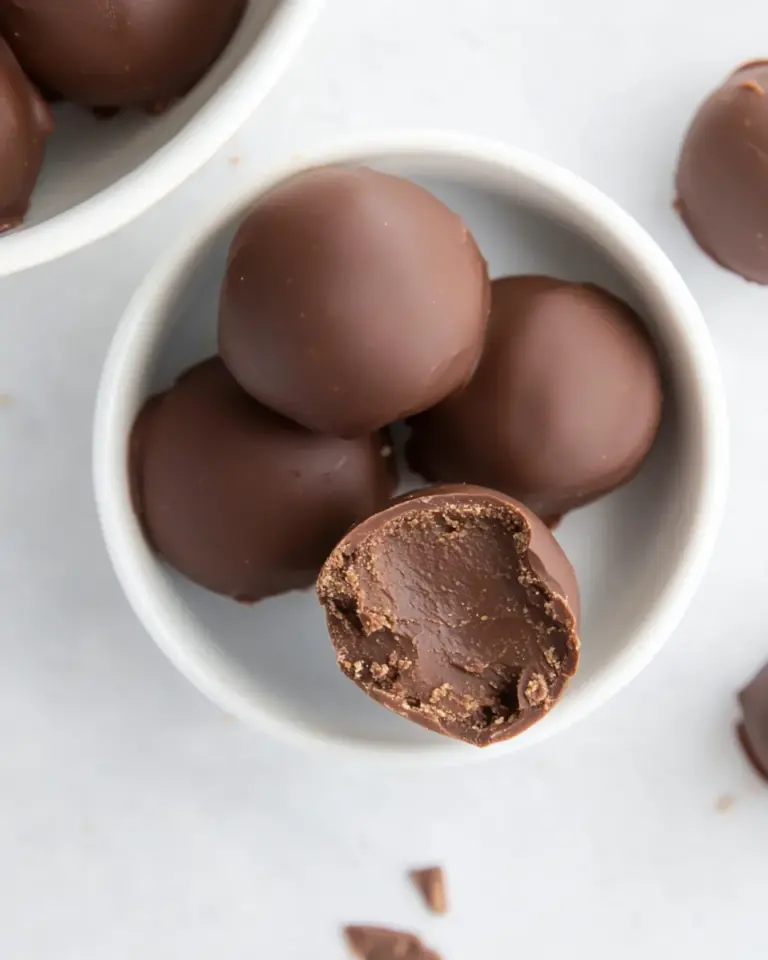
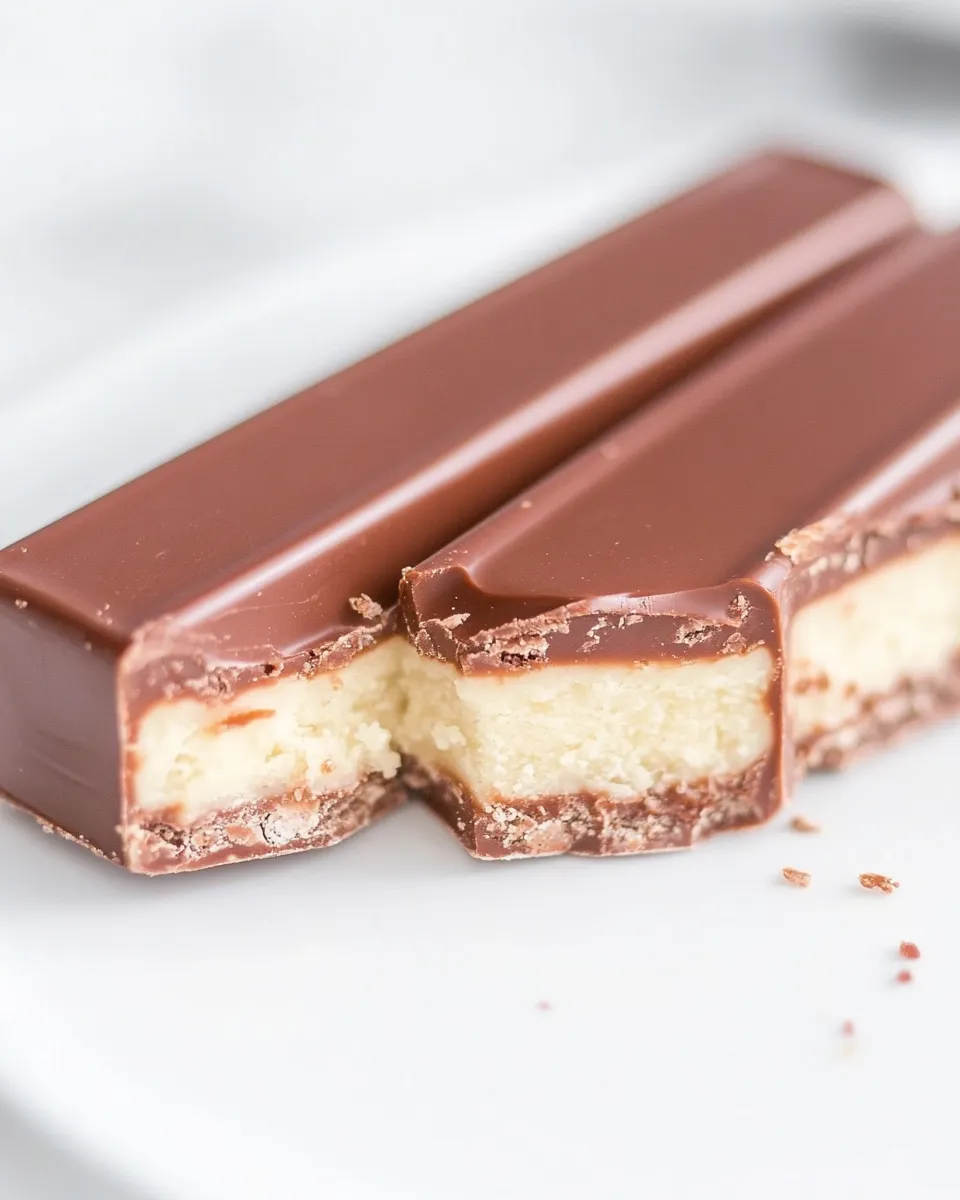
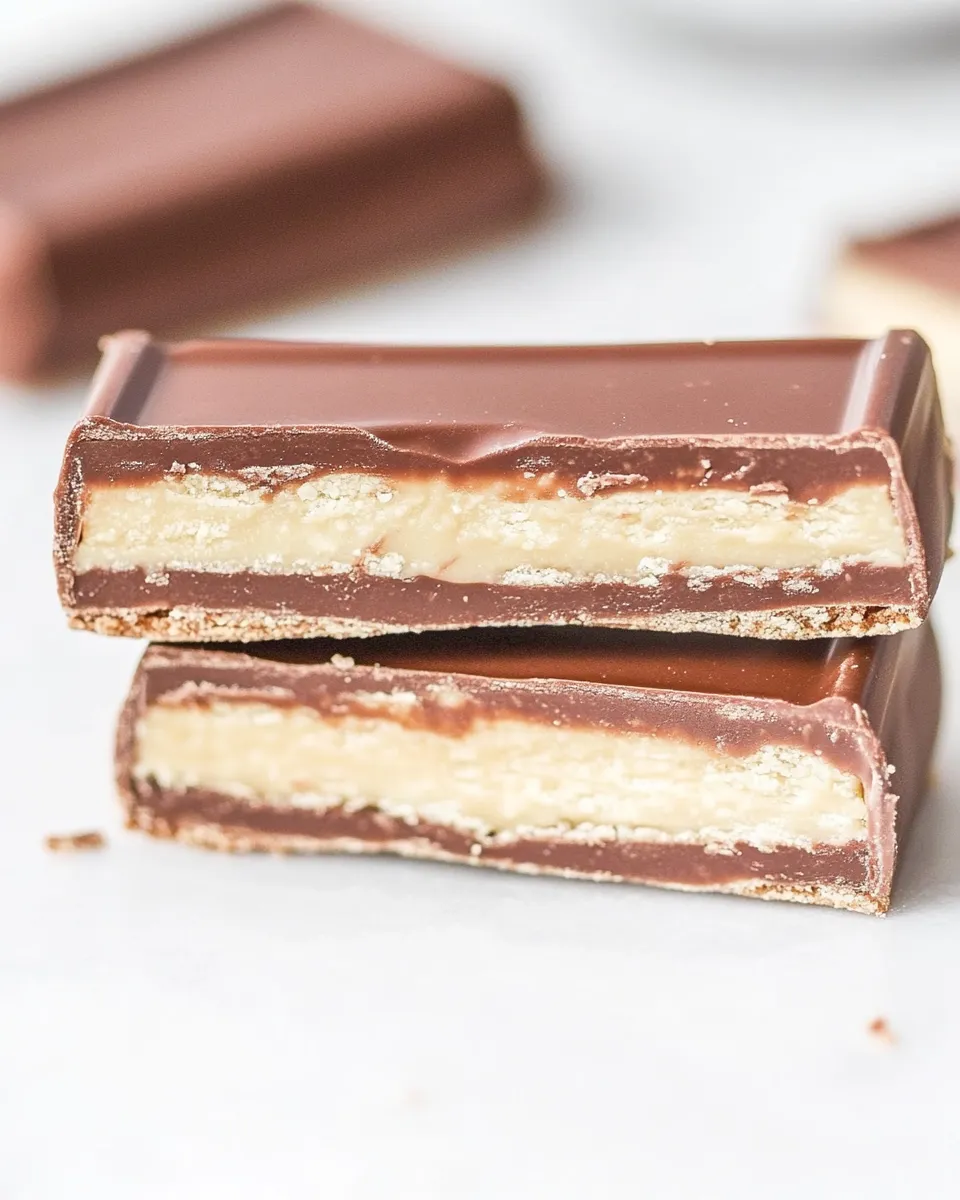
I love recipes that turn a familiar candy into something I can make at home — and this Homemade Kit Kat Bars Recipe does exactly that. It’s straightforward, surprisingly satisfying, and perfect when you want a little project with a big payoff. The texture of crisp vanilla wafers sandwiched with silky chocolate, then dipped in a glossy chocolate shell, is comfort food with a neat, nostalgic twist.
This version keeps the ingredient list short and the method approachable. You don’t need tempering skills or specialty molds: with a microwave and a sheet of parchment, you make clean, crisp bars that look professional. I’ll walk you through the exact sequence so you avoid common mistakes and get glossy, even coating every time.
Below you’ll find the ingredient notes, the verbatim step-by-step instructions, sensible substitutions, storage advice, and troubleshooting tips. Read the steps once, gather your tools, and then follow the order — the technique matters more than fanciful additions.
What You’ll Need
Ingredients
- 15 vanilla sugar wafers — these form the crisp, layered center; choose thin wafer sheets for the right bite.
- 2 cups semi-sweet chocolate chips, divided use — part is for the filling and the rest for the coating; semi-sweet balances the vanilla wafers well.
- 1 tablespoon vegetable oil — thins the coating chocolate slightly so it flows and sets with a smooth sheen.
Build Kit Kat Bars Step by Step
- Line a large baking sheet with parchment paper.
- Using a sharp knife, cut each of the 15 vanilla sugar wafers in half through the middle to make two thinner wafers (30 halves total). Place one half of each wafer on the prepared baking sheet with the cut side facing up.
- Place 1/2 cup of the 2 cups semi-sweet chocolate chips in a small microwave-safe bowl. Microwave at 50% power for 1 minute. Stir, then continue microwaving in 30-second intervals at 50% power, stirring between intervals, until the chocolate is silky smooth.
- Transfer the melted chocolate to a piping bag fitted with a small round tip, or use a plastic zip-top bag and snip a small corner off.
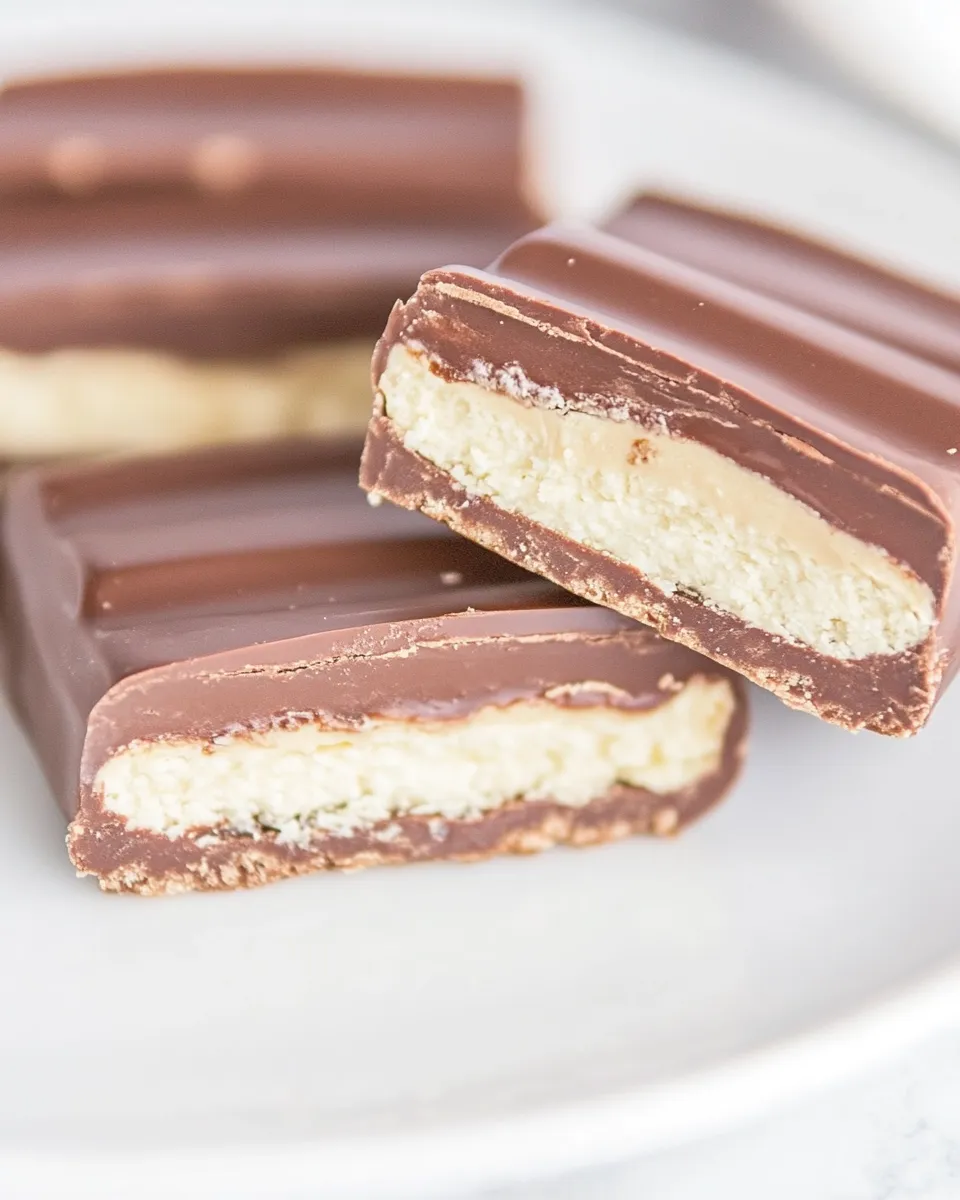
- Pipe melted chocolate onto the cut side of each wafer half on the baking sheet, spreading to cover the surface. Immediately place the remaining wafer half (cut side down) on top of each filled half to form a sandwich. Press gently to spread the filling evenly without squeezing it out.
- Refrigerate the wafer sandwiches on the baking sheet for 1 hour to set the filling.
- Near the end of the chill time, place the remaining 1 1/2 cups of semi-sweet chocolate chips in a medium microwave-safe bowl. Microwave at 50% power for 1 minute, then add 1 tablespoon vegetable oil and stir.
- Continue microwaving the chocolate in 30-second intervals at 50% power, stirring between intervals, until the chocolate is silky smooth and thinnable for dipping.
- Using two forks or dipping tools, lift one chilled wafer sandwich and dip it into the melted chocolate, fully covering it. Lift with the forks and gently shake or tap side to side to remove excess chocolate.
- Return the chocolate-covered wafer to the parchment-lined baking sheet. Repeat with remaining sandwiches.
- Refrigerate the coated bars for at least 1 hour, until the chocolate shell is completely hardened.
Why This Recipe Works
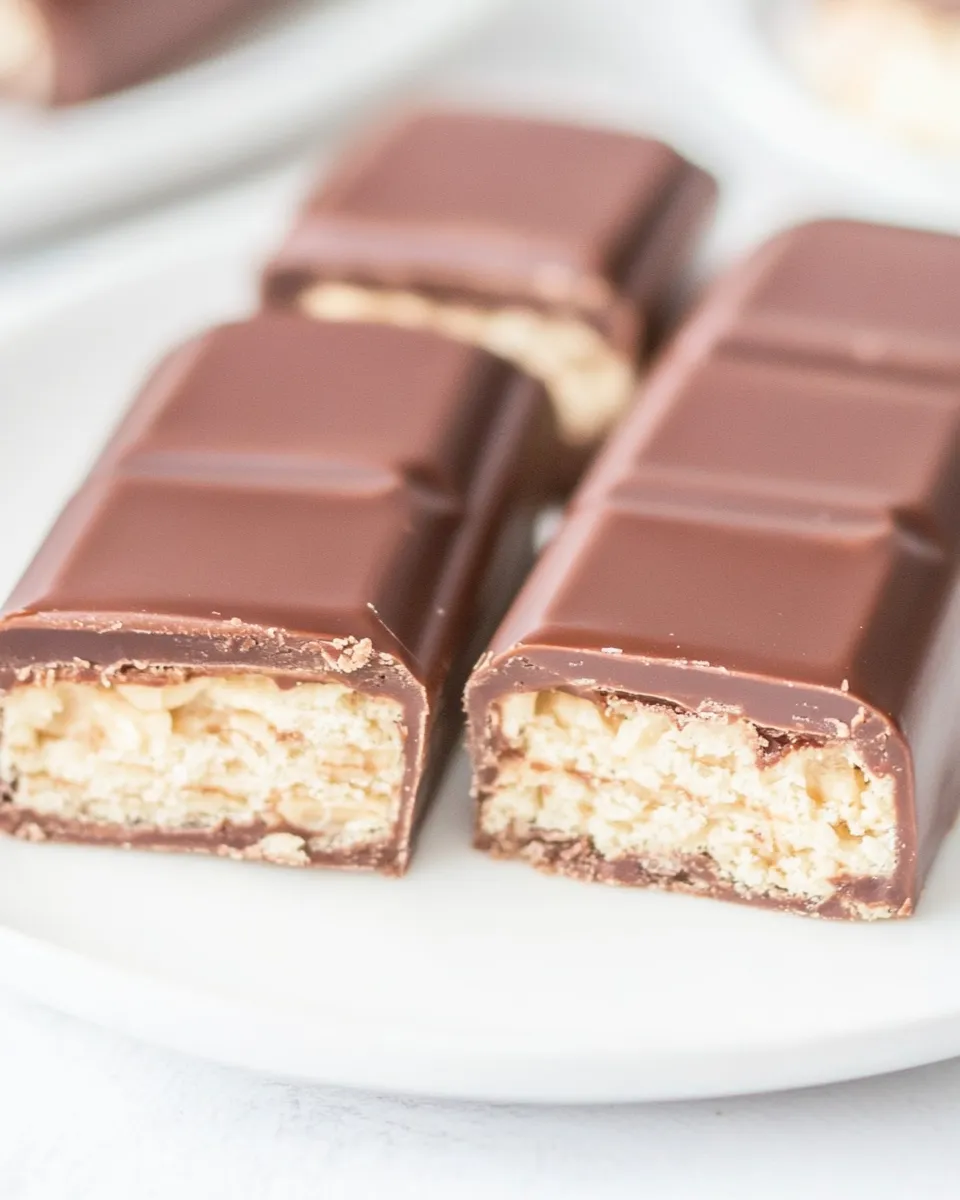
This recipe stacks a few simple technical choices that add up to satisfying bars. First, splitting the wafers increases surface area so the filling bonds and the sandwich feels like multiple crisp layers rather than a single thick biscuit. Using a small amount of melted chocolate as the filling creates a creamy adhesive that sets firm but not chalky.
Chilling before coating is crucial. Fully chilled centers prevent the filling from melting into the outer shell during dipping, so you get a clean seam and a smooth finish. The added vegetable oil in the coating reduces viscosity just enough for easy dipping, resulting in an even, glossy shell that snaps when chilled properly.
Dairy-Free/Gluten-Free Swaps
If you need dairy-free or gluten-free options, this method adapts well.
- Dairy-free: Use dairy-free or vegan semi-sweet chips for both the filling and coating. Many brands melt and set similarly to conventional chips; if they seem dry, add a neutral oil like sunflower instead of vegetable oil.
- Gluten-free: Substitute gluten-free vanilla wafers. Look for crisp, thin wafers labeled gluten-free so the texture matches the original. Avoid thicker cookies — they change the proportion and bite.
Before You Start: Equipment
Tools make a difference here. You don’t need anything exotic, but having the right basics keeps the process neat and fast.
- Large baking sheet — for arranging, chilling, and coating without crowding.
- Parchment paper — nonstick and easy cleanup.
- Sharp knife — for clean wafer halves.
- Small and medium microwave-safe bowls — one for filling chocolate, one for coating chocolate.
- Piping bag or zip-top bag — to apply filling precisely.
- Two forks or dipping tools — for lifting and tapping off excess chocolate.
- Refrigerator space — you’ll need a flat shelf to chill trays for at least an hour at two points in the process.
Watch Outs & How to Fix
Filling oozes out when you press
Cause: Too much filling or pressing too hard when sandwiching. Fix: Pipe less — a thin, even layer is enough. If a sandwich is already soggy, wipe excess chocolate off the edges with a small offset spatula before chilling.
Coating is dull or streaky
Cause: Chocolate overheated or not smooth. Fix: Reheat gently at 50% power in short bursts and stir. Adding the tablespoon of oil for the coating helps restore shine and thinness. If streaks remain, re-melt and stir until completely homogeneous.
Chocolate cracks/crumbles when cutting or handling
Cause: Shell too thick or chocolate not fully set to a crisp snap. Fix: Let coated bars chill in the fridge for a full hour or longer. Bring to cool room temperature for a few minutes before serving to reduce shell brittleness that leads to crumbling under pressure.
Smart Substitutions
Want to tweak flavors or work with what you have? Keep the technique constant and swap one element at a time.
- Chocolate type: Swap semi-sweet for dark chocolate (higher cocoa content) if you prefer less sweetness, or milk chocolate for a sweeter, creamier shell. Adjust the oil amount slightly — milk chocolate often needs a touch more to thin for dipping.
- Flavoring: If you like a hint of mint or orange, stir a drop or two of natural extract into the coating chocolate after you’ve removed it from the microwave and before you start dipping. Use sparingly — chocolate masks subtle extracts.
- Crunch: For a Nutella-style layer, you could spread a very thin smear of hazelnut spread between wafers along with the melted filling, but be mindful: that adds oil and can affect setting. If you try it, chill an extra 30 minutes before coating.
Cook’s Commentary
I often make these when friends ask for something homemade that still looks polished. The most satisfying moment is tapping the excess chocolate off a fork and seeing the bar emerge with a smooth, glossy coat. If you’re new to working with melted chocolate, go slow and use the lower power microwave recommendations in the method — chocolate can seize quickly when overheated.
One small trick I use: keep a small dish of warm water nearby to wipe your dipping forks clean as you work. It keeps the coating even and prevents tiny dried flecks from landing on the still-soft chocolate. Also, arrange everything within reach before you melt the coating — dipping goes fast once the chocolate is ready.
Best Ways to Store
Store the finished bars in an airtight container. They keep well in the refrigerator for up to 2 weeks; the chocolate stays crisp and the wafers remain snappy. If you prefer them at room temperature, pull a few out 10–15 minutes before serving so the chocolate loses its chill and becomes less brittle.
For longer storage, wrap bars individually and freeze for up to 2 months. Thaw in the refrigerator, then bring to cool room temperature before serving to avoid condensation on the chocolate surface.
Common Qs About Kit Kat Bars
Q: Can I temper the chocolate for an even shinier finish?
A: Yes. Tempering gives the glossiest finish and the firmest snap, but it’s not required here. The oil-thinned microwave method produces a reliable glossy shell for home cooks without the need for special tools.
Q: My coating isn’t setting hard — what went wrong?
A: Either the chocolate wasn’t fully melted and re-mixed (creating a soft, uncrystallized mass), or the filling was still warm when you dipped. Make sure the sandwiches are well chilled and that the coating chocolate has been thinned and stirred thoroughly. Chill the coated bars a full hour.
Q: Can I use larger wafers or thicker cookies?
A: You can, but it changes the ratio of wafer to filling and will affect the texture. Thicker cookies yield a more cookie-forward bar and need slightly more coating time and possibly more filling. For the best Kit Kat-like bite, use thin vanilla sugar wafers.
The Takeaway
This Homemade Kit Kat Bars Recipe is a short list of ingredients and a clear, repeatable method that yields polished, crisp bars. Key points: thin wafers, a small amount of melted chocolate as the filling, thorough chilling before coating, and a slightly thinned coating for easy dipping. Follow the steps in order, keep your tools ready, and you’ll have a stack of candy-bar-style treats that impress without fuss.
Make a test bar first to confirm your microwave timing and dipping technique. Once you lock that in, the rest is simply assembly line satisfaction — and a stash of homemade treats ready to share (or hide for yourself).
Homemade Kit Kat Bars Recipe
Equipment
- Baking Sheet
- Parchment Paper
- Sharp Knife
- Microwave-safe bowls
- piping bag or plastic zip-top bag
- small round piping tip (optional)
- forks or dipping tools
- Refrigerator
Ingredients
Ingredients
- 15 vanilla sugar wafers
- 2 cupssemi-sweet chocolate chipsdivided use
- 1 tablespoonvegetable oil
Instructions
Instructions
- Line a large baking sheet with parchment paper.
- Using a sharp knife, cut each of the 15 vanilla sugar wafers in half through the middle to make two thinner wafers (30 halves total). Place one half of each wafer on the prepared baking sheet with the cut side facing up.
- Place 1/2 cup of the 2 cups semi-sweet chocolate chips in a small microwave-safe bowl. Microwave at 50% power for 1 minute. Stir, then continue microwaving in 30-second intervals at 50% power, stirring between intervals, until the chocolate is silky smooth.
- Transfer the melted chocolate to a piping bag fitted with a small round tip, or use a plastic zip-top bag and snip a small corner off.
- Pipe melted chocolate onto the cut side of each wafer half on the baking sheet, spreading to cover the surface. Immediately place the remaining wafer half (cut side down) on top of each filled half to form a sandwich. Press gently to spread the filling evenly without squeezing it out.
- Refrigerate the wafer sandwiches on the baking sheet for 1 hour to set the filling.
- Near the end of the chill time, place the remaining 1 1/2 cups of semi-sweet chocolate chips in a medium microwave-safe bowl. Microwave at 50% power for 1 minute, then add 1 tablespoon vegetable oil and stir.
- Continue microwaving the chocolate in 30-second intervals at 50% power, stirring between intervals, until the chocolate is silky smooth and thinnable for dipping.
- Using two forks or dipping tools, lift one chilled wafer sandwich and dip it into the melted chocolate, fully covering it. Lift with the forks and gently shake or tap side to side to remove excess chocolate.
- Return the chocolate-covered wafer to the parchment-lined baking sheet. Repeat with remaining sandwiches.
- Refrigerate the coated bars for at least 1 hour, until the chocolate shell is completely hardened.
Notes
Store these treats in the refrigerator when not serving. Keeping them at room temperature may cause these treats to melt or crack.
You can substitute the semi-sweet chocolate chips with a 10-ounce bag of dark chocolate or milk chocolate melting wafers, depending on your preference.
To create even more of a KitKat effect, you can place them on the baking sheet side by side immediately after dipping them into chocolate. Have the long edges of the wafer touch one another which will adhere them together.
You will have leftover chocolate in this recipe.