If you’ve ever opened a packet of active dry yeast and wondered if it’s still alive, this is the post for you. Activating yeast — also called “blooming” — is a quick test and an essential first step for any recipe that relies on yeast to give dough rise. Do it right, and your bread, rolls, or pizza crust will have the structure and lift you expect. Do it wrong, and you’ll spend time troubleshooting a flat loaf.
I’m sharing a straightforward, foolproof method I use in my home kitchen. No special tricks, just a few reliable temperatures, the right tiny bit of sugar, and a brief waiting period. These steps are practical and designed to fit into any baking routine, whether you’re making a sandwich loaf or starting your first sourdough-adjacent experiment.
I’ll walk you through the essentials, give a step-by-step based exactly on a tested method, and offer tips for common pitfalls and useful swaps. Read through once, gather your three ingredients and one small saucepan, and you’ll be confidently activating yeast in about ten minutes.
The Essentials
Activating yeast means waking up dormant yeast cells so they start producing carbon dioxide and alcohol — the tiny bubbles that make dough expand. For active dry yeast, the process is simple: warm water, a pinch of sugar, and a short rest. The water must be warm enough to encourage activity but not so hot that it kills the yeast.
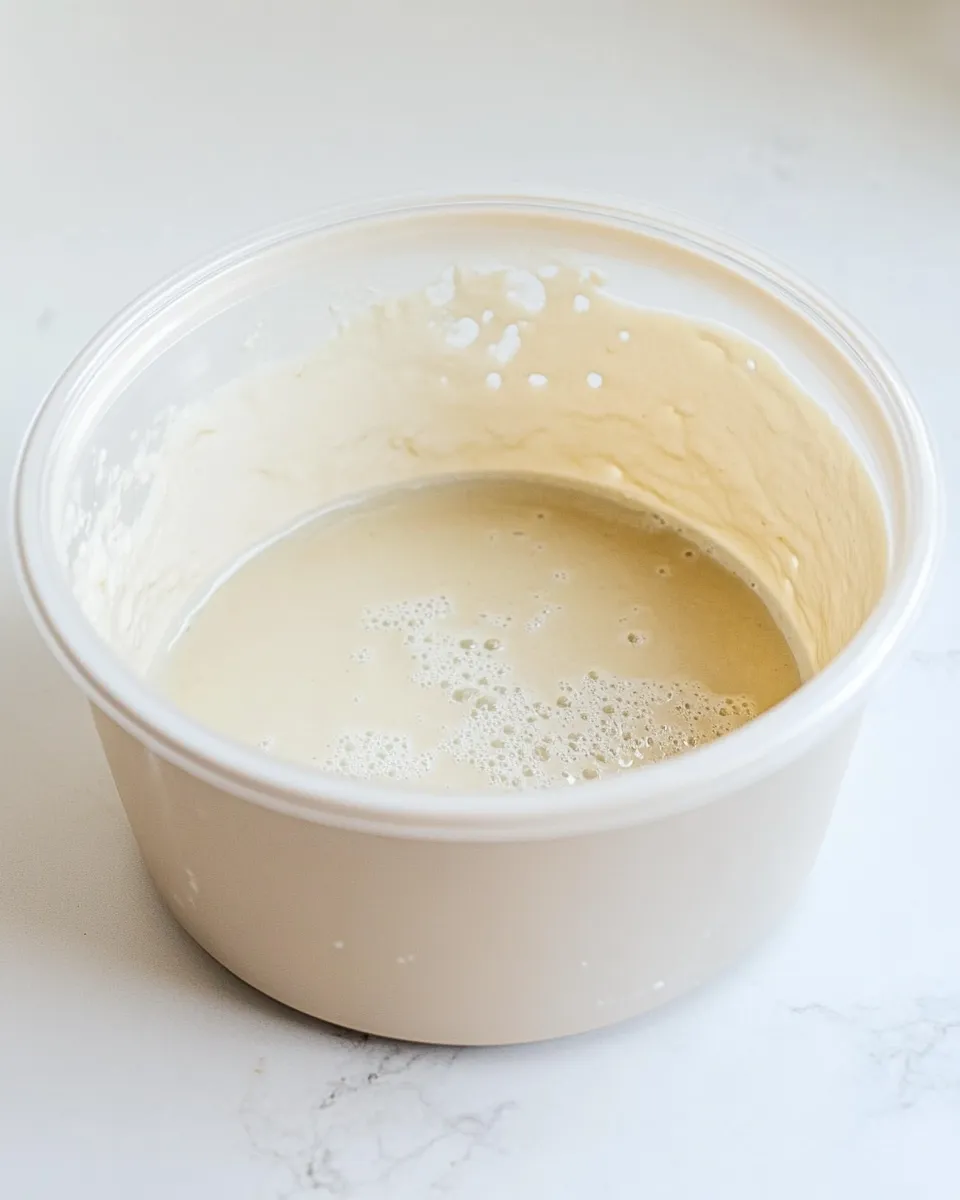
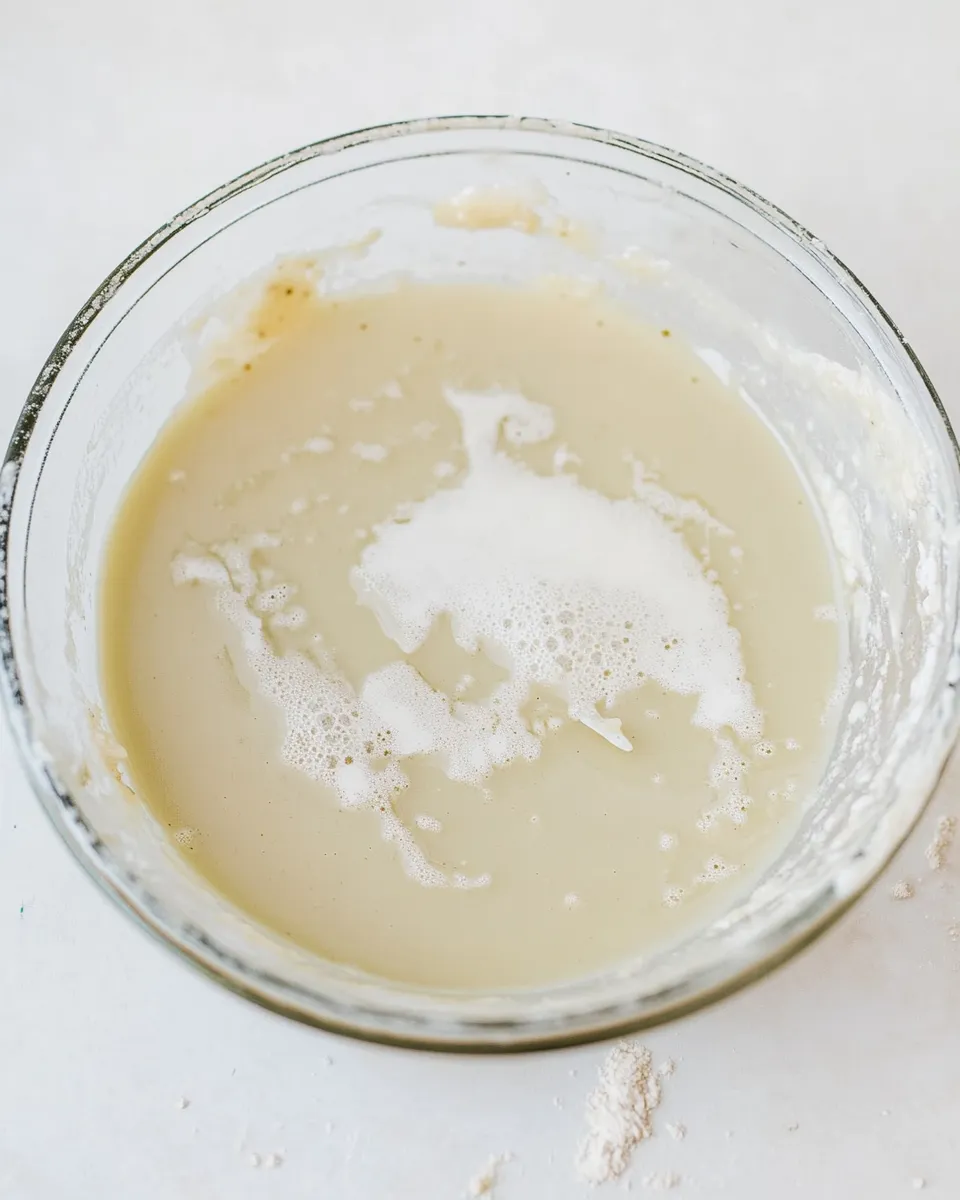
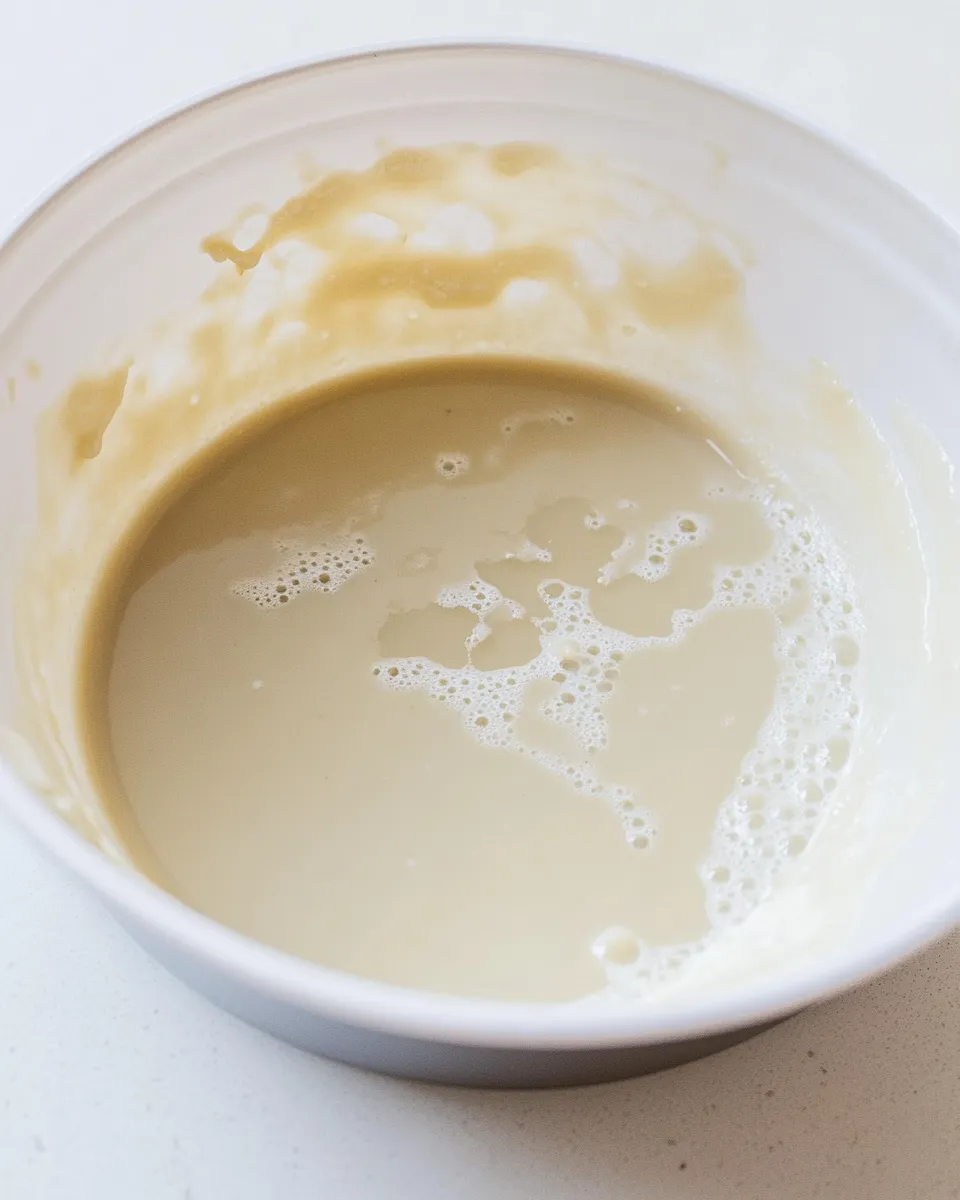
Key things to remember: aim for about 110°F (43°C), use a small amount of granulated sugar to feed the yeast, and give the mixture 5–10 minutes undisturbed to become foamy. If you see a frothy, bubbly surface, the yeast is alive and ready to use. No foam likely means the yeast is dead or the temperature was off.
Ingredients
- 1 cup water — warms the yeast to its ideal activation temperature; use about 110°F (43°C).
- 1 teaspoon granulated sugar — feeds the yeast so it starts bubbling; dissolves quickly in warm water.
- 1 (0.25 ounce) packet active dry yeast (2 ¼ teaspoons) — the leavening agent; check the packet date to ensure freshness.
Step-by-Step: Activate Yeast
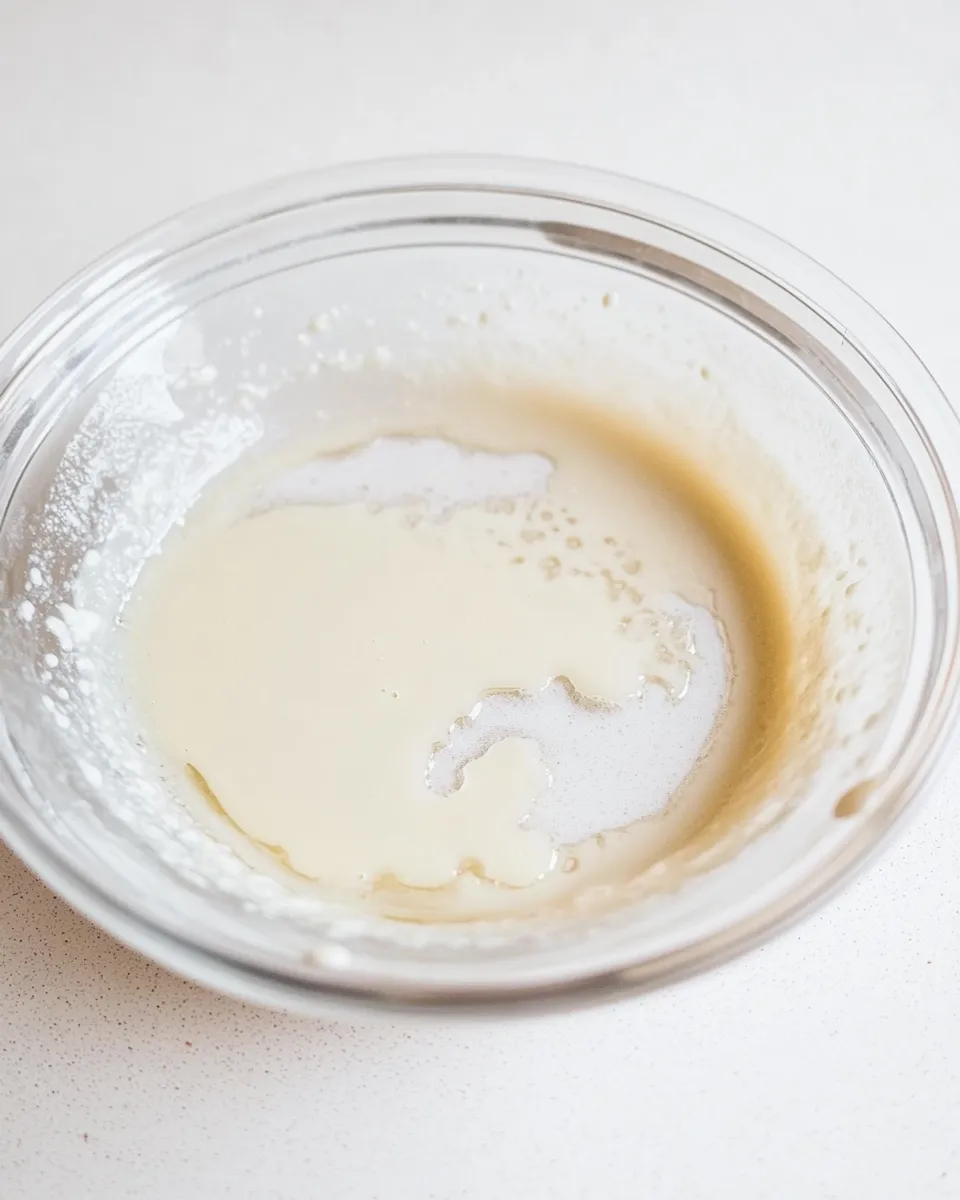
- Measure 1 cup water into a small saucepan and heat it to 110°F (43°C).
- Remove the saucepan from the heat and stir in 1 teaspoon granulated sugar until dissolved.
- Sprinkle the contents of 1 (0.25 ounce) packet active dry yeast (2 1/4 teaspoons) evenly over the surface of the warm sugar water.
- Gently stir once to combine the yeast with the water.
- Set the mixture aside, undisturbed, for 5 to 10 minutes until it becomes foamy and bubbling (the yeast is bloomed and ready).
What Makes This Recipe Special
This method is not about fancy equipment or long prep — it’s about precision. The measured water temperature and minimal sugar are what make the difference. Too hot and yeast dies; too cool and it refuses to wake. The sugar jump-starts activity without overwhelming the yeast or changing the final flavor of your dough.
The approach is also forgiving for most home bakers: it uses a small saucepan so you can control temperature easily and gives a short time window that fits naturally into a baking day. Once you see that foamy cap, you have reliable, active yeast to mix into your dough — predictability that saves you time and frustration.
Vegan & Vegetarian Swaps
Active dry yeast itself is vegan and vegetarian friendly, so there are no ingredient swaps required for most dietary preferences. If you avoid refined sugar, you can substitute a small amount of another simple fermentable like agave or maple syrup, but keep the amount small — the yeast needs just a touch of sugar to wake up.
Note: some bakers prefer honey for flavor, but honey is not strictly vegan. If you use an alternative sweetener, ensure it dissolves in warm water and doesn’t introduce additional flavors that would be unwelcome in your final product.
Gear Checklist
- Small saucepan — to heat the water gently and accurately.
- Instant-read thermometer — helpful but optional; it ensures the water is near 110°F (43°C).
- Spoon or small whisk — to dissolve the sugar and gently stir the yeast in.
- Measuring spoons and cup — for precise amounts: 1 cup water, 1 teaspoon sugar, 1 packet yeast.
- Small bowl or cup (optional) — if you prefer to mix the yeasted water in a separate vessel rather than the saucepan.
Avoid These Traps
- Using water that’s too hot — water above about 130°F (54°C) can kill active dry yeast; keep it close to 110°F (43°C).
- Using water that’s too cold — under ~95°F (35°C) and yeast will stay dormant; you won’t see foam within the expected 5–10 minutes.
- Overstirring after sprinkling — you only need one gentle stir. Vigorous agitation can deflate early bubbles and slow the visible activity.
- Using expired or improperly stored yeast — check the packet date and keep yeast in the freezer or refrigerator after opening for longer life.
- Adding too much sugar — sugar is food for yeast, but excess can dry out cells or change fermentation behavior; stick to the teaspoon here.
Better Choices & Swaps
If you want slightly faster activation, some bakers use warmer water and a two-step temperature approach, but that requires careful monitoring to avoid killing the yeast. A more reliable choice for speed without risk is to use instant yeast directly in the dough (no proofing), but this post focuses on active dry yeast, which benefits from proofing to confirm viability.
For flavor-conscious bakers, use filtered water if your tap is heavily chlorinated — chlorine can inhibit yeast activity. If your recipe will benefit from a more complex fermentation, consider adding a tiny pinch of malt powder (not required for activation) when scaling beyond simple proofing.
Cook’s Commentary
I promise this is one of the most satisfying five to ten minutes in baking. I keep a small sugar jar and a dedicated teaspoon near my baking station so I can proof yeast without a second thought. When I see that glossy foam, I make a silent little cheer — it’s a small, reliable win. It also saves me time: a foamy proof means I can confidently proceed with kneading, shaping, or mixing.
When you’re first learning, keep a thermometer handy. Over time you’ll learn to judge temperature by touch and experience, but accuracy is the friend of consistent results. If your yeast doesn’t foam, don’t assume the yeast is bad right away: check the water temperature, ensure the sugar dissolved, and confirm the yeast packet wasn’t past its prime.
Refrigerate, Freeze, Reheat
Activated yeast (the foamy mixture) is best used immediately. The live yeast cells are in full activity, and waiting long before adding to dough can lead to unpredictable fermentation. If you must pause, you can keep the starter refrigerated for a short time (an hour or two) but expect reduced activity.
Freezing activated yeast is not recommended — freezing damages the cells. If you need long-term storage of yeast, keep unopened packets cool and dry, and store opened active dry yeast in an airtight container in the refrigerator or freezer (dry yeast, not the activated mixture).
Top Questions & Answers
How will I know the yeast is good?
If the mixture becomes foamy and bubbly within 5–10 minutes, the yeast is alive. The foam indicates gas production. If there’s no activity, either the yeast is dead, the water was the wrong temperature, or there’s an issue with the sugar or water quality.
Can I use instant yeast instead?
Yes. Instant yeast typically doesn’t require proofing and can be mixed directly into dry ingredients. Proofing active dry yeast, however, is a useful check on freshness and is recommended when a recipe calls for it or when you’re unsure about the yeast’s age.
What if my yeast smells off?
Freshly activated yeast should smell mildly yeasty and slightly bready. If it smells sour, alcoholic, or unusually strong, discard it and start with a new packet — odors can indicate spoilage or contamination.
What if the foam is thin or slow to appear?
Give it the full 10 minutes. If activity is weak, check that the water was near 110°F (43°C). Weak foam can also mean the yeast is nearing its expiration; consider using a fresh packet if you want reliable rises.
Can I skip the sugar?
Yeast can feed on the dough’s flour sugars, but a small teaspoon of granulated sugar speeds up the visible activation. Skipping it is sometimes fine, but if you’re troubleshooting or proofing an older packet, include the sugar for a clearer result.
Ready, Set, Cook
Now you’re ready: heat 1 cup water to 110°F (43°C), stir in 1 teaspoon sugar, sprinkle in 1 packet of active dry yeast, and wait 5–10 minutes for that telltale foam. Once it’s foamy, fold it into your dough and continue with confidence. This small step is one of the best ways to save yourself a baking headache and ensure consistent, lovely rises.
If you try this method, tell me how it went — did the yeast bloom on schedule, or did you discover a tweak that works in your kitchen? Baking is practical, hands-on, and endlessly teachable; this activation routine should make your next loaf a little more reliable.
How to Activate Yeast
Equipment
- Small saucepan
- Measuring cup
- Measuring Spoon
Ingredients
Ingredients
- 1 cupwater or the amount in your recipe, see note 1
- 1 teaspoongranulated sugar see note 2
- 1 0.25 ounce packetactive dry yeast(2 1/4 teaspoons, see note 3)
Instructions
Instructions
- Measure 1 cup water into a small saucepan and heat it to 110°F (43°C).
- Remove the saucepan from the heat and stir in 1 teaspoon granulated sugar until dissolved.
- Sprinkle the contents of 1 (0.25 ounce) packet active dry yeast (2 1/4 teaspoons) evenly over the surface of the warm sugar water.
- Gently stir once to combine the yeast with the water.
- Set the mixture aside, undisturbed, for 5 to 10 minutes until it becomes foamy and bubbling (the yeast is bloomed and ready).
Notes
Sugar:Optional food for the yeast. Use the sugar from your recipe amount, not additional. If the recipe doesn’t call for sugar for blooming the yeast, you can still add it. Adding 1 tsp. of sugar to a recipe that doesn’t call for it, for the purpose of feeding your yeast, won’t affect the overall taste of the bread. Honey or agave syrup works, too.
Yeast:Active yeast lies dormant and needs a warm liquid to become “activated.” Instant yeast, also known as quick-rise or rapid-rise yeast, does not need to be activated or “bloomed” before using. It’s ready to go as-is and simply gets incorporated right into your dry ingredients. Fresh yeast is not easily available, but if you happen to have the small cakes or bars of it, just crumble it into warm water like active dry yeast to activate.
Yield:The measurements in this recipe are a guide to explain the process. Please follow the measurements in your particular recipe.
Storage:Store open jars of yeast in the refrigerator for up to 4 months or in the freezer for up to 6 months. Use straight from the freezer (no need to thaw). Unopened packets of yeast can be stored in a cool, dry place.
Expired:Your yeast should be bubbling and foamy within 5 to 10 minutes of activation. If it looks like nothing is happening, the yeast may have expired. Discard and try again with a fresh batch.
Yeast freshness test:In a 1-cup liquid measuring cup, dissolve 1 tsp. sugar in ½ cup warm water (between 110 and 115 degrees). Stir in 2 ¼ tsp. (or 1 packet) yeast. After 10 minutes, the yeast should have risen to or above the 1-cup marker on the measuring cup.