Brown butter is one of those tiny kitchen upgrades that feel indulgent but is shockingly easy to pull off. It’s simply butter transformed: the water cooks off, the milk solids toast, and what you get is a nutty, amber liquid that gives cookies, sauces, and vegetables a deep, caramelized lift. I reach for it when I want a shortcut to big flavor without adding a dozen extra ingredients.
You’ll learn how to make it on the stovetop in just a few minutes. The technique is straightforward, but it rewards attention: watch the color, sniff for that toasty aroma, and stop cooking the moment the solids are golden-brown. I’ll walk you through the exact steps, point out common mistakes, and give practical uses so you can put brown butter to work in weeknight meals and weekend bakes alike.
No jargon, no special tools—just one clear method and plenty of real-world tips. If you bake a lot, roast vegetables often, or make simple pan sauces, this will go into your permanent rotation.
Ingredient Breakdown
Ingredients
- ½ cup (113 g) unsalted butter — the sole ingredient; unsalted lets you control seasoning and browning is more predictable.
From Start to Finish: Brown Butter
- Measure ½ cup (113 g) unsalted butter and cut it into tablespoon-sized pieces or small chunks.
- Place the butter pieces in a light-colored small saucepan over medium–low heat.
- Allow the butter to melt, stirring frequently to encourage even cooking and prevent sticking.
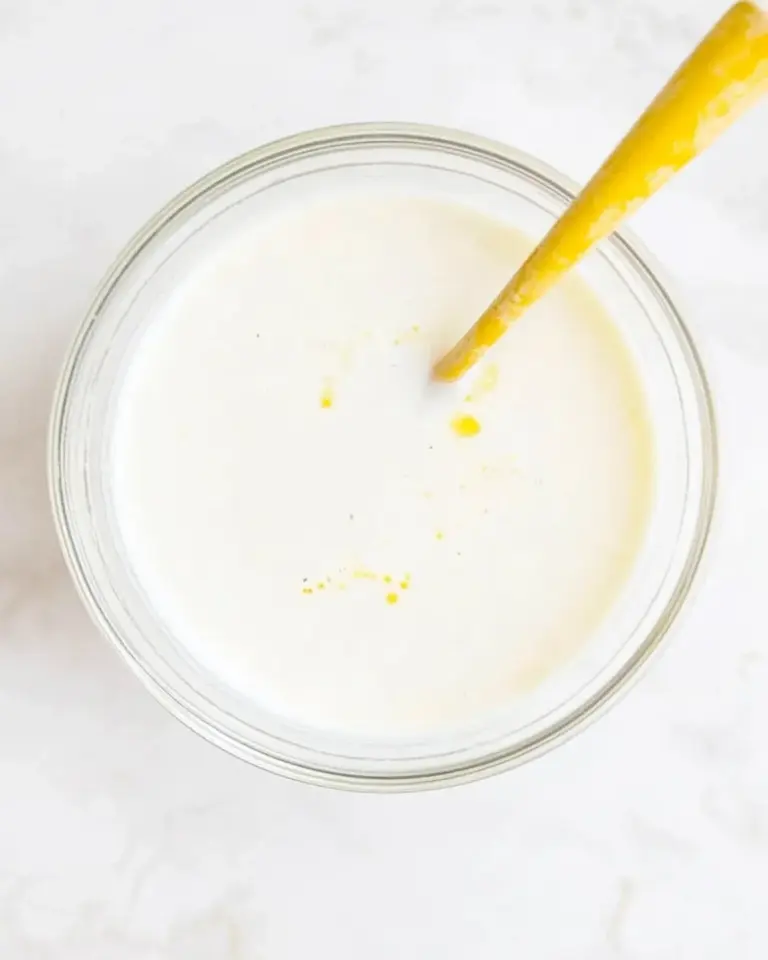
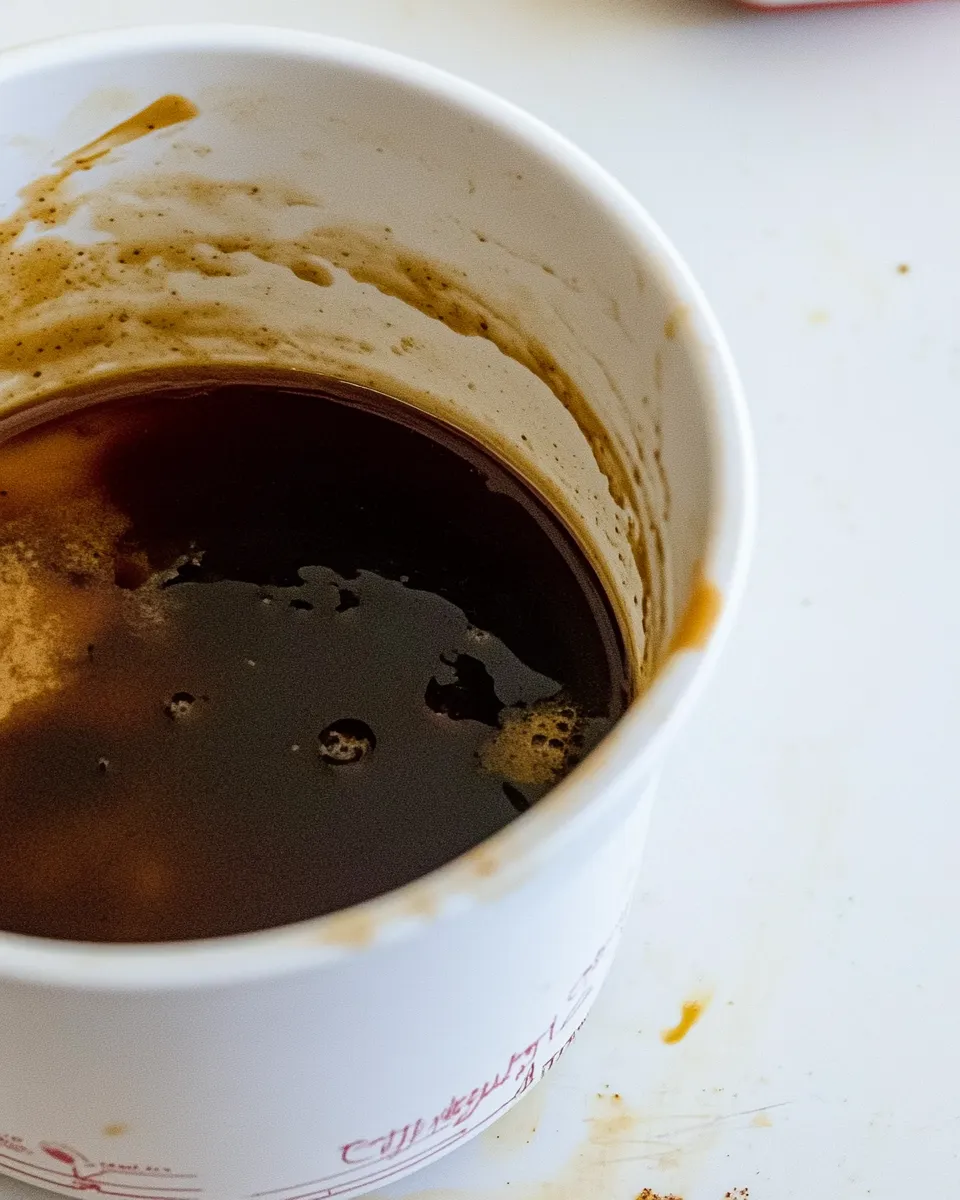
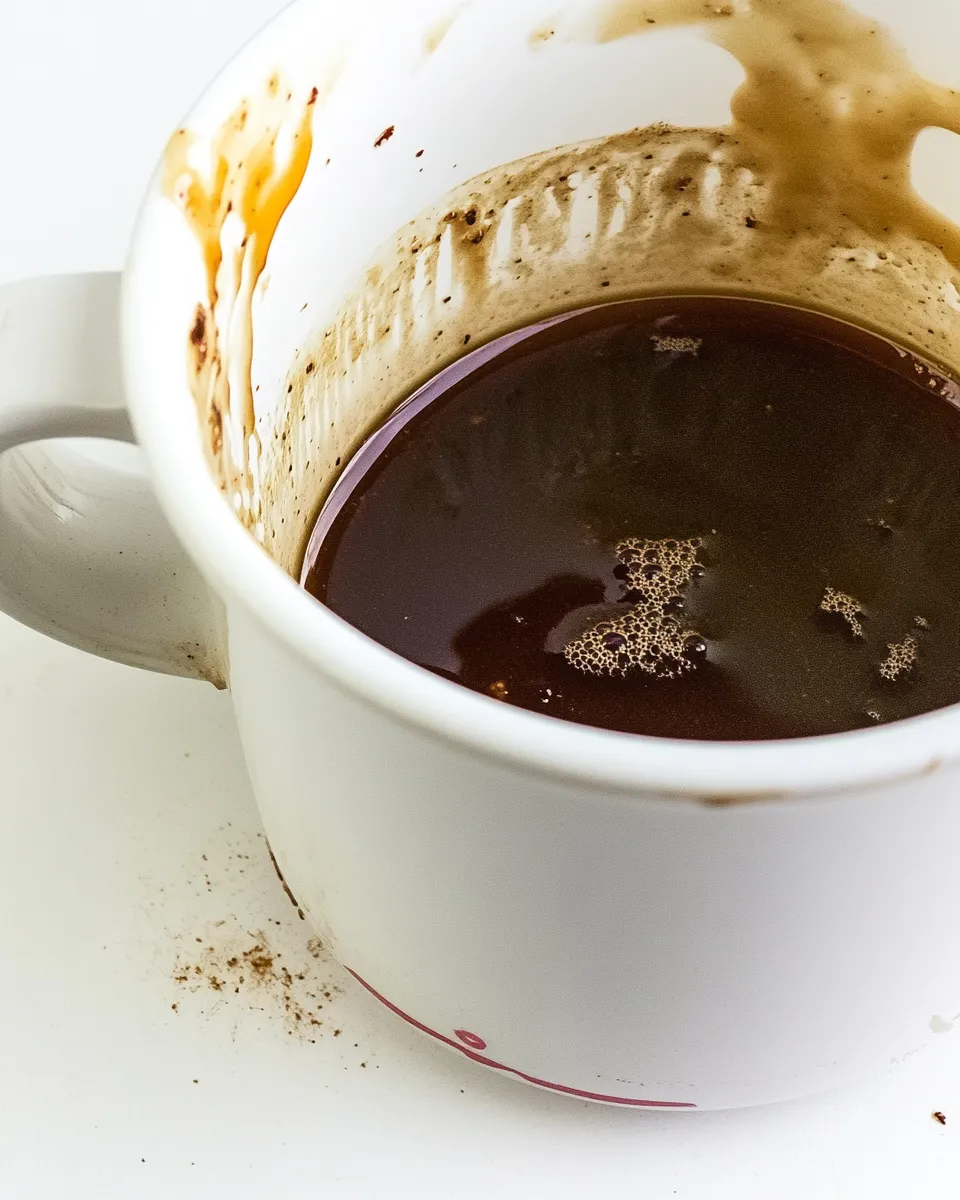
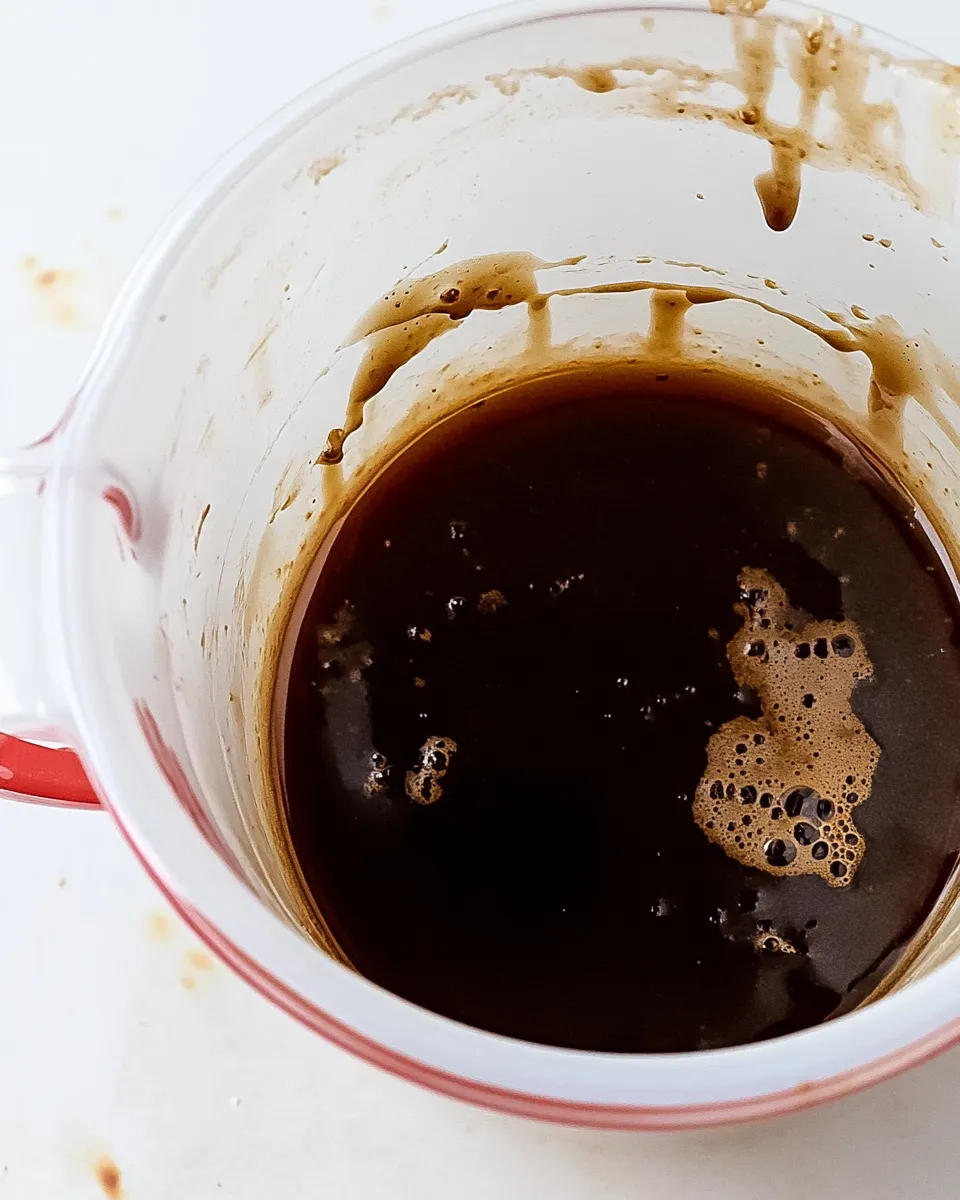
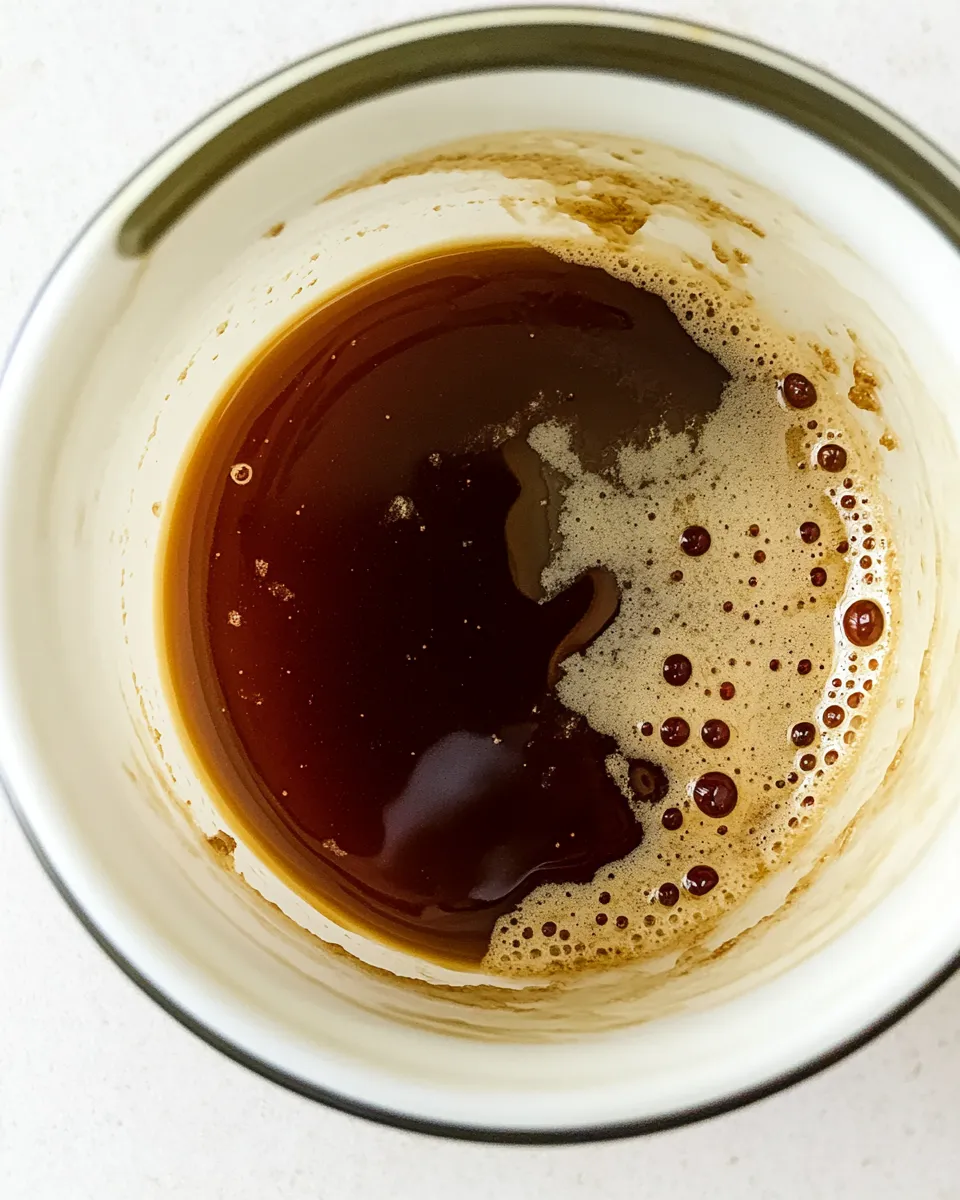
- Continue to cook, stirring frequently, as the butter melts, foams, and changes color from yellow to golden to amber; brown solids (silt) will form on the bottom. Watch closely—the color can go from browned to burned quickly.
- When the milk solids are golden-brown and the butter has a nutty aroma and amber color, immediately remove the pan from the heat and pour the brown butter into a heatproof bowl to stop the cooking.
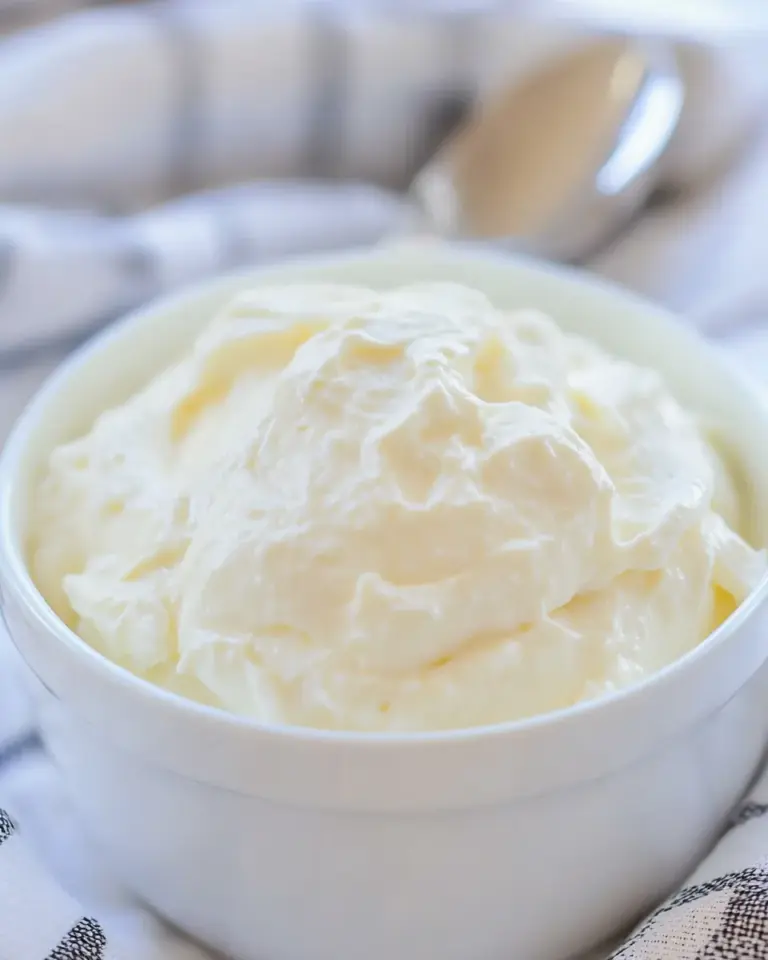
- Use the brown butter immediately, unless you need it to cool and set for frosting. The brown silt in the bottom is normal and is the flavorful part.
Why This Recipe Belongs in Your Rotation
Brown butter is a tiny investment of time for disproportionate flavor payoff. A single routine—melting and browning butter—turns an ordinary recipe into something memorably complex. For baking, it deepens the flavor of cookies, pound cake, and pie crusts. For cooking, it adds a toasted richness to pasta, roasted vegetables, and pan-seared fish. There are very few short-cuts that deliver as much sensory return for so little effort.
It’s also versatile. Use it warm as a sauce, stir it into mashed potatoes, or let it cool and whip it into buttercream for a caramel-like frosting. Because the technique involves no additional ingredients, it integrates seamlessly with whatever you’re already making. Once you master the visual and olfactory cues, brown butter becomes a go-to finishing touch rather than a special-occasion trick.
Low-Carb/Keto Alternatives
Brown butter itself is already keto-friendly: pure dairy fat with zero carbs. If you’re following a low-carb or ketogenic eating plan, brown butter is an excellent way to add flavor without carbs or added sugars.
Use it in place of oil or plain butter when sautéing low-carb vegetables like Brussels sprouts, cauliflower, or green beans. Tossing roasted nuts in brown butter is another high-fat, low-carb snack that feels indulgent while fitting easily into keto macros. Because the ingredient list is unchanged—just butter—the method requires no adaptation for low-carb cooking.
What You’ll Need (Gear)
There are no fancy tools required, but a couple of simple things make the process easier and safer:
- Light-colored small saucepan — a light interior helps you see the color change so you don’t overshoot from browned to burned.
- Heatproof bowl — to stop the cooking the moment the solids are browned; pouring off the butter protects it from residual heat in the pan.
- Spoon or silicone spatula — for frequent stirring; a flat-sided spatula helps scrape the bottom so the solids brown evenly.
- Measuring scale or cup — the recipe uses ½ cup (113 g) butter; accurate measurement helps with expected results.
Slip-Ups to Skip
There are a few easy mistakes that turn a successful batch into a burned one. Watch for these common slip-ups so you can avoid wasted butter and charred flavor.
- Cooking over too high heat — high heat makes the butter go from browned to burned in seconds. Medium–low gives you control and time to react.
- Using a dark pan — you’ll miss the subtle color changes and may overcook the milk solids. A light-colored pan is worth it.
- Walking away — even if you’re stirring occasionally, you should be close. The final color stage happens fast, and you want to remove the pan the instant you hit golden-brown.
- Leaving brown butter in the hot pan — residual heat will continue to cook the solids. Pour into a cool, heatproof bowl right away.
- Discarding the brown solids — that “silt” is the most flavorful part; don’t toss it unless you want plain melted butter.
Fresh Takes Through the Year
Brown butter is a year-round flavor enhancer, and you can riff on it depending on seasonal produce and holidays. In spring, toss asparagus or peas in warm brown butter and finish with lemon zest for brightness. Summer welcome notes of basil or thyme stirred into warm brown butter over grilled corn or tomatoes—add herbs off heat to preserve their freshness.
In fall and winter, brown butter partners beautifully with squash, sweet-potato mash, roasted carrots, or a drizzle over roasted pumpkins. For holiday bakes, use cooled brown butter in cookie dough or pie crusts to introduce a toasty, slightly caramelized backbone that pairs well with warm spices like cinnamon and nutmeg.
Pro Perspective
Consider this the professional short version: watch the color, trust your nose, and stop the cooking immediately. Chefs rely on the sensory cues—visual and aromatic—because timing can’t always be measured by a clock. The moment the milk solids turn a warm, deep-golden brown and the kitchen smells nutty and toasty, pull the pan off heat and transfer the liquid out.
Textural and technical notes
When butter melts, it separates into milk solids, water, and butterfat. As the water evaporates, the milk solids brown and those toasted fragments are what give brown butter its signature flavor. The golden-brown granules sink to the bottom and should be included unless you want clarified butter (which requires leaving the solids behind). Chefs often use a light pan so the browning stage is obvious and stays close at the stove for the final minute.
How to Store & Reheat
Brown butter stores well but behaves like any other butterfat. If you need to keep it for later use, transfer cooled brown butter (including the brown solids) to an airtight container. Stored in the refrigerator, it will solidify; it keeps for about 1–2 weeks. For longer storage, freeze it for up to 3 months.
To reheat, gently warm over low heat until liquid, or microwave in short bursts at low power. If you plan to use it in icing or creamed applications, allow it to cool until just soft or bring to room temperature and beat as required by the recipe. If the brown butter separates or looks grainy after refrigeration, a brief gentle warming and whisk will bring it back together.
Brown Butter FAQs
Q: How do I know when the butter is done?
A: Look for an amber color, smell a warm nutty aroma, and notice brown specks of milk solids on the bottom. When you see those cues, remove the pan from heat and pour the butter into a cool bowl.
Q: Can I use salted butter?
A: Yes, you can. Unsalted is preferred because it gives you precise control over seasoning, but salted butter browns just the same. Keep in mind the finished brown butter will carry whatever salt level was in the starting butter.
Q: Is the brown silt meant to be used?
A: Absolutely. That brown silt is packed with flavor and is the point of browning. Use it in sauces, baking, and finishing dishes. If you need clarified butter, you would separate and discard those solids, but for flavor, include them.
Q: Can brown butter burn and become bitter?
A: Yes. Once the milk solids go past golden-brown into very dark brown or black, they taste burnt and bitter. That’s why attentive stirring and a light pan are important—so you catch the perfect moment.
Q: What’s the best pan to use?
A: A light-colored saucepan or skillet gives the best visual feedback. Nonstick is fine for ease, but stainless or enameled pans also work well as long as the interior is light-colored.
Make It Tonight
Keep one stick or half a cup of unsalted butter in the fridge for a spur-of-the-moment upgrade. When dinner planning strikes, brown a batch: it takes about five minutes, and the payoff is immediate. Drizzle over roasted vegetables, toss with pasta and Parmesan, or fold into cookie dough for a deeper caramel note. Once you taste that toasty, nutty depth, you’ll look for excuses to use brown butter in everyday cooking.
Try it tonight: melt ½ cup (113 g) unsalted butter, follow the simple steps above, and give an ordinary recipe a quietly spectacular lift. You’ll be surprised how often this small technique becomes a starring ingredient.
How to Make Brown Butter
Equipment
- light-colored small saucepan
- Spatula or wooden spoon
- Heatproof bowl
Ingredients
Ingredients
- 1/2 cup 113 g unsalted butter
Instructions
Instructions
- Measure ½ cup (113 g) unsalted butter and cut it into tablespoon-sized pieces or small chunks.
- Place the butter pieces in a light-colored small saucepan over medium–low heat.
- Allow the butter to melt, stirring frequently to encourage even cooking and prevent sticking.
- Continue to cook, stirring frequently, as the butter melts, foams, and changes color from yellow to golden to amber; brown solids (silt) will form on the bottom. Watch closely—the color can go from browned to burned quickly.
- When the milk solids are golden-brown and the butter has a nutty aroma and amber color, immediately remove the pan from the heat and pour the brown butter into a heatproof bowl to stop the cooking.
- Use the brown butter immediately, unless you need it to cool and set for frosting. The brown silt in the bottom is normal and is the flavorful part.
Notes
Uselow to medium heatso the butter doesn’t cook too fast
Cut the butter into small chunksbefore starting so that it melts evenly
Stiroccasionally anddon’t walk away from the stove! Butter goes from brown to burned fast – so keep an eye on it!
It’s best to just brown your butter anduse immediatelyin a sauce. I wouldn’t make a bunch and save it for a rainy day – it’s best fresh.