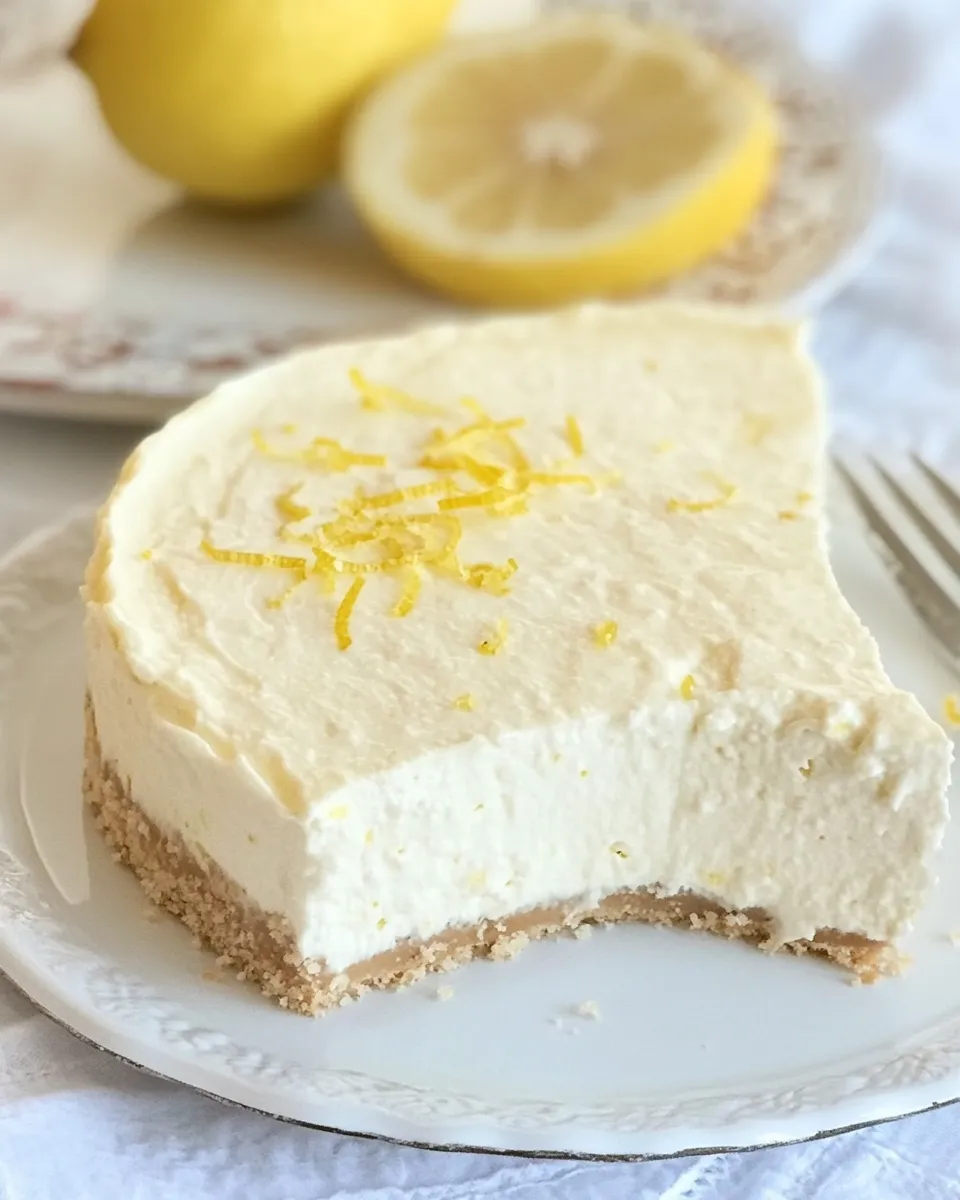
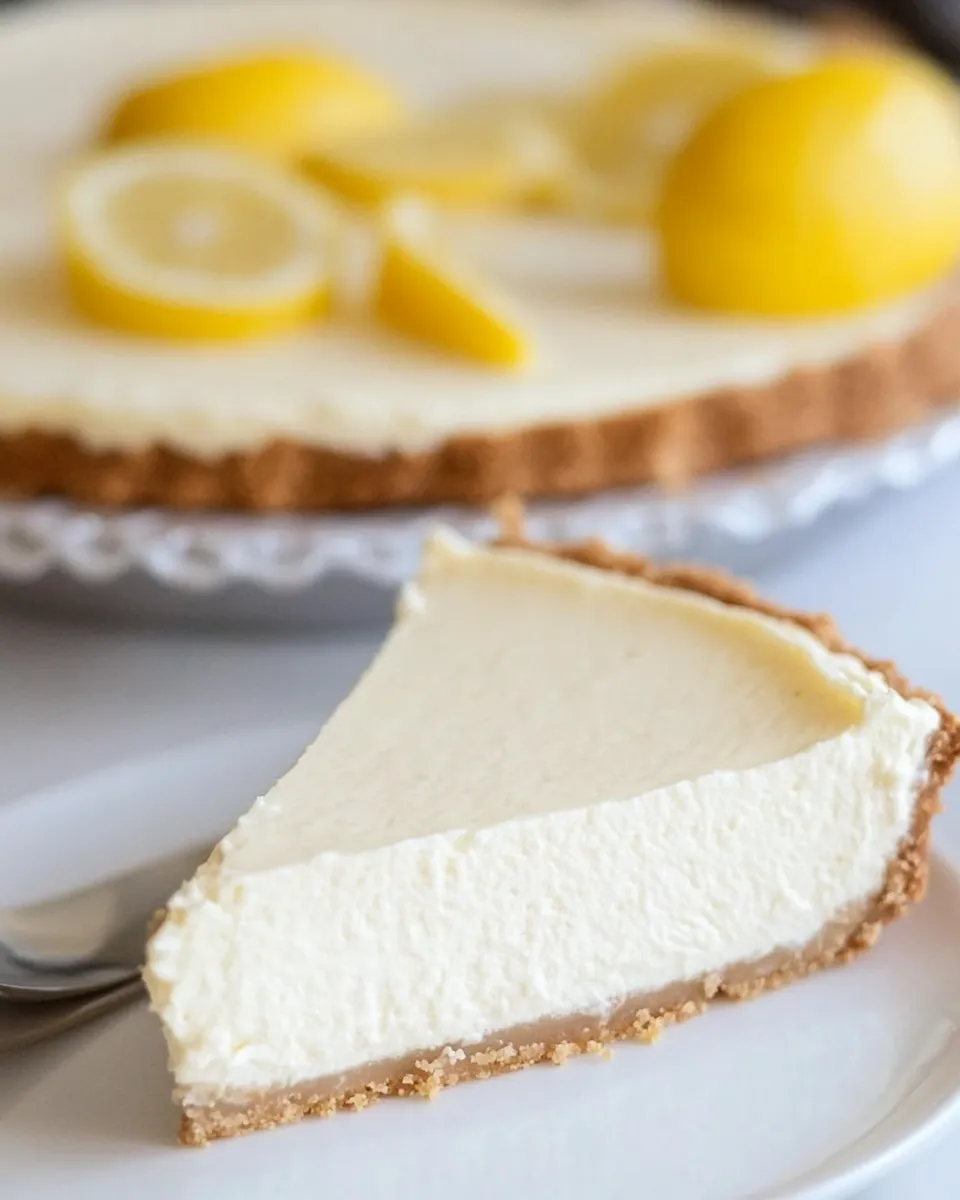
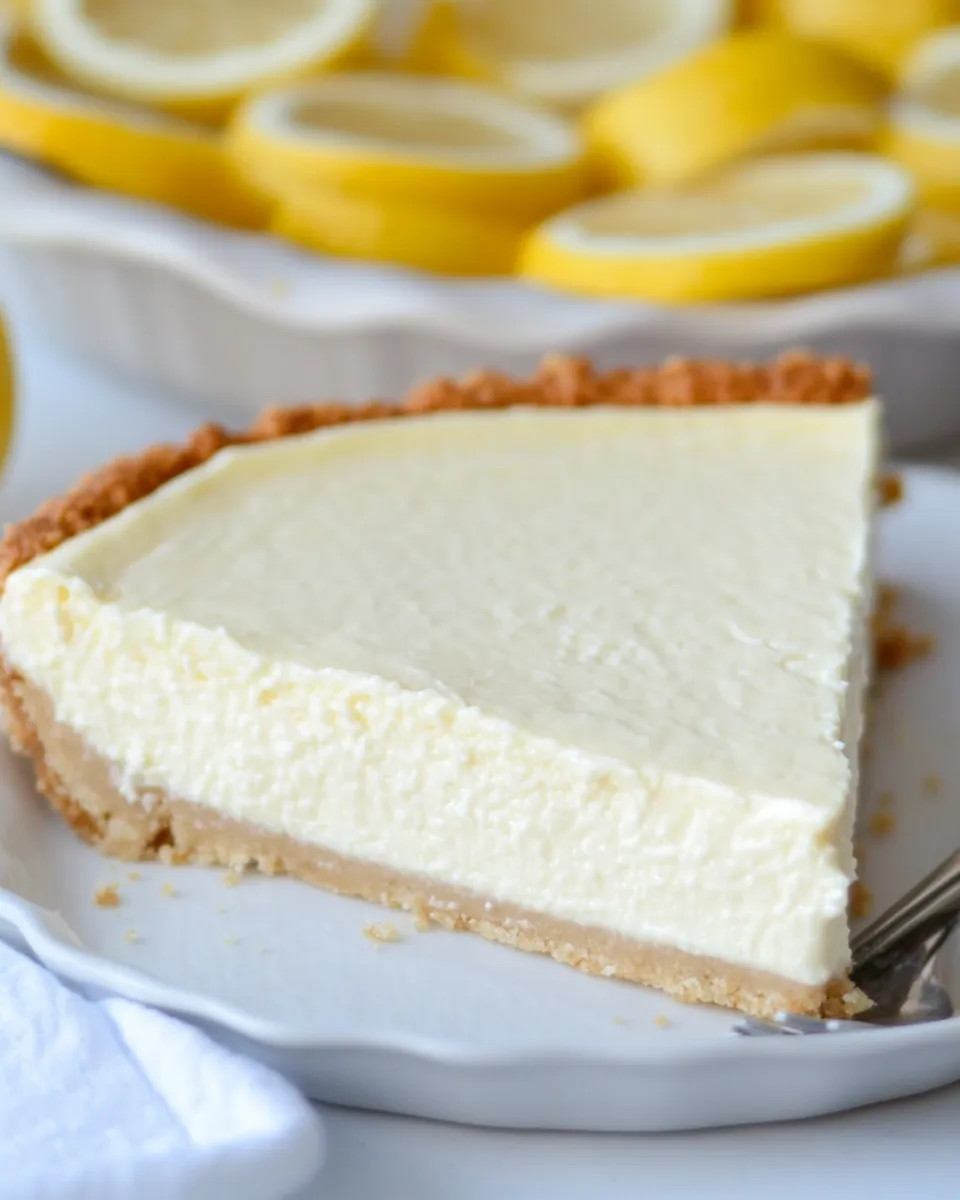
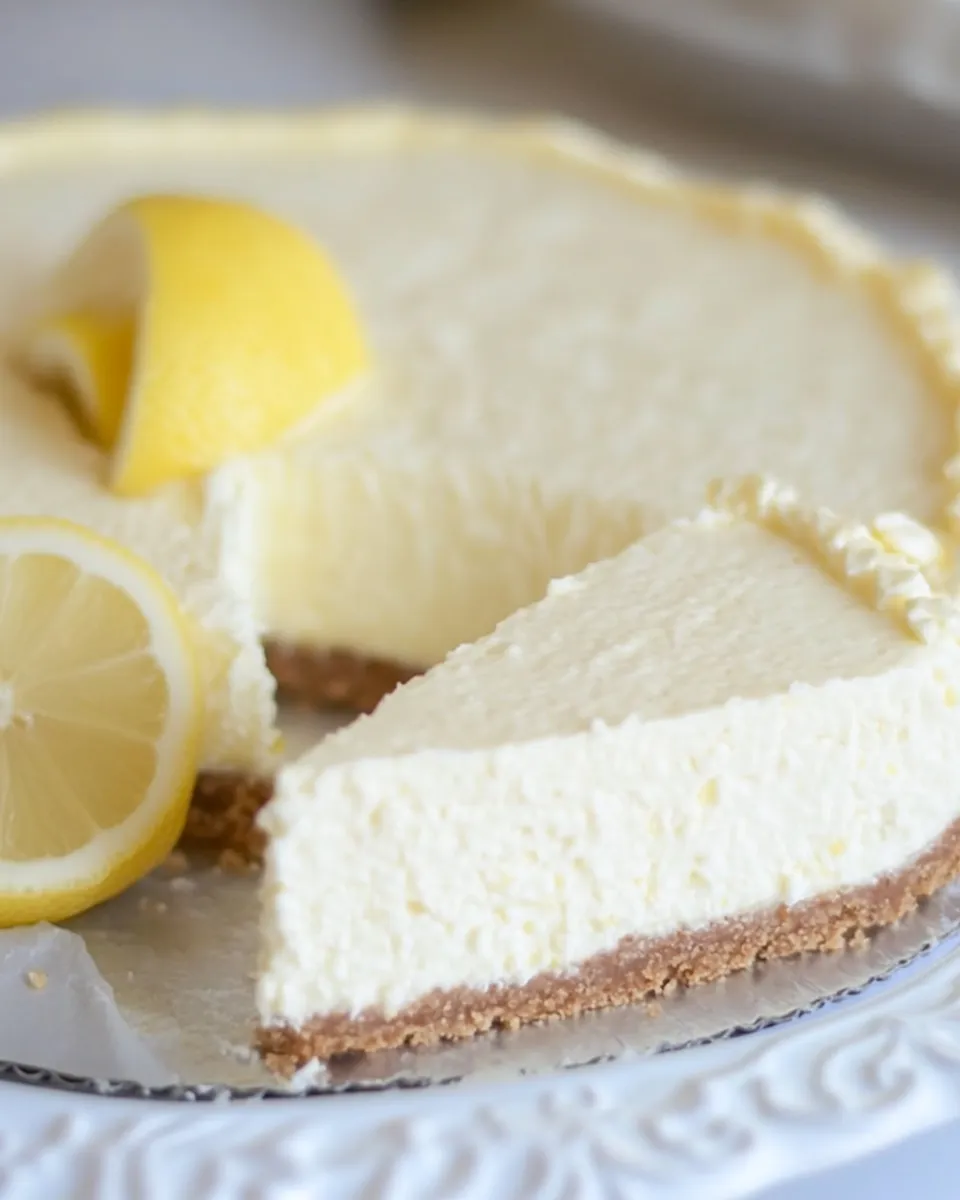
This low carb lemon cheesecake is the kind of dessert I make when I want something bright and satisfying without loading up on sugar and carbs. It balances a tender almond-coconut crust with a silky, tangy lemon filling that sets firm enough to slice cleanly yet soft enough to feel indulgent. There’s no fuss with complicated techniques—just simple mixing, baking the crust, and an overnight chill.
I test this version often because it travels well and appeals to people who normally shy away from “diet” desserts. The lemon is fresh but not sharp; it complements the cream cheese and sour cream without overpowering them. If you like a clean, citrus finish and a dessert that behaves itself at gatherings, this is a reliable pick.
Below you’ll find exact ingredient notes and the step-by-step process I use every time. I’ve also included practical swaps, troubleshooting tips, storage guidance, and answers to the questions readers ask most often. If you follow the sequence here, you’ll have a neat, low-carb tart ready to serve and enjoy.
What Goes Into Low Carb Lemon Cheesecake
Ingredients
- 1.5 cups almond flour (150 g) — the main structure for the crust; gives a moist, low-carb base.
- 3/4 cup desiccated coconut (70 g), unsweetened — adds texture and a touch of natural fat; helps bind the crust when the oil releases.
- 1 egg, large — binds the crust ingredients together and helps set the base during baking.
- 10.5 oz cream cheese (300 g), room temperature — the rich, tangy backbone of the filling; bring to room temp to avoid lumps.
- 10.5 oz sour cream (300 g) — lightens the filling and adds a silky, tangy creaminess.
- 1 lemon, zest and juice — provides fresh lemon flavor; zest intensifies aroma while juice adds bright acidity.
- 2 tablespoons powdered sweetener — sweetens the filling without sugar; powdered form blends smoothly.
- 1 pack gelatine (12 g) — sets the filling firmly; follow the manufacturer’s instructions for dissolving.
Cooking Low Carb Lemon Cheesecake: The Process
- Preheat the oven to 180°C / 350°F. Line the bottom of a tart or pie dish with parchment paper and grease the sides.
- Make the crust: combine 1.5 cups almond flour (150 g), 3/4 cup desiccated coconut (70 g) and 1 large egg in a blender, food processor, or a bowl. Blend or mix until the mixture forms sticky crumbles and the coconut begins to release oil.
- Press the mixture evenly into the bottom (and slightly up the sides, if desired) of the prepared tart/pie dish. (A dish about 22 cm bottom / 26 cm top works well.)
- Bake the crust for about 20 minutes, or until lightly browned. Remove from the oven and let the crust cool completely in the pan.
- While the crust cools, make the filling: in a bowl beat together 300 g cream cheese (room temperature), 300 g sour cream, the zest and juice of 1 lemon, and 2 tablespoons powdered sweetener until smooth and uniform.
- Dissolve 1 pack (12 g) gelatine according to the manufacturer’s instructions. Once dissolved and liquid, add the gelatine to the filling and mix thoroughly until fully incorporated and smooth.
- Pour the filling into the cooled crust and smooth the top with a spatula.
- Refrigerate the tart until set, at least 2 hours or preferably overnight.
- Before serving, optionally decorate with additional lemon zest.
Why This Recipe is a Keeper
There are a few reasons this lemon cheesecake has earned a permanent place in my rotation. First, it’s reliable: the method is straightforward and forgiving. The crust uses ingredients that bind naturally, so you don’t need tricky ratios or specialist flours. The filling is stabilized with gelatine, which means you get clean slices that hold their shape—great for presentation or plate service.
Second, the flavor balance is thoughtful: cream cheese and sour cream create a lush mouthfeel that the lemon cuts through, keeping the dessert from feeling cloying. The powdered sweetener is easy to tweak to taste, so you can dial sweetness up or down without affecting texture. Finally, it’s a make-ahead dessert. Preparing it the day before gives the lemon time to bloom and saves stress on the day you plan to serve it.
Budget & Availability Swaps
Smart swaps can help with cost or availability without changing the overall approach:
- Almond flour vs. ground almonds — the recipe already lists both; use what’s available. If you only have coarser ground almonds, pulse them briefly for a finer crumb.
- Desiccated coconut — if unsweetened desiccated coconut is hard to find, look for unsweetened shredded coconut and pulse to a finer texture before mixing.
- Gelatine — follow the pack you have. If the pack is labeled differently, check the manufacturer’s instructions for equivalent amounts; do not improvise the dissolution step or it may affect set.
- Powdered sweetener — powdered form is recommended to avoid graininess. If you only have granulated sweetener, pulse it to a powder in a blender before adding, or expect a slightly different texture.
Tools of the Trade
Minimal tools are required. A few quality items make the process smoother:
- Blender or food processor — for combining the crust into sticky crumbles quickly and evenly.
- Tart or pie dish (about 22 cm bottom / 26 cm top) — the recipe uses this size for predictable baking and filling volume.
- Spatula — for smoothing the filling and scraping the bowl clean.
- Mixing bowls — one for crust, one for filling. Room for a handheld mixer if you prefer faster smoothing of the filling.
- Parchment paper and a grease brush — helps release the tart cleanly and keeps the sides neat.
Things That Go Wrong
Common issues are easy to prevent once you know the cause.
- Crust too crumbly and falls apart: press it firmly into the pan and ensure the coconut has released its oil. The egg helps bind; if you under-pressed, rework the base slightly and press again before baking.
- Filling doesn’t set: make sure the gelatine is fully dissolved and hot enough to incorporate without clumping. Also confirm you used the full pack (12 g) indicated. Pouring a warm filling onto a hot crust can slow setting, so cool the crust completely first.
- Lumps in the filling: bring the cream cheese to room temperature and beat until smooth before adding other ingredients. If lumps persist, a short whisk or a quick pass with an immersion blender smooths the mixture.
- Slices are messy: chill long enough. At least 2 hours is required, but overnight is best. Use a hot, dry knife wiped between cuts for clean slices.
Allergy-Friendly Swaps
Allergies require substitutes, and while this recipe leans on almonds and dairy, there are practical approaches:
- Nut sensitivity — the recipe already notes “ground almonds” as an option. If almonds are off-limits, try using a coconut-only crust by increasing the desiccated coconut and using a binder (egg). Pulse shredded coconut finer if needed. Note: texture will change.
- Dairy sensitivity — full dairy-free swaps will require plant-based cream cheese and sour cream alternatives. Choose brands labeled for baking and bring them to room temperature before mixing. Keep in mind setting behavior can differ; you may need a stabilizer designed for plant-based fillings.
- Sweetener concerns — use a powdered sweetener appropriate for your dietary needs. Powdered form is important for a smooth filling.
Behind-the-Scenes Notes
Why this particular crust and filling? Almond flour provides a naturally low-carb base with a tender crumb; desiccated coconut contributes texture and oil that helps bind the crust when warmed slightly during mixing. I like the 20-minute bake because it’s long enough to set the base and develop light color without drying it out.
For the filling, the combination of cream cheese and sour cream keeps the texture silken but still rich. Gelatine is the simplest, most reliable binder here—when dissolved and mixed properly, it gives a firm set while preserving creaminess. If you skip it, expect a softer, spoonable filling rather than slicable tart.
Storing Tips & Timelines
Storage is straightforward and forgiving:
- Refrigerator — store the cheesecake covered for up to 4–5 days. Keep it in the pan or transfer to an airtight container once fully set and sliced to prevent fridge odors from affecting the lemon flavor.
- Freezer — you can freeze the whole tart or individual slices. Wrap tightly in plastic, then foil. Freeze for up to 1 month. Thaw in the refrigerator overnight before serving; the texture may be slightly firmer after freezing.
- Make-ahead — assemble and refrigerate overnight for best texture and flavor. This also shortens prep time on serving day.
Frequently Asked Questions
Q: Can I use powdered sugar instead of powdered sweetener?
A: Yes, powdered sugar will work but it changes the carb/sugar profile. Use the same volume but taste and adjust if needed.
Q: How can I prevent cracks or separation in the filling?
A: Avoid overmixing air into the filling. Beat just until smooth, and make sure the gelatine is fully dissolved and incorporated while the filling is warm enough to blend. Cool the tart slowly in the refrigerator rather than leaving it at room temperature too long.
Q: What’s the best way to get clean slices?
A: Chill thoroughly (overnight if possible). Use a large, sharp knife warmed under hot water, wipe it dry between cuts, and slice with confident, single strokes rather than sawing motions.
Q: Can I double the recipe for a larger crowd?
A: Yes. Use a larger dish and adjust baking time for the crust as needed until lightly browned. Ensure the ratio of crust to filling remains balanced for best texture.
Ready to Cook?
If you have the ingredients on hand, this is a quick win—about 30 minutes active time and a few hours to set. Follow the ordered steps, pay attention to temperatures (room-temperature cream cheese, fully dissolved gelatine), and give it adequate chill time. You’ll end up with a bright, tidy lemon cheesecake that’s low on carbs but high on flavor. Happy baking—let me know how yours turns out and any tweaks you make.
Low Carb Lemon Cheesecake
Equipment
- pie pan with a removable bottom
Ingredients
Ingredients
- 1.5 cupalmond flour150 g or ground almonds
- 3/4 cupdesiccated coconut70 g unsweetened
- 1 egglarge
- 10.5 ozcream cheese300 g room temperature
- 10.5 ozsour cream300 g
- 1 lemon zest and juice
- 2 tablespoonpowdered sweetener or more, to taste
- 1 packgelatine12 g
Instructions
Instructions
- Preheat the oven to 180°C / 350°F. Line the bottom of a tart or pie dish with parchment paper and grease the sides.
- Make the crust: combine 1.5 cups almond flour (150 g), 3/4 cup desiccated coconut (70 g) and 1 large egg in a blender, food processor, or a bowl. Blend or mix until the mixture forms sticky crumbles and the coconut begins to release oil.
- Press the mixture evenly into the bottom (and slightly up the sides, if desired) of the prepared tart/pie dish. (A dish about 22 cm bottom / 26 cm top works well.)
- Bake the crust for about 20 minutes, or until lightly browned. Remove from the oven and let the crust cool completely in the pan.
- While the crust cools, make the filling: in a bowl beat together 300 g cream cheese (room temperature), 300 g sour cream, the zest and juice of 1 lemon, and 2 tablespoons powdered sweetener until smooth and uniform.
- Dissolve 1 pack (12 g) gelatine according to the manufacturer's instructions. Once dissolved and liquid, add the gelatine to the filling and mix thoroughly until fully incorporated and smooth.
- Pour the filling into the cooled crust and smooth the top with a spatula.
- Refrigerate the tart until set, at least 2 hours or preferably overnight.
- Before serving, optionally decorate with additional lemon zest.
Notes
4.3g net carbs per slice. Makes 12 generous slices. The tart could also yield 16 smaller slices.
Option to top the tart with a layer of whipped cream or
sugar free lemon curd
.
Store in the fridge for up to 5 days or freeze pre-sliced for up to 3 months.