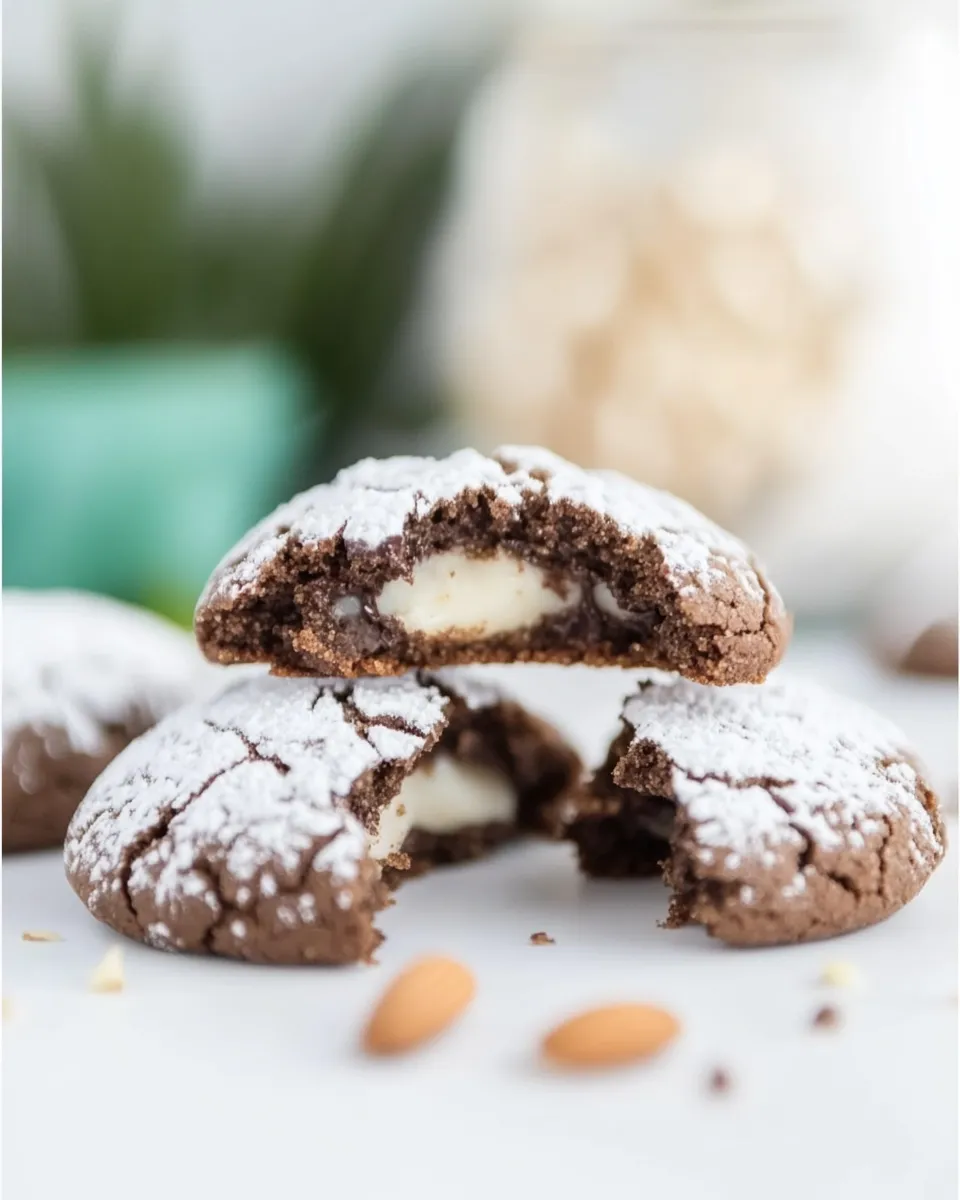
These almond chocolate cookies are the kind of small comfort that arrives fast. They’re crisp at the edges, chewy inside, and rely on just a handful of pantry staples. No butter to soften, no chilling marathon — mostly mixing, shaping, and a short bake. They’re perfect when you want a quick bake that still feels thoughtful.
I make these when I want something chocolatey but not heavy. The almond flour gives them a gentle nuttiness and fine texture; the powdered sugar melts into the dough and leaves a soft, crackled surface when dusted. The result is a small, elegant cookie that holds up well in a tin and disappears even faster than I expect.
Below I give you the exact ingredients and step-by-step instructions, plus practical notes on swaps, equipment, and troubleshooting. Read through once, gather your few items, and you’ll be done before the kitchen fills with that irresistible chocolate-almond scent.
What Goes Into Almond Chocolate Cookies

Ingredients
- 180 g almond flour — Provides the structure and nutty base; use finely ground almond flour for a smooth dough.
- 220 g powdered sugar, plus extra for dusting the cookies — Sweetens and helps give the cookies a delicate crackle; reserve some for rolling the dough balls.
- 4 tablespoons cocoa powder — Gives the chocolate flavor and color; unsweetened cocoa is assumed.
- 60 g egg whites, approx the egg whites from 2 large eggs — Binds the dough and adds lift; whip until foamy per the method below.
How to Prepare Almond Chocolate Cookies
- Preheat the oven to 180°C / 360°F and place a baking tray on the middle rack. Line the tray with parchment paper or a silicone mat if available.
- In a large bowl, combine 180 g almond flour, 220 g powdered sugar, and 4 tablespoons cocoa powder. Mix until evenly distributed.
- In a separate bowl, whisk 60 g egg whites until foamy.
- Gradually add the whipped egg whites to the dry mixture, folding with a spatula or spoon until a sticky, cohesive dough forms.
- If the dough is very sticky, dust your hands lightly with some of the extra powdered sugar (from the reserved dusting sugar) and continue handling.
- Portion the dough into small, even balls using your hands, a spoon, or an ice-cream scoop. Place the balls on the prepared baking tray with a little space between them.
- Optional: chill the dough balls in the fridge for 30 minutes up to 12 hours if you prefer (this is not required).
- Roll each dough ball in the extra powdered sugar to coat, then return them to the lined tray.
- Gently flatten each sugared ball slightly with the back of a spoon or the palm of your hand.
- Bake on the middle rack for 15 minutes, until the surface is slightly crispy but the cookies remain soft to the touch.
- Transfer the cookies to a cooling rack and allow them to cool completely before serving.
Why I Love This Recipe
I love how straightforward these cookies are. They don’t demand creaming butter or tempering chocolate. The texture melds almond flour’s tender crumb with cocoa’s bittersweet note. And because they’re small and quick to bake, they’re reliable for last-minute guests or a calm afternoon with coffee.
They’re forgiving too. A little extra powdered sugar on your hands or a touch more egg white won’t ruin them; you’ll end up adjusting texture more than flavor. And they travel well—stacked in a tin they stay nice for several days. The flavor deepens slightly overnight, so they feel even better the next day.
Budget & Availability Swaps

If you can’t find almond flour or it’s pricey where you are, consider the following practical swaps. Note that these change texture and flavor, so adjust expectations rather than trying to recreate the original exactly.
- Almond flour substitute: If almond flour is unavailable, very finely ground hazelnut meal can work for a nutty flavor; however, it’s more aromatic and can make the cookies darker. For a non-nut option, a blend of 160 g all-purpose flour + 20 g finely ground oats may approximate bulk but will produce a chewier, less delicate cookie.
- Cocoa powder: Use unsweetened cocoa as listed. If all you have is Dutch-processed, the color and acidity will change slightly; the cookies will still be delicious.
- Powdered sugar: Powdered sugar both sweetens and affects texture. If you must use granulated sugar, pulse it in a blender with a tablespoon of cornstarch to create a finer texture, but expect a different surface finish.
- Egg whites: The recipe uses only egg whites for lift. For allergies, see the adaptations section below.
Kitchen Gear Checklist
Only a few items are essential for these cookies. They’re intentionally minimal so you won’t need to hunt down obscure tools.
- Mixing bowls — One large bowl for dry ingredients and one for whipping the egg whites.
- Whisk or electric mixer — A whisk will work, but an electric hand mixer speeds up foaming the egg whites.
- Spatula or spoon — For folding the whipped egg whites into the dry mix.
- Baking tray and parchment or silicone mat — Prevents sticking and encourages even baking.
- Scoop or spoon — To portion evenly; an ice-cream scoop is handy for consistent sizes.
- Cooling rack — Helps the cookies set and prevents sogginess on the tray.
Troubleshooting Tips
Here are quick fixes for common hiccups.
- Dough too wet or sticky: Lightly dust your hands with extra powdered sugar before rolling. If it’s still unmanageable, chill the dough balls briefly to firm them up.
- Cookies spread too much: Make sure you’re using almond flour, not almond meal with larger pieces. Also, if the dough was overhydrated, a short chill helps.
- Cookies are cakey or dry: Overbaking causes dryness. Remove them when the surface is slightly crispy but still soft to the touch, as the recipe states. They firm as they cool.
- Uneven texture: Ensure cocoa and powdered sugar are well mixed into the almond flour before adding egg whites. Clumps of cocoa can make pockets of dryness.
Adaptations for Special Diets
These notes cover common dietary needs. Some changes alter texture; I call out what to expect so you can choose deliberately.
- Gluten-free: The base is naturally gluten-free when using almond flour and pure powdered sugar. Check your cocoa and powdered sugar for cross-contamination if you need strict GF.
- Dairy-free: The recipe contains no dairy as written.
- Vegan: This recipe uses egg whites for structure, so a direct vegan swap isn’t straightforward. Aquafaba (chickpea liquid) whipped to foam can mimic egg whites in some recipes; try whipping 60 g aquafaba to soft peaks and follow the same steps, noting the texture will be slightly different.
- Nut allergies: Almond flour is central to these cookies’ texture and flavor, so this recipe isn’t suitable if you have a tree-nut allergy. See the Budget Swaps for possible non-nut alternatives, but be aware the result won’t be the same.
Behind-the-Scenes Notes
Why the method works: powdered sugar dissolves into the almond flour and cocoa rather than remaining crystalline like granulated sugar would. That produces a delicate, almost melt-in-your-mouth crumb. The whipped egg whites add air and help bind without fat, which keeps the cookies light and slightly crisp on the outside but tender inside.
Timing tips: if you chill the balls for longer than 30 minutes, you’ll notice a slightly denser interior and sometimes a neater crackle on top. If you’re in a hurry, skip the chill — the cookies still bake up nicely and sometimes have a more tender center.
Leftovers & Meal Prep
These cookies store well. Keep them in an airtight container at room temperature for up to four days. If your kitchen is humid, store them in a cool, dry place to maintain the slightly crisp surface. For longer storage, freeze in a single layer on a tray until firm, then transfer to a freezer bag for up to two months. Thaw at room temperature for 30–60 minutes before serving.
If you want to batch-prepare dough balls: shape and roll them, then freeze them on a tray until solid. Transfer to a bag and bake from frozen, adding a minute or two to the bake time and watching for that slightly crispy surface.
Troubleshooting Q&A
Q: My cookies didn’t crack on top — are they ruined?
A: Not at all. The crackle varies with humidity, how much powdered sugar you used to coat them, and how thoroughly you whipped the egg whites. They’ll still taste great.
Q: Can I make larger cookies?
A: Yes. Increase bake time slightly and watch for the surface to crisp while the center stays soft. Larger cookies may also require slightly more time to cool fully so they set properly.
Q: I used store-bought egg whites from a carton. Will that change anything?
A: Carton egg whites are fine but sometimes whip differently than fresh. They can still give good results—whip them to a foamy stage and fold gently.
Ready to Cook?
Gather the four ingredients, preheat your oven, and follow the straightforward steps above. These cookies are fast to make and forgiving to handle. If you try a swap or a tweak, come back and note what changed so you can perfect your version. Now, heat the oven and enjoy the small joy of almond and chocolate in every bite.

Almond Chocolate Cookies
Equipment
- Baking tray
- parchment paper or silicone mat
- Large Bowl
- Spoon or spatula
- Whisk
- Cooling rack
- refrigerator (optional)
Ingredients
Ingredients
- 180 galmond flour
- 220 gpowdered sugar plus extra for dusting the cookies
- 4 tablespoonscocoa powder
- 60 gegg whites approx the egg whites from 2 large eggs
Instructions
Instructions
- Preheat the oven to 180°C / 360°F and place a baking tray on the middle rack. Line the tray with parchment paper or a silicone mat if available.
- In a large bowl, combine 180 g almond flour, 220 g powdered sugar, and 4 tablespoons cocoa powder. Mix until evenly distributed.
- In a separate bowl, whisk 60 g egg whites until foamy.
- Gradually add the whipped egg whites to the dry mixture, folding with a spatula or spoon until a sticky, cohesive dough forms.
- If the dough is very sticky, dust your hands lightly with some of the extra powdered sugar (from the reserved dusting sugar) and continue handling.
- Portion the dough into small, even balls using your hands, a spoon, or an ice-cream scoop. Place the balls on the prepared baking tray with a little space between them.
- Optional: chill the dough balls in the fridge for 30 minutes up to 12 hours if you prefer (this is not required).
- Roll each dough ball in the extra powdered sugar to coat, then return them to the lined tray.
- Gently flatten each sugared ball slightly with the back of a spoon or the palm of your hand.
- Bake on the middle rack for 15 minutes, until the surface is slightly crispy but the cookies remain soft to the touch.
- Transfer the cookies to a cooling rack and allow them to cool completely before serving.
Notes
US Cups amounts are provided, or click on the button "US Customary" for fluid/ ounce amounts. Please note that I use grams for all my baking recipes because they're accurate and offer consistent results.#
You can
substitute almond flour with blanched almonds
. Simply place them in a powerful food processor and blitz until very finely ground.
You can form the chocolate amaretti with
a
small ice cream scoop
. This will help you make evenly-sized cookies.
If the dough is very sticky,
dust your hands in powdered sugar,
then form the cookie dough balls.
You can roll the dough balls into
fine sugar or powdered sugar.
Let the
chocolate
almond cookies cool completely on a cooling rack
, this will help them achieve the perfect crunchy and chewy texture.