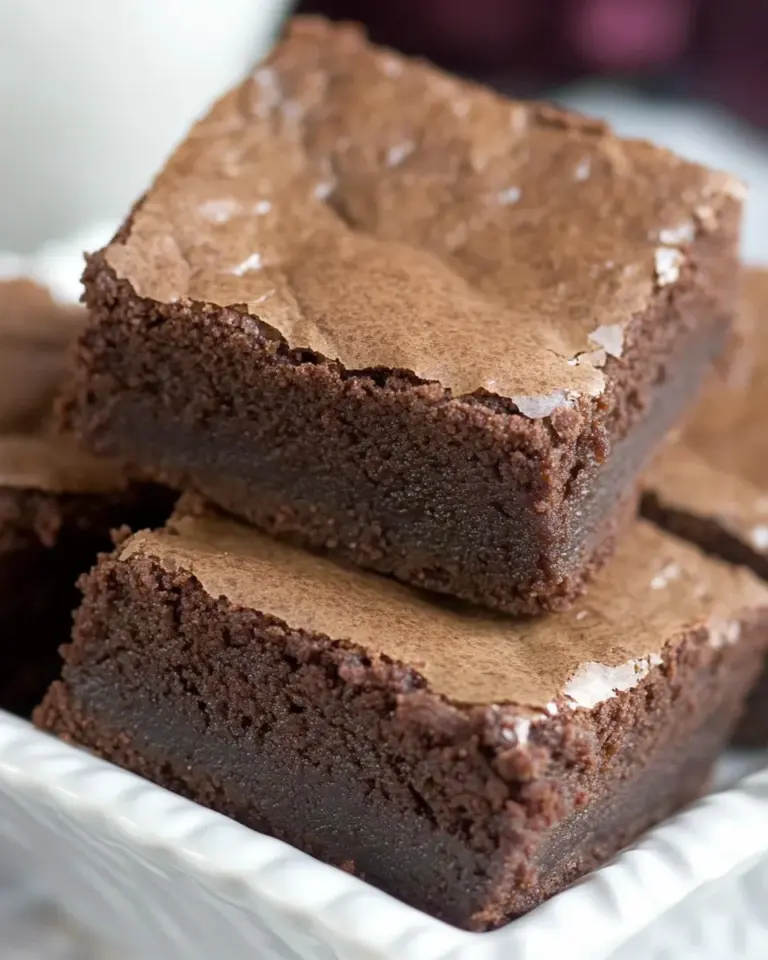
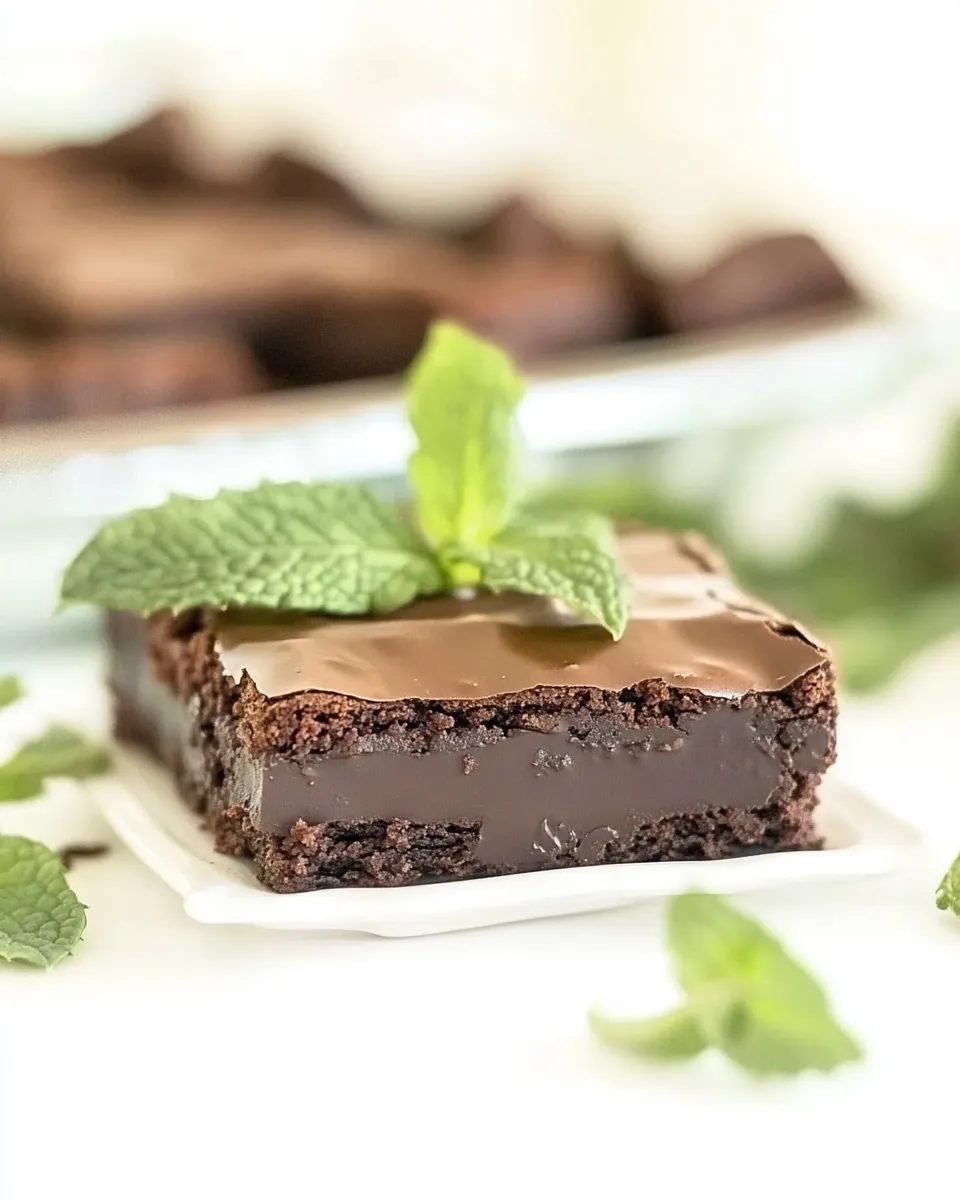
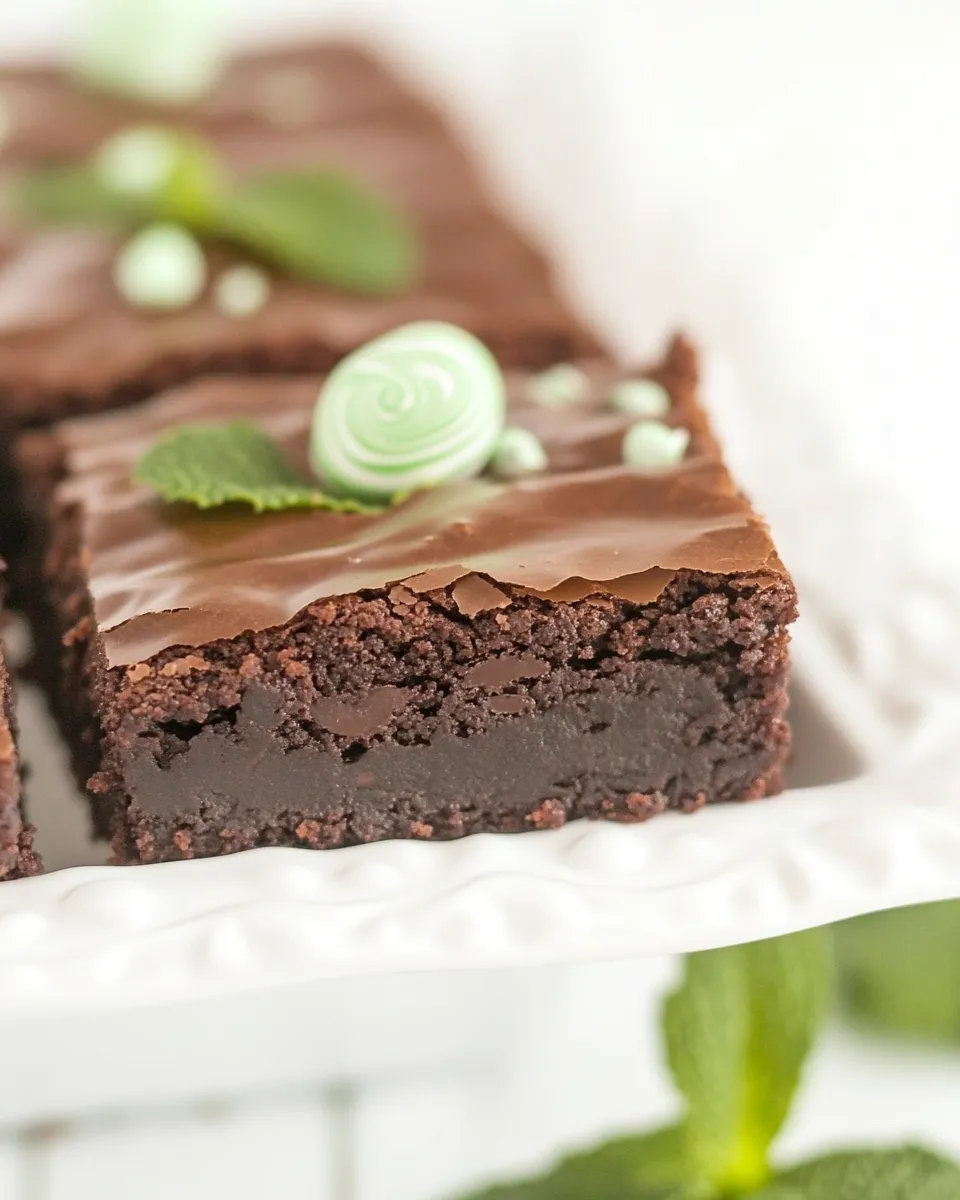
These brownies are the assembly of two very good ideas: a dense chocolate brownie base and a minty cookie truffle layer, finished with a glossy chocolate cap. It’s a straightforward upgrade that turns a simple pan of brownies into something people will ask you about. No fancy tempering or exotic ingredients — just good timing and a few common tools.
I test these in my kitchen when I want something that travels well to potlucks and lasts in the fridge without losing shape. The truffle layer is forgiving — you’re shaping it more than piping it — and the final chill sets everything so clean squares cut without gooey mess. Expect crunchy cookie bits, a creamy middle, and a shiny chocolate top that snaps.
Below you’ll find exactly what to gather, step-by-step directions straight from the recipe source, practical tips, and sensible swaps. Read once, gather your tools, and make sure the brownies are fully cooled before you begin. That cooling step matters.
What You’ll Gather

Ingredients
- 1 9×13” pan of brownies — baked and completely cooled; this is your sturdy base so don’t skip the cooling step.
- 52 Thin Mint Cookies or Keebler Grasshoppers — from two boxes; these bring the mint-chocolate flavor and structure for the truffle layer.
- 4 ounces low-fat cream cheese — softened slightly if very cold; acts as the binder, keeping the cookie crumbs cohesive without being overly rich.
- 2 cups chocolate chips — milk or semi-sweet; melts into the glossy final layer.
- 1 tablespoon Crisco — helps thin the melted chocolate for a shiny, spreadable top.
The Method for Thin Mint Truffle Brownies
- Make sure the 1 9×13” pan of brownies is completely cooled.
- Prepare the truffle layer: if using a food processor, add 52 Thin Mint Cookies (or Keebler Grasshoppers) and 4 ounces low-fat cream cheese (softened slightly if very cold) to the processor and process until the mixture begins to form a cohesive ball. If you don’t have a food processor, place the 52 cookies in a sealed plastic bag and crush to fine crumbs with a rolling pin; transfer the crumbs to a bowl, add the 4 ounces low-fat cream cheese, beat with a hand mixer until combined, then use your hands to bring the mixture together into a cohesive mass.
- Crumble or press the cookie–cream cheese mixture evenly over the cooled brownies so the entire surface is covered. Gently press the mixture down so it adheres to the brownies without tearing them.
- Place 2 cups chocolate chips and 1 tablespoon Crisco in a medium microwave-safe bowl. Microwave on HIGH in 30-second increments, stirring between each increment, until the chocolate is fully melted and smooth (about 1½ minutes total). Stir thoroughly and avoid overheating.
- Pour the melted chocolate over the truffle layer and spread it evenly with an offset spatula or the back of a spoon.
- Chill the pan in the refrigerator until the chocolate topping is set (about 30–60 minutes).
- Remove the brownies from the refrigerator and let them sit at room temperature at least 20 minutes before slicing into squares.
- Store the brownies in an airtight container. They can be frozen for up to one month.
Why Thin Mint Truffle Brownies is Worth Your Time
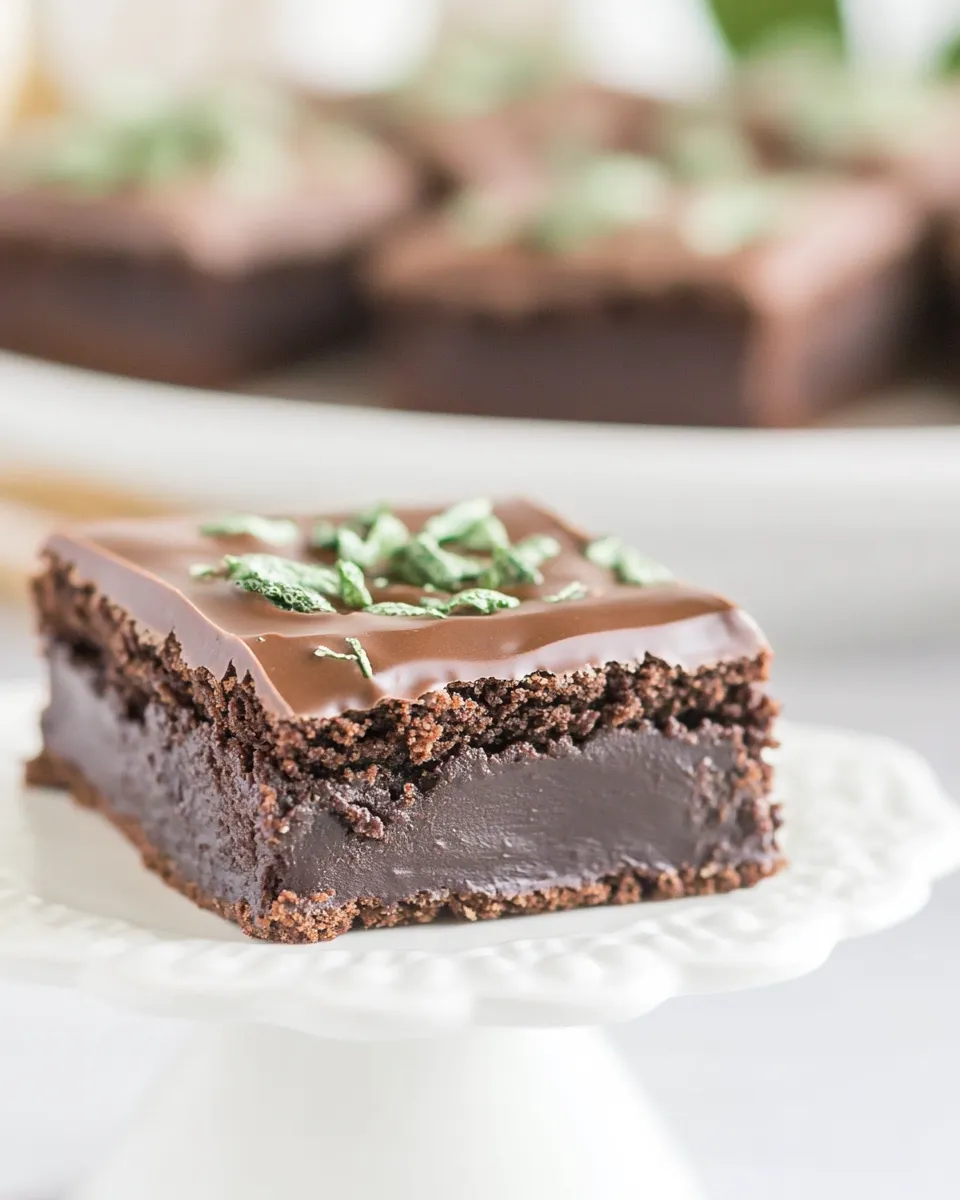
These brownies are worth the ten or so extra minutes because the flavor contrast is immediate: the mint cookie brings bright, slightly herbal notes while the cream cheese tames the sweetness and adds a truffle-like texture. The finished bars feel upscale but require no special bakery skills.
They travel well. The firm truffle layer and hardened chocolate top protect the brownies underneath, which means you can pack them for a bake sale, picnic, or office drop-off without worrying about everything getting squashed. And because the recipe uses a pre-baked 9×13 pan, you can make the base ahead of time and assemble on short notice.
Finally, the recipe is forgiving. Overworking the cookie mixture slightly changes texture but doesn’t ruin it. The key technical bits are simple: cool the brownies fully, press rather than scrape when adding the truffle layer, and chill the top so your cuts are clean.
Smart Substitutions
- Cookies: If Thin Mints are unavailable, Keebler Grasshoppers are the suggested alternative in the source. Other mint-chocolate sandwich cookies will work, but expect subtle flavor differences.
- Cream cheese: The recipe calls for low-fat cream cheese. You can use regular cream cheese if you prefer a richer truffle — just note it will be softer at room temperature.
- Chocolate chips: Milk or semi-sweet are both listed. Use semi-sweet if you want a less sweet contrast to the cookie layer; milk chocolate will give a sweeter, creamier top.
- Shortening: The 1 tablespoon of Crisco thins and glosses the melted chips. If you don’t use Crisco, a neutral oil (like vegetable oil) can be an alternative in small amounts, but it can slightly alter shine and mouthfeel.
Equipment Breakdown
Keep the list short. You don’t need a lot to get great results.
Essential
- 9×13” baking pan — to bake the brownies ahead of time.
- Food processor or rolling pin + sealed bag — to turn the cookies into fine crumbs.
- Hand mixer (optional) — helpful if you’re combining crumbs and cream cheese without a processor.
- Microwave-safe bowl — for melting chocolate chips safely.
Helpful, not required
- Offset spatula — makes spreading the melted chocolate smooth and even.
- Plastic wrap and airtight container — for chilling and storing the finished tray.
Steer Clear of These
Do not skip the cooling. If the brownies are still warm the truffle layer will slide into the brownie and the top will look uneven. Let them cool completely before building the layers.
Avoid overheating the chocolate. The microwave directions are explicit for a reason. Stir between short bursts and stop when smooth. If you overheat, the chocolate can seize, become grainy, and lose its glossy finish.
Don’t press too hard when smoothing the cookie mixture onto the brownies. Press gently so the truffle adheres. Too much pressure can compress the brownie base and make the bars dense instead of layered.
Customize for Your Needs
Want smaller servings? Cut the brownies into smaller squares after chilling and let them sit out briefly before serving so the chocolate top isn’t rock hard. Serving them slightly warmer improves the truffle mouthfeel.
Want something decorative? After pouring the chocolate and before chilling, scatter a few crushed Thin Mint pieces on top for texture and visual cue. Or use a fork to drag a line across the top in a decorative pattern. Keep it minimal so the bars remain easy to cut.
Need to make ahead? Bake the brownies up to two days in advance and keep them wrapped in the pan at room temperature. Assemble the truffle and top on the day you plan to serve. The truffle sets quickly once chilled.
If You’re Curious
Yes, the cookie choice matters. Thin Mints have a crisp cookie with a mint-chocolate coating; Keebler Grasshoppers are a close commercial analog. The cookie’s crispness creates tiny crunch pockets inside the truffle layer. If you use a softer cookie, the truffle will be creamier and less texturally distinct.
Low-fat cream cheese is specified to keep the filling manageable at room temperature. Full-fat will be richer, and reduced-fat versions can sometimes be a touch grainier depending on brand. If you pick full-fat, chill the assembled pan a bit longer before cutting.
The Crisco helps the melted chocolate spread smoothly and gives a glossy finish. Without it, the chocolate will still set but may be slightly firmer and less shiny.
Store, Freeze & Reheat
Store the brownies in an airtight container in the refrigerator if you plan to keep them longer than a day. The cookbook source is clear: they can be frozen for up to one month. Wrap individual squares or freeze the whole pan tightly covered so no freezer odors migrate.
To thaw from frozen, transfer wrapped squares to the refrigerator overnight, then bring to room temperature for at least 20 minutes before serving so the truffle softens and the chocolate loses that fridge firmness.
If you want the chocolate shinier before serving, set the pan at room temperature for 20–30 minutes and then use a warm knife (run under hot water and dry) to slice cleaner pieces — wipe the knife between cuts.
Thin Mint Truffle Brownies Q&A
Q: Can I skip the cream cheese and just use cookie crumbs?
A: The cream cheese binds the cookie crumbs into a cohesive truffle layer and adds creaminess. Without it the crumbs will be loose and won’t form the truffle texture the recipe relies on.
Q: What if my truffle layer seems too wet after mixing?
A: If the cream cheese was very soft, pop the mixture in the fridge for 10–15 minutes and then press it again. A slightly firmer center will hold up better under the melted chocolate.
Q: Can I pipe the truffle layer instead of pressing it?
A: The mixture is usually too dense to pipe. It’s designed to be crumbled or pressed evenly over the brownies. If you want neat piping, you’d need to loosen the mixture with additional cream cheese, which changes texture and flavor.
Q: How long do they keep at room temperature?
A: Because of the cream cheese, store them in the fridge if keeping more than a few hours. Serving at room temperature for 20 minutes before eating is ideal.
The Last Word
This is one of those recipes that feels impressive but is reliably simple. Follow the order: cool the brownies, make and press the truffle, melt and seal with chocolate, chill, then wait a short while before slicing. The payoff is worth the small extra effort — mint and chocolate in creamy, crunchy, and fudgy layers. Make a pan, bring it to a gathering, and watch how fast it disappears.
Thin Mint Truffle Brownies
Equipment
- Food Processor
- Rolling Pin
- sealed plastic bag
- Bowl
- Hand Mixer
- medium microwave-safe bowl
- Microwave
- Offset spatula
- Spoon
- Refrigerator
Ingredients
Ingredients
- 1 9 x13” pan of browniesbaked and cooled
- 52 Thin Mint Cookies or Keebler Grasshoppersfrom two boxes
- 4 ounceslow-fat cream cheese
- 2 cupschocolate chipsmilk or semi-sweet
- 1 tablespoonCrisco
Instructions
Instructions
- Make sure the 1 9x13” pan of brownies is completely cooled.
- Prepare the truffle layer: if using a food processor, add 52 Thin Mint Cookies (or Keebler Grasshoppers) and 4 ounces low-fat cream cheese (softened slightly if very cold) to the processor and process until the mixture begins to form a cohesive ball. If you don’t have a food processor, place the 52 cookies in a sealed plastic bag and crush to fine crumbs with a rolling pin; transfer the crumbs to a bowl, add the 4 ounces low-fat cream cheese, beat with a hand mixer until combined, then use your hands to bring the mixture together into a cohesive mass.
- Crumble or press the cookie–cream cheese mixture evenly over the cooled brownies so the entire surface is covered. Gently press the mixture down so it adheres to the brownies without tearing them.
- Place 2 cups chocolate chips and 1 tablespoon Crisco in a medium microwave-safe bowl. Microwave on HIGH in 30-second increments, stirring between each increment, until the chocolate is fully melted and smooth (about 1½ minutes total). Stir thoroughly and avoid overheating.
- Pour the melted chocolate over the truffle layer and spread it evenly with an offset spatula or the back of a spoon.
- Chill the pan in the refrigerator until the chocolate topping is set (about 30–60 minutes).
- Remove the brownies from the refrigerator and let them sit at room temperature at least 20 minutes before slicing into squares.
- Store the brownies in an airtight container. They can be frozen for up to one month.