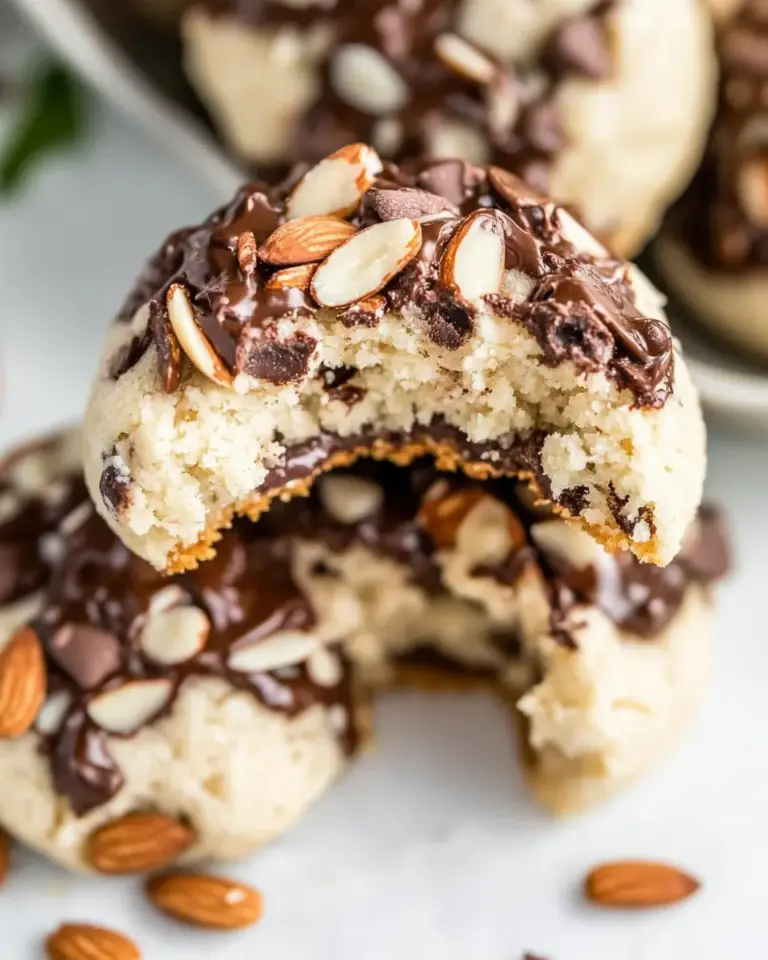
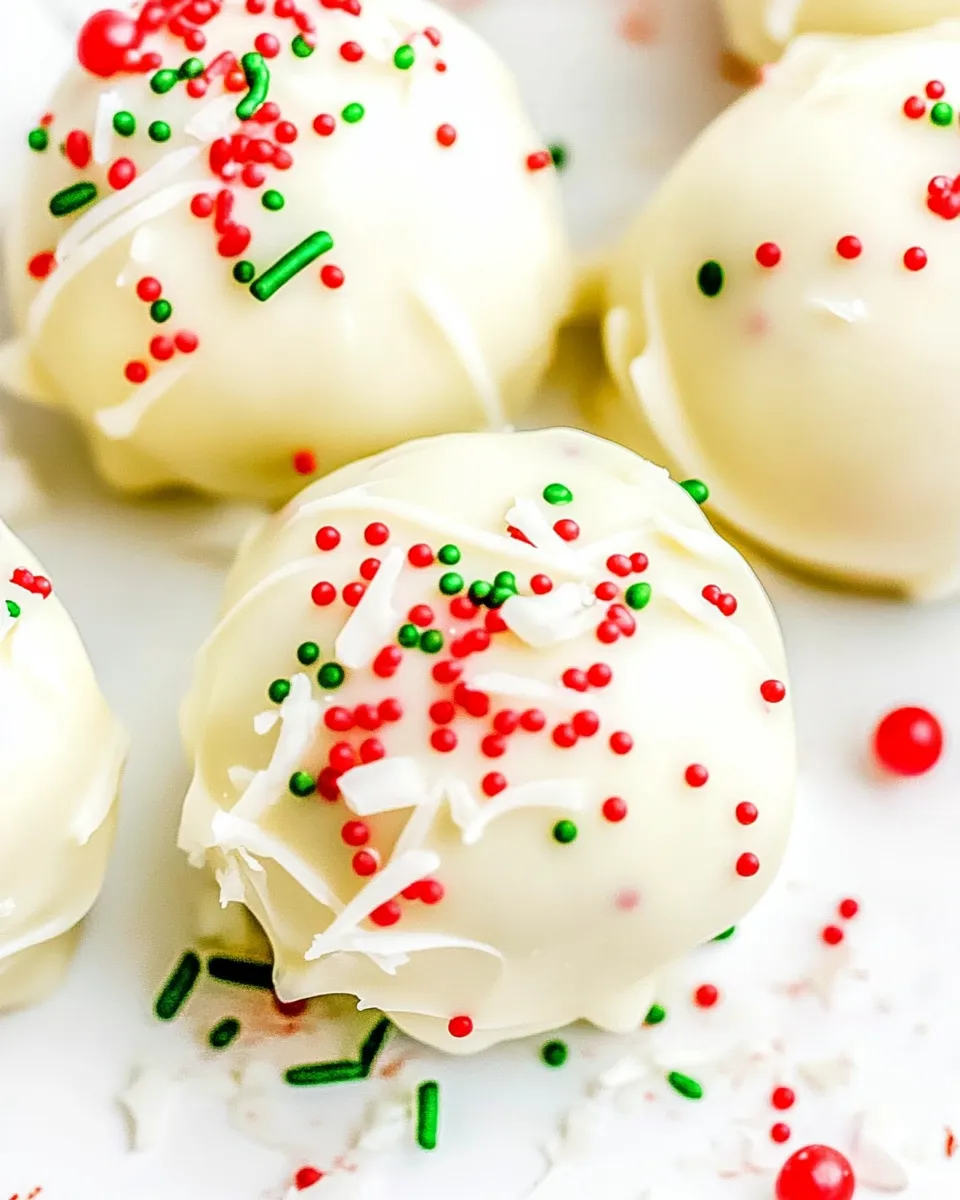
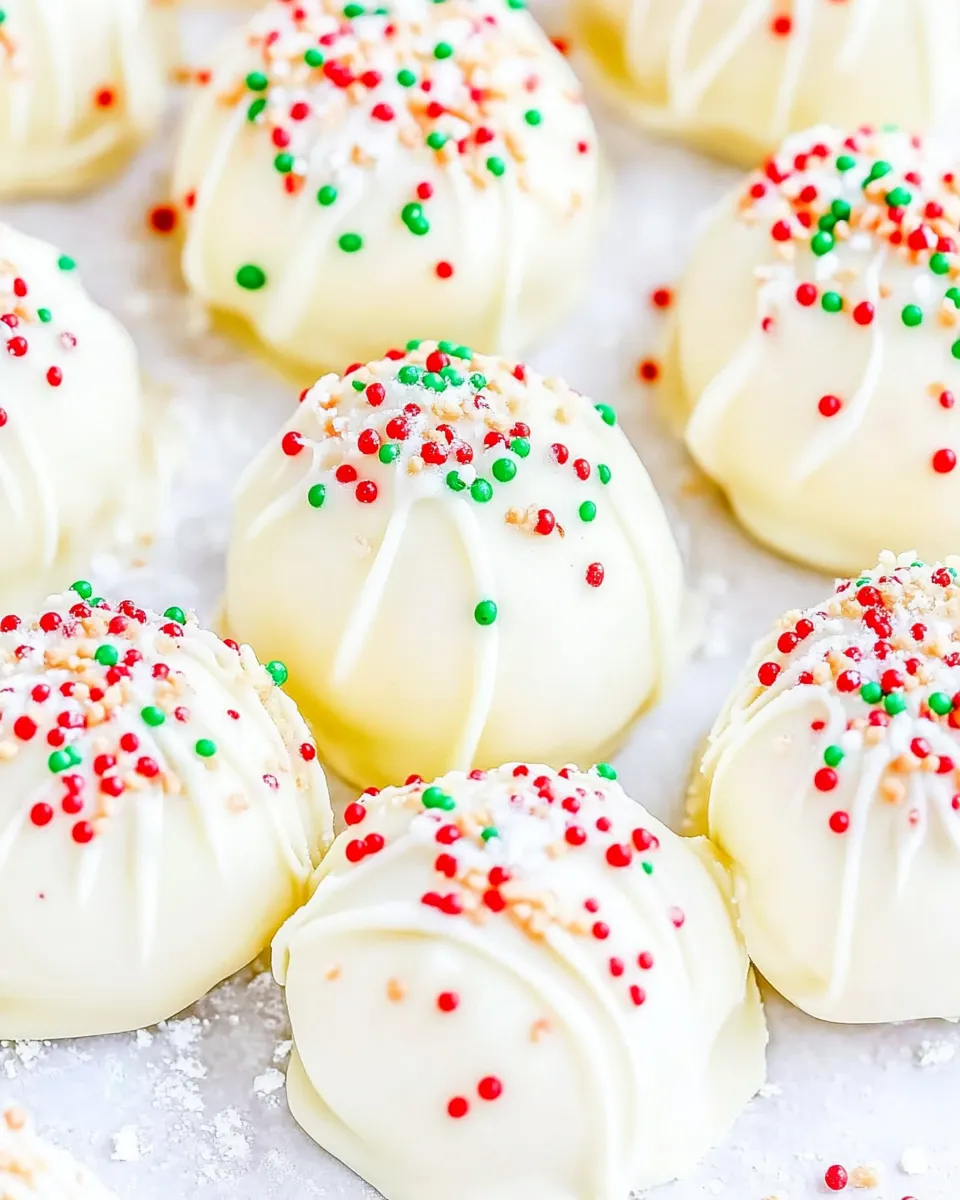
These White Chocolate Peanut Butter Truffles are one of those recipes I reach for when I want something that feels indulgent but comes together fast. They have that silky, peanut-buttery center wrapped in a sweet white chocolate shell and finished with a scatter of holiday sprinkles for a little crunch and nostalgia. No tempering, no fancy tools—just straightforward steps and a reliable result.
I make a batch whenever friends stop by, and they disappear faster than I expect. The dough is sturdy enough to roll without being chalky, and chilling the centers first makes dipping easy and tidy. If you’re comfortable with a handheld mixer and a microwave, you’re already more than equipped.
Below you’ll find the exact ingredient list and the step-by-step directions I use every single time. There are also notes, swaps, and troubleshooting tips so you can customize them or rescue the batch if something goes off-script. Let’s get to it.
The Ingredient Lineup

- ⅓ cup unsalted butter, melted — provides fat and smoothness; melting it before mixing ensures it blends evenly with the peanut butter.
- 1 ½ cups creamy peanut butter, use Jif, Skippy, or similar — the star of the filling; creamy peanut butter yields the smoothest texture.
- 1 teaspoon vanilla extract — brightens and rounds the peanut butter flavor.
- 2 cups confectioners’ sugar, sifting is recommended — sweetens and firms the dough; sifting avoids lumps and keeps the truffle centers silky.
- ¾ cups graham cracker crumbs, or about 5 sheets full sized sheets graham crackers, or as necessary — adds body and structure so the balls hold their shape; add a little more if the mixture feels too wet.
- 10 ounces Ghirardelli White Melting Wafers, or similar, or as needed — melts smoothly for dipping and sets with a thin, glossy shell; use melting wafers for convenience.
- Holiday sprinkles, as desired — optional finishing touch that adds color and a tiny crunchy contrast to the soft center.
White Chocolate Peanut Butter Truffles: How It’s Done
- Place 1/3 cup unsalted butter in a large microwave-safe bowl and heat until melted; stir to fully combine if needed.
- Add 1 1/2 cups creamy peanut butter and 1 teaspoon vanilla extract to the melted butter. Beat with a handheld electric mixer (or whisk by hand) until smooth and evenly combined.
- Sift (optional) and add 2 cups confectioners’ sugar and 3/4 cup graham cracker crumbs (about 5 full graham cracker sheets) to the peanut butter mixture. Mix with the mixer or a sturdy spatula until a firm, evenly combined dough forms. If the mixture seems too wet, add additional graham crumbs a little at a time until it holds together.
- Using a small-to-medium cookie scoop or about 1 to 1 1/2 tablespoons of mixture per portion, portion the dough into approximately 24 equal balls.
- Roll each portion between your palms to form smooth balls. Place the balls on a plate or tray (lined with parchment if you like).
- Cover the tray tightly with plastic wrap and refrigerate the balls for at least 1 hour or overnight. Do not skip this chilling step—chilled centers make dipping and coating easier.
- When the balls are chilled, place 10 ounces Ghirardelli White Melting Wafers (or similar) in a large microwave-safe bowl and melt according to the package directions until smooth.
- Remove the peanut butter balls from the refrigerator. Using a fork or a toothpick, pierce one ball, dip it into the melted white chocolate to fully coat, and lift it out. Tap the fork gently on the edge of the bowl to remove excess chocolate.
- Place the coated truffle onto a wire rack set over parchment or directly onto a parchment-lined tray. Immediately sprinkle the top with holiday sprinkles before the chocolate begins to set.
- Repeat the dipping, tapping off excess, placing, and sprinkling process for all remaining peanut butter balls. If the melted chocolate becomes too thick, reheat briefly according to the wafer package directions.
- Let the dipped truffles sit uncovered at room temperature until the chocolate is completely set and hardened.
- Store the truffles in an airtight container: at room temperature for up to 5 days, in the refrigerator for up to 1 month, or in the freezer for up to 4 months.
Top Reasons to Make White Chocolate Peanut Butter Truffles
- They’re quick to assemble—most of the work is mixing and chilling, not hands-on time.
- No tempering required—melting wafers give you a smooth shell without fuss.
- They’re universally loved—peanut butter and white chocolate is a crowd-pleasing combo, especially around holidays.
- They travel and store well—ideal for gifting, parties, or keeping on hand for last-minute desserts.
- Customizable—add sprinkles, crush nuts, or drizzle with extra chocolate to match any occasion.
Easy Ingredient Swaps
- Creamy peanut butter: You can use natural peanut butter, but expect a slightly looser dough—add graham crumbs a bit more cautiously. Do not substitute with chunky if you want super-smooth centers.
- Graham cracker crumbs: If you don’t have graham crackers, substitute with finely crushed digestive biscuits or vanilla wafers. Keep an eye on moisture and add crumbs gradually.
- White melting wafers: If you prefer, use white chocolate chips—but they may need a touch of vegetable shortening or oil to get the same dipping consistency. Follow the chip package directions.
- Sprinkles: Swap for finely chopped toasted peanuts, crushed pretzel, or cocoa nibs for different texture and flavor profiles.
Appliances & Accessories
- Microwave-safe bowls — for melting butter and melting wafers safely and evenly.
- Handheld electric mixer (or a sturdy whisk) — speeds up smoothing the peanut butter and butter mixture.
- Small-to-medium cookie scoop (1 to 1 1/2 tablespoons) — for uniform truffles that look professional and bake evenly.
- Parchment paper and a tray — keeps dipped truffles from sticking and makes cleanup easy.
- Wire rack — useful for draining excess coating for a cleaner finish; place tray under rack to catch drips.
- Plastic wrap — to tightly cover the tray during chilling and prevent the truffles from picking up fridge smells.
Pitfalls & How to Prevent Them
- Mixture too wet or too dry: If the dough feels wet and won’t hold its shape, add graham cracker crumbs a tablespoon at a time until it firms up. If it’s dry or crumbly, a teaspoon of melted butter or a small splash of peanut butter will bring it together. Add liquid sparingly.
- Centers fall apart while dipping: This usually means they weren’t chilled long enough. Refrigerate the balls for at least 1 hour or overnight. If your kitchen is warm, chill for longer.
- White chocolate seizing or grainy: Avoid getting any water into the melted wafers. If the chocolate thickens, warm briefly in short 10–15 second bursts in the microwave, stirring between bursts. Use the package directions for best results.
- Uneven coating or big drips: Tap the fork gently on the bowl edge to remove excess chocolate, and place coated truffles on a wire rack so excess can drip off cleanly.
- Sprinkles sink or smear: Sprinkle immediately after placing the coated truffle onto the rack or tray, while the chocolate is still glossy and wet. Don’t wait; white chocolate sets quickly.
Make It Your Way
Flavor additions
- Add 1/4 teaspoon fine sea salt to the dough if you like salted-sweet contrast.
- Fold in a few teaspoons of finely chopped toasted peanuts for extra crunch in the center (this does change the texture slightly).
- For a peppermint twist, add a drop or two of peppermint extract to the melted wafers and use red-and-white sprinkles.
Presentation ideas
- Wrap individual truffles in mini cupcake liners for gifting.
- Drizzle warmed dark chocolate over the white chocolate shell for a high-contrast finish.
- Make a sampler plate: leave some plain, some with sprinkles, and some with chopped nuts so guests can choose.
Recipe Notes & Chef’s Commentary
I stick with the ingredient ratios in the recipe because they balance sweet, fat, and structure. The butter and peanut butter form the creamy base; confectioners’ sugar sweetens and firms; graham crumbs give tooth and body without adding extra sweetness. The suggested brands are simply a guideline—use a familiar creamy peanut butter and good-quality melting wafers for consistent melting and setting.
When mixing, aim for a homogeneous dough. If you use a whisk instead of the electric mixer, be patient—creamy peanut butter can be resistant at first, but the melted butter and warmth help. When dipping, work over a rack with parchment underneath; it keeps your workspace tidy and gives you a chance to reheat the coating without remelting the whole batch.
Prep Ahead & Store
Prep tips: The dough can be mixed and rolled into balls up to 48 hours ahead—keep them tightly wrapped and chilled. You can also freeze the rolled centers on a tray, then transfer to a freezer bag for longer storage; dip them straight from frozen but allow an extra minute in the melted chocolate so the coating sets properly.
Storage (same as the directions): Store the truffles in an airtight container at room temperature for up to 5 days if your home is cool. Refrigerate for up to 1 month—bring them to room temperature for 10–15 minutes before serving for the best texture. For long-term storage, freeze for up to 4 months; thaw in the refrigerator overnight before serving. Label any frozen container with the date so you can enjoy them at their best.
Ask & Learn
- Q: Can I use natural peanut butter?
A: Yes, but natural peanut butter can be a bit oilier and will likely need a touch more graham crumbs to reach the right consistency. - Q: Can I make these nut-free?
A: This specific recipe is peanut-butter based. For nut-free options, consider a sunbutter (sunflower seed butter) swap, but I haven’t tested that with the exact same crumb ratio—start with the base recipe and adjust crumbs as needed. - Q: Why use wafers instead of melting chocolate bars?
A: Wafers are formulated to melt smoothly and set with a stable sheen. White chocolate bars can be used, but they sometimes need careful melting and possibly added cocoa butter or shortening to achieve the same dipping consistency. - Q: Can I dip in dark or milk chocolate instead?
A: Yes—both are delicious contrasts to the sweet white shell. Use the same melting instructions per the chocolate you select.
Before You Go
These White Chocolate Peanut Butter Truffles are dependable, festive, and forgiving—great for a beginner and satisfying for the experienced home baker. Keep the recipe handy because people will ask for it. If you try a variation, make a note of the crumb adjustments; small changes to moisture and fat can shift the dough’s texture. Happy rolling, dipping, and sharing.

White Chocolate Peanut Butter Truffles
Equipment
- Large microwave-safe bowl
- handheld electric mixer or whisk
- small-to-medium cookie scoop (about 1 to 1 1/2 tablespoons)
- fork or toothpick
- Wire Rack
- parchment paper or parchment-lined tray
- Plastic Wrap
- Refrigerator
Ingredients
Ingredients
- 1/3 cupunsalted butter melted
- 1 1/2 cupscreamy peanut butter use Jif, Skippy, or similar
- 1 teaspoonvanilla extract
- 2 cupsconfectioners’ sugar sifting is recommend
- 3/4 cupsgraham cracker crumbs or about 5 sheets full sized sheets graham crackers, or as necessary
- 10 ouncesGhirardelli White Melting Wafers or similar, or as needed
- Holiday sprinkles as desired
Instructions
Instructions
- Place 1/3 cup unsalted butter in a large microwave-safe bowl and heat until melted; stir to fully combine if needed.
- Add 1 1/2 cups creamy peanut butter and 1 teaspoon vanilla extract to the melted butter. Beat with a handheld electric mixer (or whisk by hand) until smooth and evenly combined.
- Sift (optional) and add 2 cups confectioners’ sugar and 3/4 cup graham cracker crumbs (about 5 full graham cracker sheets) to the peanut butter mixture. Mix with the mixer or a sturdy spatula until a firm, evenly combined dough forms. If the mixture seems too wet, add additional graham crumbs a little at a time until it holds together.
- Using a small-to-medium cookie scoop or about 1 to 1 1/2 tablespoons of mixture per portion, portion the dough into approximately 24 equal balls.
- Roll each portion between your palms to form smooth balls. Place the balls on a plate or tray (lined with parchment if you like).
- Cover the tray tightly with plastic wrap and refrigerate the balls for at least 1 hour or overnight. Do not skip this chilling step—chilled centers make dipping and coating easier.
- When the balls are chilled, place 10 ounces Ghirardelli White Melting Wafers (or similar) in a large microwave-safe bowl and melt according to the package directions until smooth.
- Remove the peanut butter balls from the refrigerator. Using a fork or a toothpick, pierce one ball, dip it into the melted white chocolate to fully coat, and lift it out. Tap the fork gently on the edge of the bowl to remove excess chocolate.
- Place the coated truffle onto a wire rack set over parchment or directly onto a parchment-lined tray. Immediately sprinkle the top with holiday sprinkles before the chocolate begins to set.
- Repeat the dipping, tapping off excess, placing, and sprinkling process for all remaining peanut butter balls. If the melted chocolate becomes too thick, reheat briefly according to the wafer package directions.
- Let the dipped truffles sit uncovered at room temperature until the chocolate is completely set and hardened.
- Store the truffles in an airtight container: at room temperature for up to 5 days, in the refrigerator for up to 1 month, or in the freezer for up to 4 months.
Notes
*
Tips -
If you are using chocolate melts in
white, milk or dark chocolate
, which is what I recommend, it may take a little while (30 minutes or so) for the chocolate to fully set up, since these products are designed to not harden overly quickly.
Have patience and just let them sit at room temperature for as long as necessary to harden.
I do not like putting anything with melted chocolate in the refrigerator or freezer because it has a tendency to develop condensation later on out of the fridge or freezer, which cosmetically doesn't look as good, and the glossy chocolate sheen will diminish.