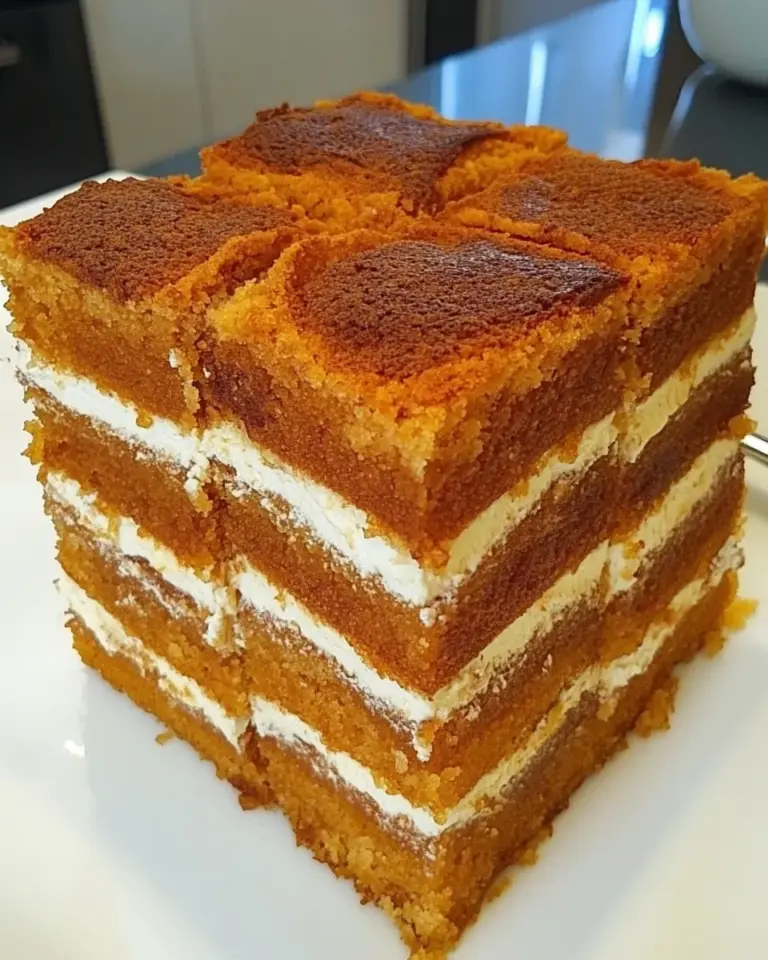
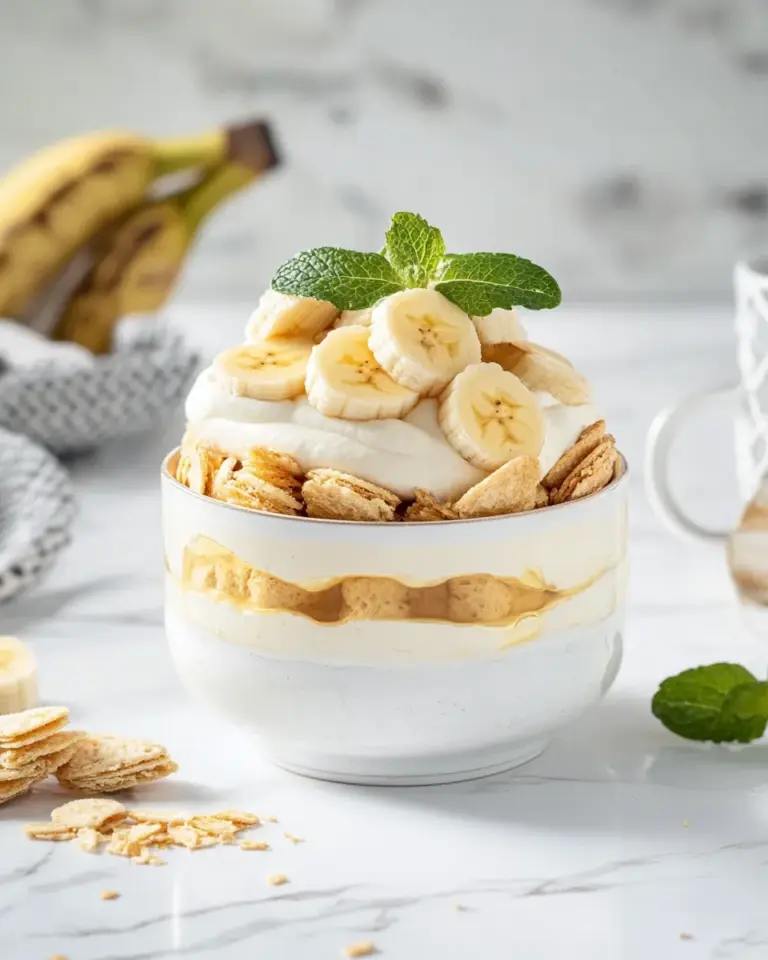
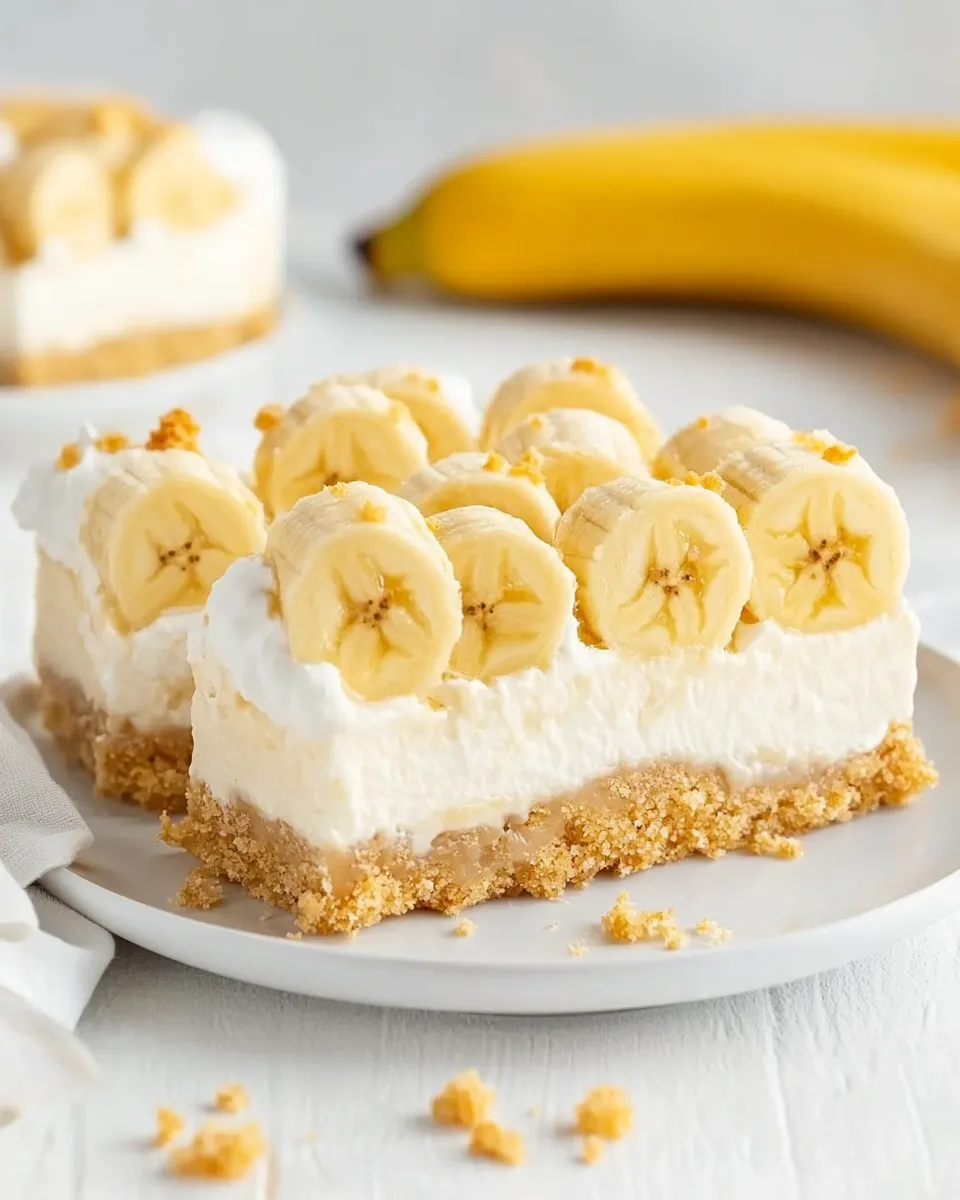
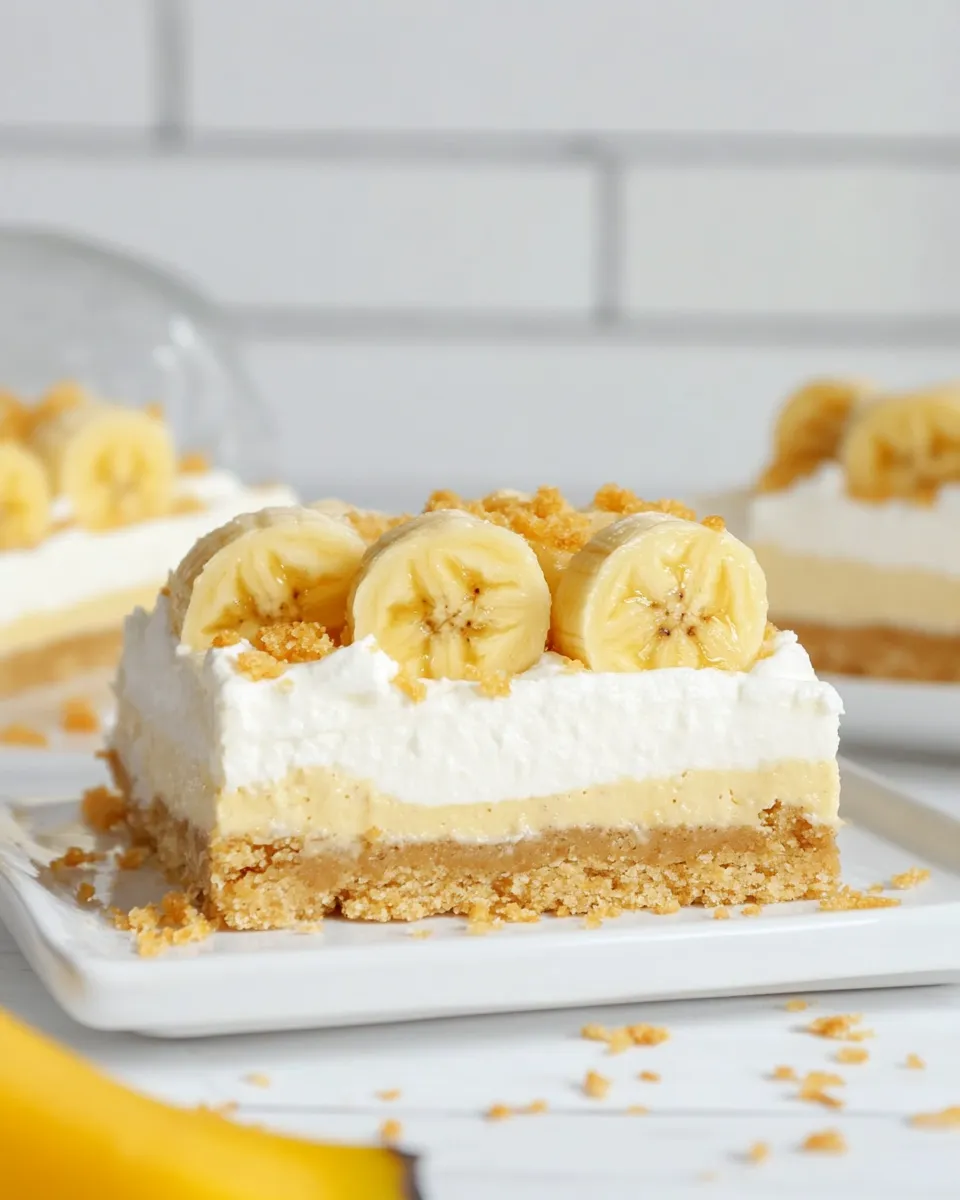
I make these bars whenever I want something that feels like banana pudding and cheesecake had a happy marriage. They’re no-bake, forgiving, and perfect for bringing to potlucks, weeknight dessert duty, or for keeping in the fridge when I want a quick sweet bite. The texture is creamy and light, with a buttery vanilla-wafer crust and a fluffy banana cheesecake layer that sets up without an oven.
The recipe is straightforward but precise in parts — measuring the whipped topping and folding gently are small steps that make a neat, sliceable bar. I’ll walk you through the exact order so you get clean bars, pretty swirls, and a fresh banana on top of each square.
Below you’ll find the ingredients, step-by-step directions (this is a true no-bake), practical substitutions, gear suggestions, common mistakes and fixes, and storage tips so your bars stay fresh. If you want to make this in a different size pan or swap a few ingredients, I’ve included safe options without changing the core outcome.
What Goes In
Ingredients
- 2 cups crushed vanilla wafers (plus 9 wafers for garnish) — forms the base flavor and crunchy crust; reserve whole wafers for the final touch.
- 2 tablespoons granulated sugar — adds a touch of sweetness to the crust and helps bind crumbs.
- ½ cup salted sweet cream butter (melted and cooled) — binds the crust; salted butter gives a rounded flavor.
- 16 ounces cream cheese (softened) — the creamy backbone of the filling; soften to room temperature for a lump-free mix.
- ⅓ cup granulated sugar — sweetens the cream cheese layer without overpowering the banana flavor.
- 3.4 ounces banana cream instant pudding mix (any brand; I used Great Value) — brings concentrated banana flavor and helps the filling set.
- 16 ounces whipped topping (thawed (divide out 1¼ cups for the filling, the remainder of the container will be for the optional swirl garnish. The second container will top the filling)) — provides lightness and volume in two roles: most goes on top; a measured portion goes into the filling.
- 1¼ cups half and half cream — thins the filling to a smooth, spreadable consistency and adds richness.
- 2 tablespoons crushed vanilla wafer crumbs (optional garnish) — optional finish for a little texture on top.
- 9 slices ripe bananas (garnish) — fresh slices for each bar; pick firm-ripe bananas to avoid too much brown.
How to Prepare (Banana Pudding Cheesecake Bars)
- Preheat nothing — this is a no-bake recipe. Line a 9×9 baking dish with parchment paper, leaving an overhang on two opposite sides to lift the bars out later.
- In a small bowl combine 2 cups crushed vanilla wafers and 2 tablespoons granulated sugar. Stir to combine, then add ½ cup melted and cooled salted sweet cream butter. Stir until all crumbs are evenly coated with butter.
- Press the buttered crumb mixture firmly and evenly into the bottom of the prepared 9×9 pan to form the crust. Place the crust in the refrigerator while you make the filling.
- Prepare the whipped topping for use: you will need two 16‑ounce containers thawed. From one 16‑ounce container measure out 1¼ cups and set that 1¼ cups aside for the filling. Leave the remainder of that same container sealed or reserved for piping swirls later. Do not use the reserved portion for the filling. The second full 16‑ounce container will be used to spread over the filling later.
- In a stand mixer or large bowl with a hand mixer, beat 16 ounces softened cream cheese with 1/3 cup granulated sugar on medium-high for 1 to 1½ minutes, until smooth and no lumps remain. Scrape down the sides and bottom of the bowl as needed.
- Add the 3.4‑ounce banana cream instant pudding mix to the cream cheese mixture and beat just until combined and smooth.
- Lower mixer speed to low and add the 1¼ cups of thawed whipped topping you set aside in step 4. Mix on low just until incorporated.
- While mixing on low, slowly drizzle in 1¼ cups half-and-half. Mix only until the half-and-half is fully incorporated and the filling is smooth. Scrape the bowl and fold gently once if needed to ensure everything is combined.
- Spread the banana cheesecake filling evenly over the chilled crust.
- Open the second full 16‑ounce container of whipped topping and spread the entire container in an even layer over the filling.
- Cover the pan and chill in the refrigerator for at least 6 hours or up to overnight to firm up.
- When ready to serve, lift the chilled cheesecake slab from the pan using the parchment overhang. Place on a cutting board. Using a large, sharp knife, cut into 3 rows by 3 rows to make 9 bars total; wipe the knife clean between cuts for neater slices.
- Evenly sprinkle 2 tablespoons crushed vanilla wafer crumbs (optional garnish) over the top of the bars.
- Add decorative swirls and final garnish: put the remaining whipped topping from the first container (the portion reserved in step 4) into a piping bag fitted with a large open star tip (or transfer to a zip-top bag and snip a corner). Hold the tip about ½ inch above the center of each bar and pipe a single star-style swirl on each one.
- Top each piped swirl with one slice of ripe banana and one whole vanilla wafer (use the 9 banana slices and 9 wafers from the ingredient list). Serve immediately.
What You’ll Love About This Recipe
First, the texture. The filling is airy but still cheesecake-like, thanks to the whipped topping and cream cheese balance. It slices clean after chilling and carries a bright banana note from the instant pudding without relying solely on fresh bananas, which can brown or overwhelm the texture.
Second, the no-bake convenience. This is one of those recipes that feels layered and professional but comes together in under an hour of hands-on time. You can assemble it the night before, chill, and serve the next day — which is perfect for planning ahead.
Finally, the presentation. The boxed instant pudding makes the color and flavor consistent, the crust gives a satisfying crunch, and the small piped swirls and banana slices finish each portion so every bar looks deliberate and pretty.
Smart Substitutions

- Crust: If you’re out of vanilla wafers, graham crackers or shortbread crumbs work fine — keep the same weight/volume of crumbs and the same ½ cup butter.
- Butter: Unsalted butter may be used; add a pinch of salt to the crumbs if you prefer.
- Whipped topping: If you want a less processed option, whipped cream stabilized with a bit of powdered sugar and gelatin can substitute, but because the recipe measures specific amounts, match the volume called for exactly.
- Pudding mix: Stick with banana cream instant pudding for the specific flavor and set — other flavors (like vanilla) will change the profile, not the structure.
- Half-and-half: A light cream (10–18% fat) or whole milk can be used, but richer dairy yields a silkier filling. Don’t use skim or very low-fat milk; texture will be thinner.
Gear Up: What to Grab

- 9×9 baking dish — parchment overhang helps lift the bars cleanly.
- Stand mixer or hand mixer — for smooth, lump-free cream cheese mixing.
- Two 16-ounce containers of whipped topping (thawed) — important for the layering and garnish.
- Measuring cups/spoons and a small bowl — to combine crust ingredients.
- Piping bag with a large open star tip (or a zip-top bag with a snipped corner) — for the decorative swirls.
- Large, sharp knife — wipe between cuts for tidy slices.
Frequent Missteps to Avoid
- Using cold cream cheese: Cold cream cheese leads to lumps. Soften to room temperature and beat until smooth for best texture.
- Skipping the measured whipped topping: The recipe specifically reserves 1¼ cups for the filling and keeps the remainder for topping/piping. Using the wrong amounts changes texture and quantity of topping.
- Over-mixing after adding half-and-half: Mix only until incorporated. Over-whipping can cause the filling to be too loose or grainy.
- Not chilling long enough: These need at least 6 hours to set firmly. Slice too soon and the bars will be gooey and fall apart.
- Using brown or overripe banana slices for garnish: Pick firm-ripe bananas and add them right before serving to avoid brown tops.
Variations by Season
Spring/Summer: Top each bar with a small spoonful of macerated berries (lightly sugared and drained) next to the banana slice for a bright contrast. Serve chilled with iced coffee.
Fall: Add a teaspoon of finely grated toasted pecans to the crust mixture for a nutty layering. Serve with a lightly spiced caramel drizzle on the side.
Winter/Holidays: Swap half of the vanilla wafer crumbs for speculoos or ginger snap crumbs for a warming spice note. Use thicker banana slices and dust a tiny pinch of cinnamon over the whipped swirls.
Chef’s Notes
Assembly rhythm
Work in a steady rhythm: crust, chill, filling, top, chill again. Chilling the crust first helps it set so the filling doesn’t push crumbs around. When spreading the filling, use a small offset spatula for an even layer.
Knife technique
Use a large, sharp knife warmed under hot water, wiped dry, and then make each cut with one clean down-and-through motion. Wipe between cuts for the cleanest edges.
Banana freshness
Slice the bananas just before plating. If you must slice ahead, toss them with a few drops of lemon juice to slow browning, but this will alter the flavor slightly.
Keep-It-Fresh Plan
Refrigerator: Store bars in an airtight container or wrapped tightly in plastic wrap for up to 3 days. The crust will stay reasonably crisp for that window; beyond that, it softens as it absorbs moisture from the filling.
Freezer: I don’t recommend freezing bars with the fresh banana garnish or piped swirls, but you can freeze the un-garnished slab without the fresh banana slices for up to 1 month. Wrap tightly in two layers of plastic and then foil. Thaw overnight in the refrigerator, then add fresh banana slices and the reserved whipped topping before serving.
Troubleshooting Q&A
- Q: My filling is watery after mixing the half-and-half. What happened?
A: Mix only until the half-and-half is incorporated. If you over-mix, the structure can break down. Chill the pan for the full 6 hours; chilling often firms it up as the pudding mix and cream cheese stabilize.
- Q: The bars are too soft to cut neatly.
A: Return them to the refrigerator for another few hours. If they were cut too soon, the structure needs time to firm. For neater slices, warm your knife between cuts as described above.
- Q: My crust is falling apart when I press it in.
A: Make sure the butter is fully coating the crumbs and press firmly and evenly into the pan. If the crumbs are too dry, add a teaspoon of melted butter at a time until the mix holds together when pressed.
- Q: Can I use fresh banana puree instead of pudding mix?
A: The instant pudding provides flavor and setting properties; substituting puree will change texture and the filling may not set as intended. If you want more fresh banana flavor, use ripe slices as garnish or add a small amount of mashed banana but keep the pudding mix for structure.
That’s a Wrap
These Banana Pudding Cheesecake Bars are one of my go-to make-ahead desserts. They travel well, feed a crowd, and look charming with minimal fuss. Follow the mixing order, measure the whipped topping when instructed, and give the pan ample chill time. The result is a clean, creamy bar with a nostalgic banana-pudding flavor and a buttery vanilla crust.
Make them a day ahead when you can; add the banana slices and piped swirls right before serving for the best presentation. Enjoy — and if you try a seasonal twist, tell me which one you liked best.
Banana Pudding Cheesecake Bars
Equipment
- 9x9-inch baking dish
- Parchment Paper
- Mixing Bowl
- Stand Mixer or Hand Mixer
- Spatula
- Piping Bag or Zip-top Bag
- large open star piping tip
- Sharp Knife
- Cutting Board
- Refrigerator
Ingredients
Ingredients
- 2 cupscrushed vanilla wafers plus 9 wafers for garnish
- 2 tablespoonsgranulated sugar
- 1/2 cupsalted sweet cream butter melted and cooled
- 16 ouncescream cheese softened
- 1/3 cupgranulated sugar
- 3.4 ouncesbanana cream instant pudding mix any brand; I used Great Value
- 16 ounceswhipped topping thawed (divide out 1 1/4 cups for the filling, the remainder of the container will be for the optional swirl garnish. The second container will top the filling)
- 1 1/4 cupshalf and half cream
- 2 tablespoonscrushed vanilla wafer crumbs optional garnish
- 9 slicesripe bananas garnish
Instructions
Instructions
- Preheat nothing — this is a no-bake recipe. Line a 9×9 baking dish with parchment paper, leaving an overhang on two opposite sides to lift the bars out later.
- In a small bowl combine 2 cups crushed vanilla wafers and 2 tablespoons granulated sugar. Stir to combine, then add ½ cup melted and cooled salted sweet cream butter. Stir until all crumbs are evenly coated with butter.
- Press the buttered crumb mixture firmly and evenly into the bottom of the prepared 9×9 pan to form the crust. Place the crust in the refrigerator while you make the filling.
- Prepare the whipped topping for use: you will need two 16‑ounce containers thawed. From one 16‑ounce container measure out 1¼ cups and set that 1¼ cups aside for the filling. Leave the remainder of that same container sealed or reserved for piping swirls later. Do not use the reserved portion for the filling. The second full 16‑ounce container will be used to spread over the filling later.
- In a stand mixer or large bowl with a hand mixer, beat 16 ounces softened cream cheese with 1/3 cup granulated sugar on medium-high for 1 to 1½ minutes, until smooth and no lumps remain. Scrape down the sides and bottom of the bowl as needed.
- Add the 3.4‑ounce banana cream instant pudding mix to the cream cheese mixture and beat just until combined and smooth.
- Lower mixer speed to low and add the 1¼ cups of thawed whipped topping you set aside in step 4. Mix on low just until incorporated.
- While mixing on low, slowly drizzle in 1¼ cups half-and-half. Mix only until the half-and-half is fully incorporated and the filling is smooth. Scrape the bowl and fold gently once if needed to ensure everything is combined.
- Spread the banana cheesecake filling evenly over the chilled crust.
- Open the second full 16‑ounce container of whipped topping and spread the entire container in an even layer over the filling.
- Cover the pan and chill in the refrigerator for at least 6 hours or up to overnight to firm up.
- When ready to serve, lift the chilled cheesecake slab from the pan using the parchment overhang. Place on a cutting board. Using a large, sharp knife, cut into 3 rows by 3 rows to make 9 bars total; wipe the knife clean between cuts for neater slices.
- Evenly sprinkle 2 tablespoons crushed vanilla wafer crumbs (optional garnish) over the top of the bars.
- Add decorative swirls and final garnish: put the remaining whipped topping from the first container (the portion reserved in step 4) into a piping bag fitted with a large open star tip (or transfer to a zip-top bag and snip a corner). Hold the tip about ½ inch above the center of each bar and pipe a single star-style swirl on each one.
- Top each piped swirl with one slice of ripe banana and one whole vanilla wafer (use the 9 banana slices and 9 wafers from the ingredient list). Serve immediately.
Notes
Make sure your cream cheese is at room temperature, or it may leave lumps in the cheesecake mixture.
You can layer fresh banana slices over the crust before layering the banana cheesecake filling. Just remember that bananas will turn brown the longer they sit.
Wait until just before serving to slice the banana for garnishing. Bananas will turn brown if they are not used right away.