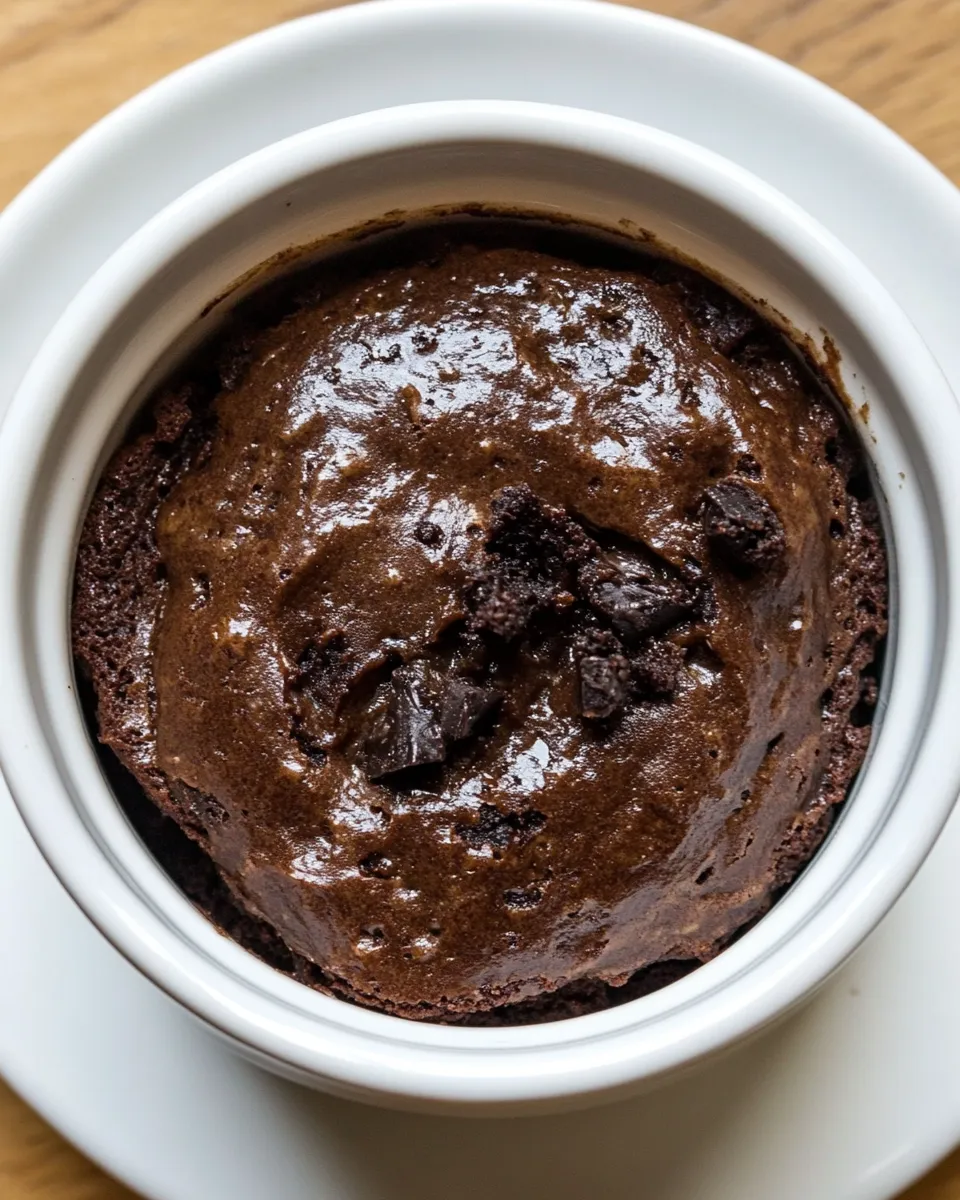
When you want chocolate now, this mug brownie delivers. It takes under a minute in the microwave and uses pantry-friendly ingredients. No fuss. No oven. Just a single mug and a few spoonfuls to satisfy that urgent chocolate craving.
I test quick desserts for real life—the kind you make at 10 p.m. after a long day. This Gluten-Free Mug Brownie is reliably fudgy, chocolate-forward, and easy to tweak if you need to avoid gluten or just keep things simple. I’ll walk you through the small details that make it turn out well every time.
Below you’ll find the exact ingredients and the step-by-step method I use, plus troubleshooting, swaps, and storage notes. Follow the short, ordered directions and you’ll have a warm brownie with minimal cleanup.
The Ingredient Lineup

Ingredients
- 1/4 cup gluten-free all-purpose flour — provides structure; make sure your blend contains a binder like xanthan gum or use one labeled for 1:1 baking.
- 1/4 cup coconut sugar — sweetens and gives a subtle caramel note; it’s less refined than white sugar and keeps the brownie moist.
- 3 Tbsp cocoa powder — the main chocolate flavor. Use unsweetened, preferably Dutch-processed for deeper color and taste.
- 1 pinch sea salt — heightens the chocolate notes. Even a small pinch makes a big difference.
- 3 Tbsp avocado oil or melted coconut oil — fat for richness and a tender crumb; avocado oil is neutral, coconut oil adds a mild coconut aroma.
- 3 Tbsp water — hydrates the dry mix and keeps the texture soft without dairy.
- 1/4 tsp ground cinnamon — a warm background note that complements the cocoa without being spicy.
- 1/8 tsp pure vanilla extract — lifts and rounds the chocolate flavor; a little goes a long way.
- 1 Tbsp chocolate chips — optional pockets of melty chocolate; stir them in so they’re evenly distributed.
Mastering Gluten-Free Mug Brownie: How-To
- Use a microwave-safe mug. Add 1/4 cup gluten-free all-purpose flour, 1/4 cup coconut sugar, 3 Tbsp cocoa powder, 1 pinch sea salt, and 1/4 tsp ground cinnamon to the mug. Stir well to combine the dry ingredients.
- Add 3 Tbsp avocado oil (or melted coconut oil), 3 Tbsp water, and 1/8 tsp pure vanilla extract to the mug. Stir until the batter is smooth and there are no visible dry streaks of flour.
- Stir 1 Tbsp chocolate chips into the batter until evenly distributed.
- Wipe any batter from the rim of the mug and smooth the top with the back of the spoon.
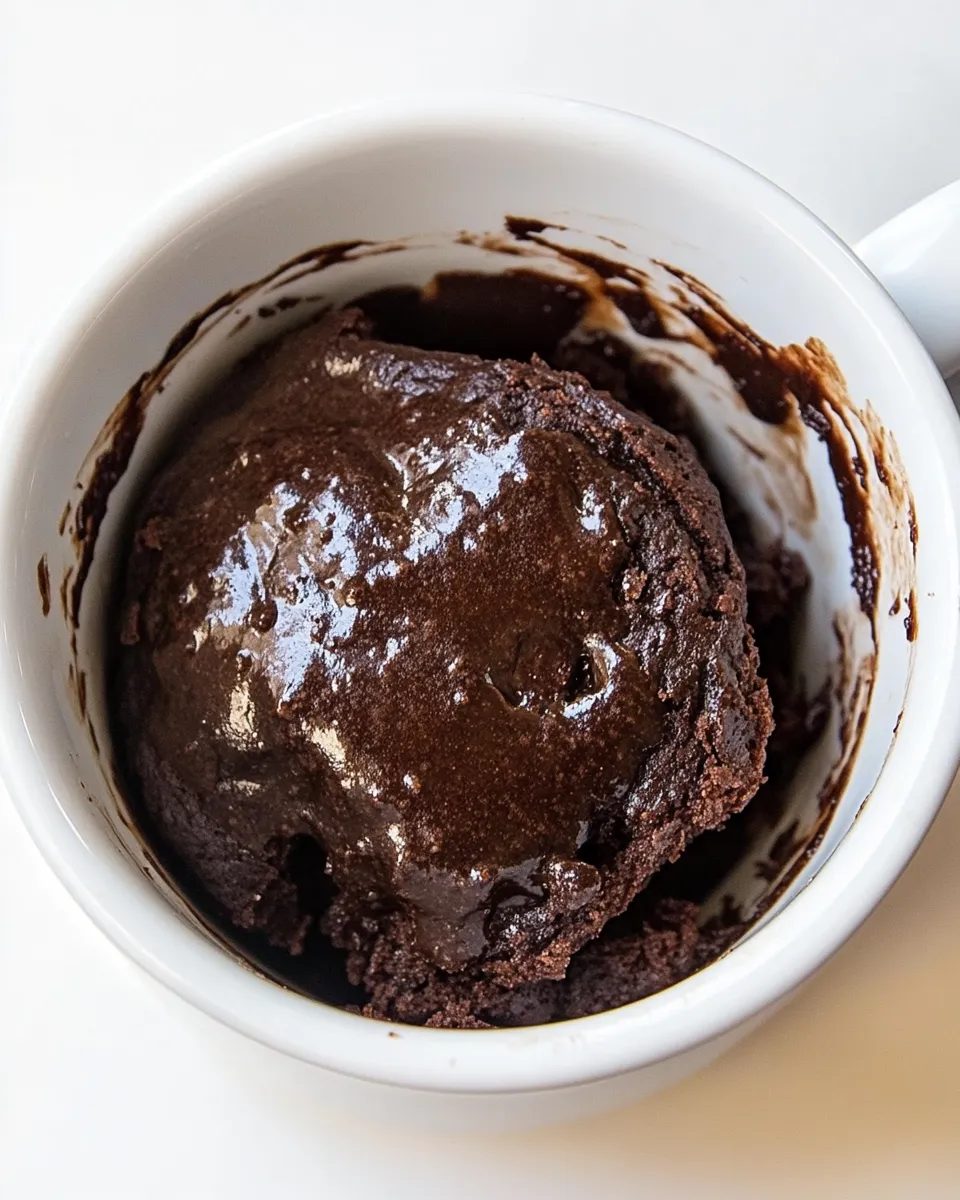
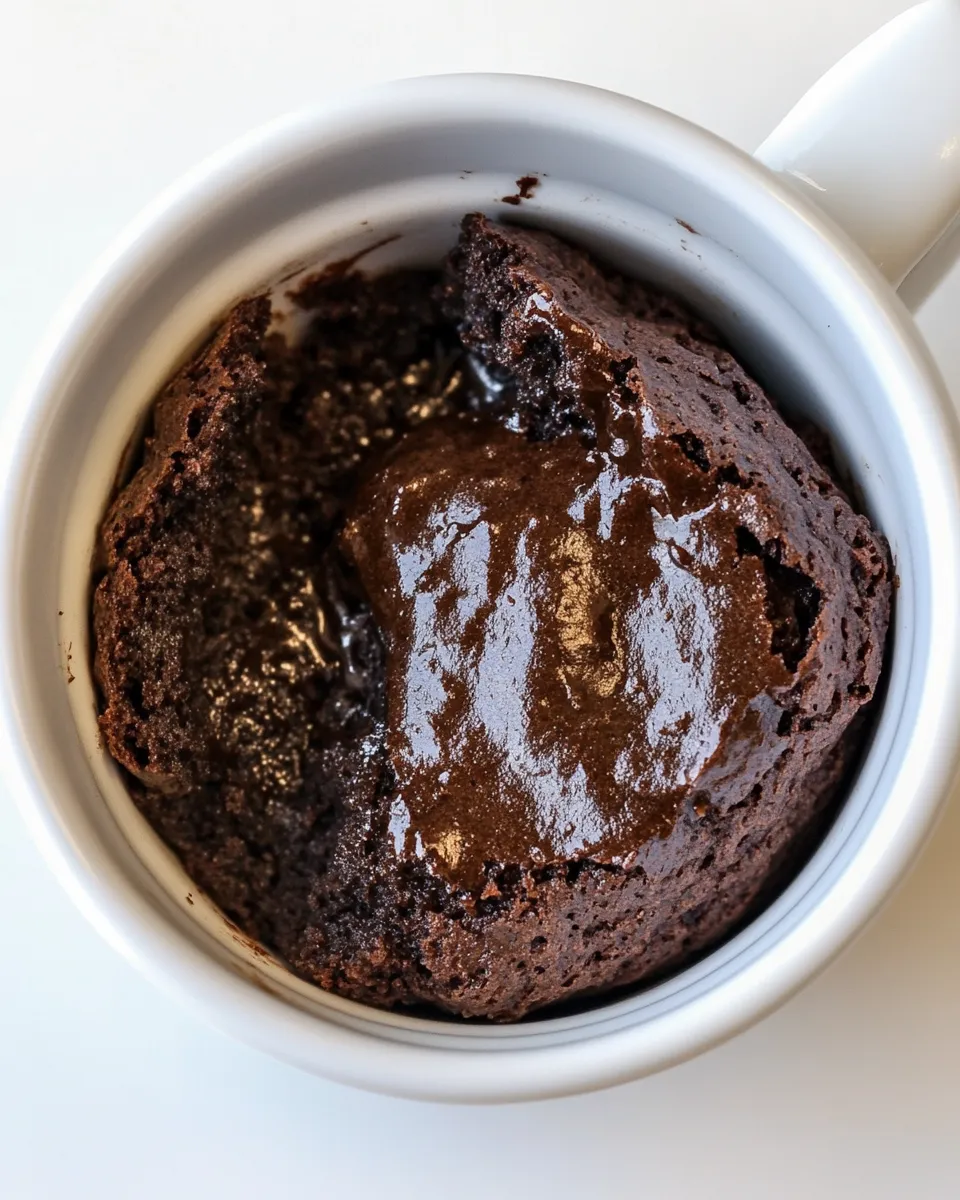
- Microwave on high for 40–50 seconds, until the center is just set but still appears slightly moist (microwave times may vary).
- Let the mug brownie cool for about 30–60 seconds, then enjoy carefully—the mug and brownie will be hot.
Why I Love This Recipe
This mug brownie is the definition of practical comfort. It’s quick, uses a handful of pantry staples, and works for gluten-free diets without sacrificing texture. I love that it’s single-serve: no sticky brownie pan to clean, and you don’t end up with a full tray tempting you for days.
The flavor is genuinely chocolatey, and the texture hits the sweet spot between fudgy and cake-like. It’s forgiving—if your timing’s off by a few seconds the result still tastes great. For weeknights or late-night cravings, it’s my go-to fix.
What to Use Instead
- If you don’t have gluten-free all-purpose flour: Use another gluten-free blend labeled 1:1 for baking. Avoid single-flour alternatives like straight almond or rice flour without adjusting binding agents.
- Swap for another sweetener: If you prefer, regular granulated sugar can replace coconut sugar cup-for-cup in sweetness; texture and flavor will change slightly.
- Oil alternatives: Melted coconut oil works fine and adds a faint coconut note. Neutral oils like light olive oil or grapeseed oil can also work.
- Chocolate mix-ins: Chopped chocolate, cacao nibs, or cacao nibs give texture. You can omit chips entirely for a straightforward cocoa brownie.
- Liquid swaps: The recipe calls for water to keep it dairy-free. For extra richness, use milk (dairy or plant-based) in the same quantity.
Setup & Equipment
Essential
- Microwave-safe mug (10–12 oz works well to avoid overflow).
- Measuring spoons and a 1/4 cup measure.
- Spoon for stirring and smoothing the top.
Nice-to-have
- A small sieve for the cocoa if it’s lumpy, but not required.
- A microwave with consistent power; if your microwave runs hot, reduce time slightly.
Troubleshooting Tips
- Batter too dry or grainy: Stir more thoroughly until no flour streaks remain. If it still seems dry, add a splash (1/2 tsp) of water or oil and mix.
- Brownie undercooked in the center: Microwave in additional 5–10 second bursts. Stop when the center looks slightly moist but set. Overcooking makes it dry.
- Browine soggy or too wet after microwaving: Your microwave may heat unevenly. Finish with 5–10 seconds more and let it rest; residual heat will carry it to doneness.
- Mug overflowed: Use a larger mug next time. Fill no more than halfway to allow for slight rise.
- Grainy texture from coconut sugar: Coconut sugar can be coarser than white sugar. Stir extra well and consider dissolving it briefly in the wet ingredients next time.
Warm & Cool Weather Spins
- Warm serving: Top with a small scoop of vanilla ice cream or a dollop of whipped cream just after microwaving. The contrast of hot brownie and cold topping is classic.
- Make it a sundae: Add a drizzle of nut butter or a spoonful of jam for a grown-up twist.
- Chilled slice: For a denser, fudgier texture, cool the mug in the fridge for 20–30 minutes and then scoop like a mini brownie.
- Fruity summer version: Stir in a few fresh berries after microwaving so they warm slightly without breaking down.
Notes on Ingredients
Stick to the listed measurements. The texture of a microwave mug dessert depends on balance: too much flour or too little fat and liquid will make it dry. The small amount of cinnamon is optional but recommended—it amplifies the chocolate without making the brownie taste spicy.
Using a gluten-free all-purpose flour labeled for 1:1 baking gives the best results. Those blends include starches and a binder to mimic wheat flour’s structure. If your blend lacks a binder, the texture may be looser but still enjoyable as a warm spoonable treat.
Make-Ahead & Storage
This mug brownie is best eaten immediately. If you need to make it ahead, you can prepare the dry mix in a jar: combine the flour, coconut sugar, cocoa, salt, and cinnamon and store in a cool, dry place for up to a month. When ready, add the wet ingredients directly to the jar’s measured portion and microwave in a mug.
Leftovers: If you somehow have leftover brownie in the mug, cover and refrigerate for up to 48 hours. Reheat in the microwave for 10–15 seconds, or enjoy cold for a denser texture.
Helpful Q&A
- Can I bake this in the oven? Yes. Transfer the batter to a small ramekin and bake at 350°F (175°C) for 10–12 minutes, watching carefully. The microwave method is faster and gives a slightly different texture.
- Is it dairy-free? Yes, as written it uses water and oil, so it’s dairy-free. Swap water for milk if you want a richer bite.
- What microwave power is this timed for? The 40–50 second guideline assumes a typical 1000W microwave. If yours is lower wattage, add time in short bursts until set.
- Can I double the recipe for two mugs? Yes. Make two separate mugs rather than doubling in one mug to keep the same cook time and texture.
- Can I add an egg? You can, but it changes the texture to more cake-like. If you add an egg, reduce the water slightly (by about 1 tsp) and test in shorter microwave intervals.
That’s a Wrap
If you need a fast, gluten-free chocolate fix, this mug brownie is a dependable solution. It’s small-batch, almost instant, and forgiving. Follow the ingredient list and the short steps exactly for the first try, and once you’re comfortable you can experiment with swaps and toppings.
Keep your favorite mug handy and stash the dry mix in a jar for emergencies. That way, a warm, chocolatey treat is always within reach. Happy microwaving—and enjoy that brownie.
Gluten-Free Mug Brownie
Equipment
- Microwave-safe mug
- Spoon
- Microwave
Ingredients
Ingredients
- 1/4 cupgluten-free all-purpose flour
- 1/4 cupcoconut sugar
- 3 Tbspcocoa powder
- 1 pinchsea salt
- 3 Tbspavocado oilor melted coconut oil
- 3 Tbspwater
- 1/4 tspground cinnamon
- 1/8 tsppure vanilla extract
- 1 Tbspchocolate chips
Instructions
Instructions
- Use a microwave-safe mug. Add 1/4 cup gluten-free all-purpose flour, 1/4 cup coconut sugar, 3 Tbsp cocoa powder, 1 pinch sea salt, and 1/4 tsp ground cinnamon to the mug. Stir well to combine the dry ingredients.
- Add 3 Tbsp avocado oil (or melted coconut oil), 3 Tbsp water, and 1/8 tsp pure vanilla extract to the mug. Stir until the batter is smooth and there are no visible dry streaks of flour.
- Stir 1 Tbsp chocolate chips into the batter until evenly distributed.
- Wipe any batter from the rim of the mug and smooth the top with the back of the spoon.
- Microwave on high for 40–50 seconds, until the center is just set but still appears slightly moist (microwave times may vary).
- Let the mug brownie cool for about 30–60 seconds, then enjoy carefully—the mug and brownie will be hot.
Notes
Serves 1.