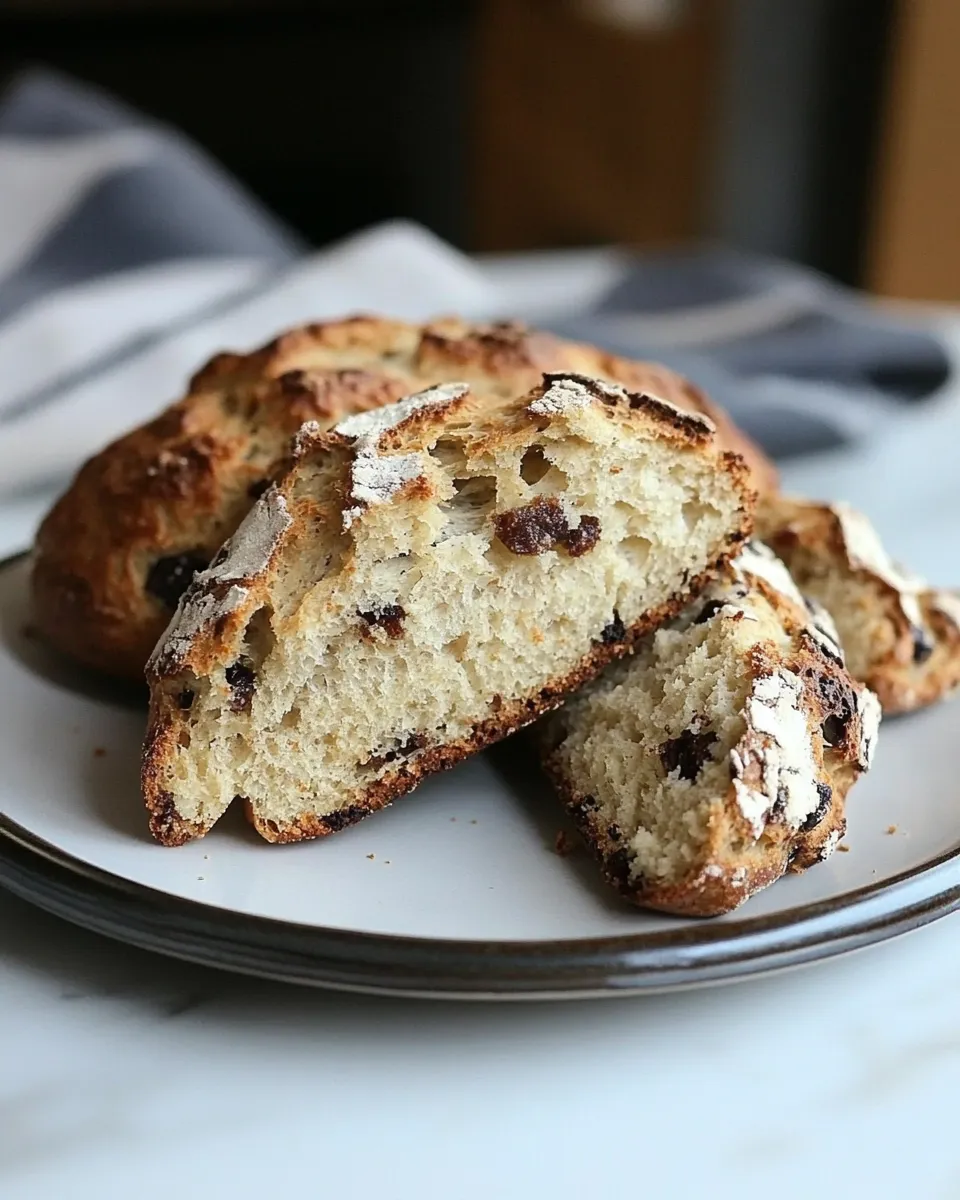
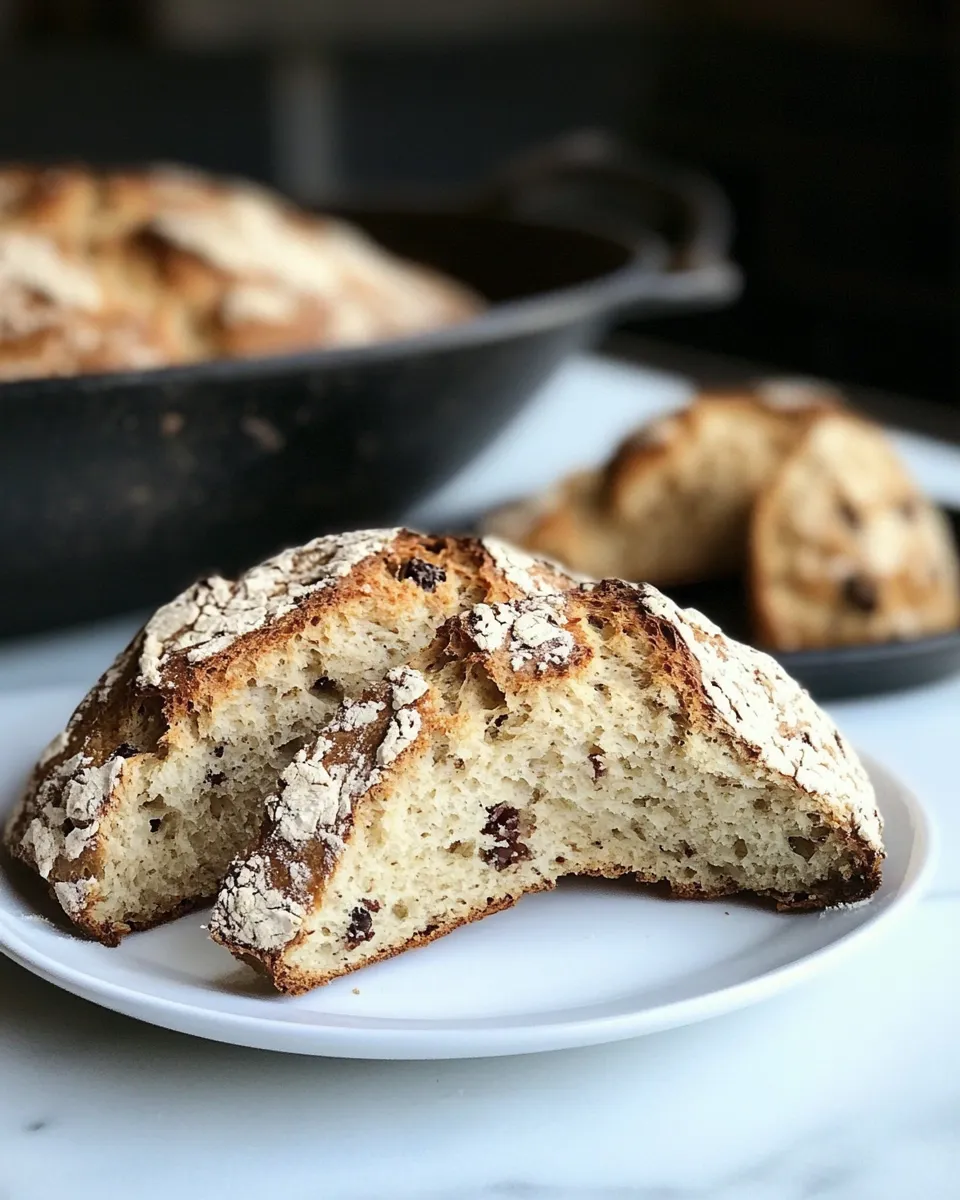
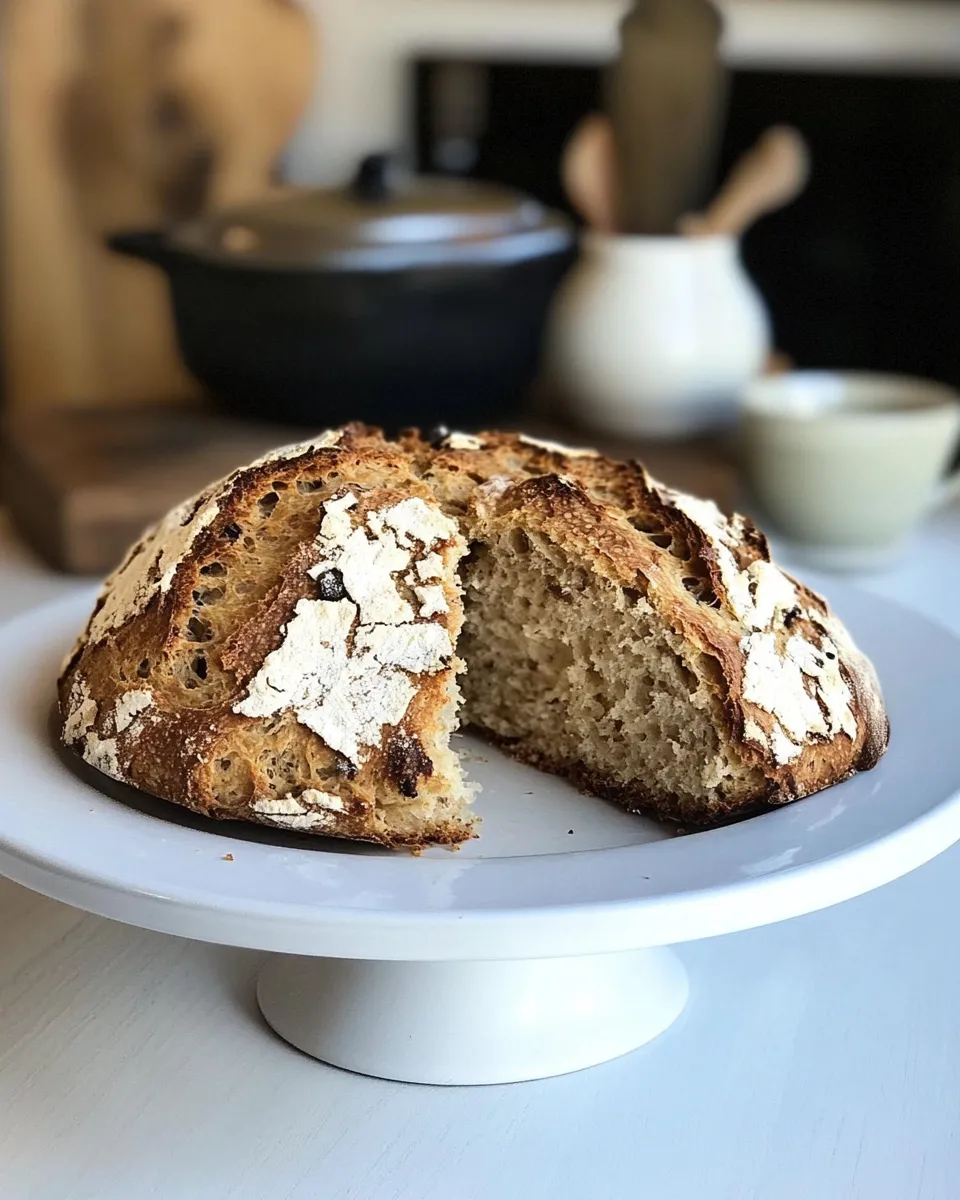
Irish soda bread is a quick, honest loaf that doesn’t wait for yeast or long rises. It delivers a golden crust and a tender crumb with minimal fuss, which is exactly why I make it when I want warm bread on the table without an all-day commitment.
This version is gluten-free and studded with raisins or currants and caraway seeds, so it keeps the soul of a traditional soda loaf while being accessible for gluten-sensitive eaters. The technique is straightforward: mix dry, add buttermilk, shape, and bake.
Below you’ll find a clear ingredient list, step-by-step directions exactly as written, and practical notes for success — what to avoid, what tools you’ll need, and how to keep loaves tasting great over time.
Ingredient Breakdown
Ingredients
- 4 cups gluten-free all-purpose flour — the main structure of the loaf; plus more for dusting to prevent sticking.
- 1 tablespoon baking powder — primary leavening to help the loaf rise quickly.
- 1 teaspoon baking soda — works with acidic buttermilk for lift and crumb tenderness.
- 1 teaspoon sea salt — balances flavor and strengthens the dough.
- 1 tablespoon caraway seeds — optional flavor note that gives a mild anise-like lift to the bread.
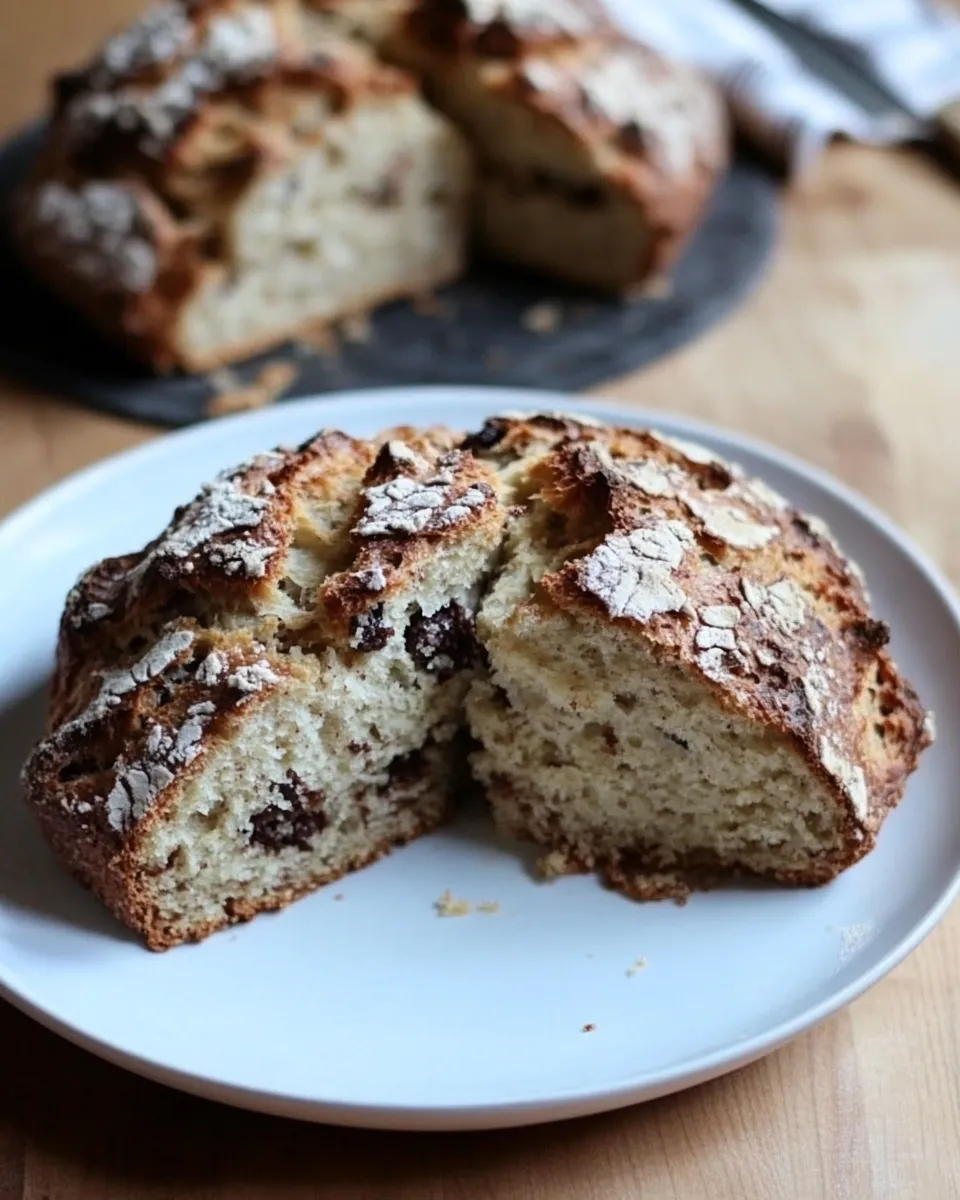
- 1 cup raisins or currants, rinsed in hot water and patted dry — adds pockets of sweetness; rinsing plumps and removes any grit.
- 2 1/4 cups buttermilk — acidic liquid that reacts with the soda for rise and adds moisture and flavor.
Irish Soda Bread, Made Easy
- Preheat the oven to 350°F (175°C). Lightly oil a large baking sheet with olive oil or cooking spray.
- Rinse 1 cup raisins or currants in hot water and pat dry. Set aside.
- In a large mixing bowl sift together 4 cups gluten-free all-purpose flour, 1 tablespoon baking powder, 1 teaspoon baking soda, and 1 teaspoon sea salt.
- Add 1 tablespoon caraway seeds and the rinsed, dried raisins or currants to the dry ingredients. Stir until evenly distributed.
- Make a well in the center of the flour mixture and pour in 2 1/4 cups buttermilk. Stir from the center outward until a dough forms and the ingredients are incorporated into a shaggy, slightly sticky dough.
- Lightly flour a work surface (use the extra flour reserved for dusting). Turn the dough out onto the floured surface and knead briefly for about 1 minute to bring the dough together.
- Shape the dough into a single large disc, then cut it in half with a knife. With floured hands, form each half into a round disc (two small discs total).
- Place both discs on the prepared baking sheet, leaving at least 3 inches between them. Using a serrated knife, cut a 1/4-inch–deep X into the top of each disc.
- Bake in the preheated oven for 45 to 65 minutes, until the crust is golden brown and a knife or skewer inserted into the center comes out clean.
- Remove the breads from the oven and let them cool at least 20 minutes on the baking sheet or a cooling rack.
- Transfer to a cutting board and slice with a serrated knife into 1 to 1.5-inch–thick slices. Serve with butter and/or jam if desired.
Top Reasons to Make Irish Soda Bread
- Speed: no yeast, no long proofing; dinner-friendly when time is short.
- Reliability: the chemical leavening and buttermilk pairing is forgiving and consistent.
- Adaptability: studded with dried fruit and caraway seeds here, but the base method accepts small swaps in add-ins or seeds.
- Texture: a crisp, golden crust with a tender, slightly crumbly interior that pairs well with savory or sweet toppings.
No-Store Runs Needed
- Most of these ingredients are long-lived pantry staples: flour, baking powder, baking soda, and salt. The raisins or currants can often be found in the back of a cabinet.
- Caraway seeds are optional. If you don’t have them, the bread still performs well without them.
- Buttermilk is the only perishable item on the list; plan the bake for when you have it on hand. The recipe’s quantities are fixed, so check you have 2 1/4 cups before starting.
Hardware & Gadgets
- Large mixing bowl — room to sift and mix dry ingredients.
- Sieve or sifter — for aerating the flour and evenly distributing baking powder and soda.
- Measuring cups and spoons — accuracy matters for the 4 cups flour, 1 tablespoon leavening, and 2 1/4 cups buttermilk.
- Large baking sheet — a flat surface for two small discs; lightly oiled per directions.
- Serrated knife — needed both to cut the X in the tops and to slice the cooled loaves cleanly.
- Cooling rack — useful if you want air circulation under the loaves while they cool.
Steer Clear of These
- Underbaking: follow the guidance of a clean skewer or knife coming out clean. With gluten-free flours, the center can feel set but still be too moist if not baked long enough.
- Overworking the dough: just a brief knead to bring it together; over-kneading can make the crumb dense.
- Skipping the rinse step for dried fruit: un-rinsed raisins can be dusty; rinsing and patting dry improves texture and appearance.
- Not scoring the top: that 1/4-inch–deep X guides expansion and gives the loaf its traditional look. Score both discs as directed.
Make It Year-Round
- Spring and summer: serve slices lightly toasted with fresh butter or a bright jam to complement the loaf’s mild sweetness.
- Autumn and winter: pair warm slices with soups and stews — the denser texture holds up well to hearty broths and gravies.
- Freezing: slice cooled loaves and freeze in an airtight bag. Thaw slices at room temperature and refresh in a toaster or oven before serving.
- Batch baking: shape and bake both discs as instructed, then freeze one if you don’t plan to eat both within a couple of days.
Author’s Commentary
I keep a jar of caraway seeds on my spice shelf for this exact loaf; they cut through the sweetness of the raisins and add a subtle lift. That said, the bread is honest and good without any frills. The gluten-free flour in this recipe keeps the crumb slightly different from wheat soda bread — a touch more delicate, but still satisfying.
My practical tip: check your buttermilk measurement before you start. Because this recipe uses 2 1/4 cups, it’s harder to compensate once your dry mix is combined. Also, use the extra flour for dusting sparingly; you want just enough to keep the dough manageable without drying the surface.
Shelf Life & Storage
- Room temperature: wrapped in a clean tea towel or stored in a bread box, the loaf will keep well for 1 to 2 days.
- Refrigeration: you can refrigerate sliced bread for up to 5 days, though refrigeration can firm the crumb; reheat slices briefly to restore softness.
- Freezing: for longer storage, freeze wrapped slices for up to 3 months. Toast or warm gently before serving.
Frequently Asked Questions
- Can I make one large loaf instead of two small discs? The directions shape the dough into two small discs for more even baking. If you choose one large disc, expect longer bake time; ensure the center reaches the same doneness by testing with a skewer.
- Do I have to use gluten-free flour? This recipe is written with gluten-free all-purpose flour as its base. Substituting another flour changes texture and behavior.
- Why rinse the raisins or currants? Rinsing removes any dust and plumps them slightly. Patting them dry prevents adding excess surface moisture into the dough.
- My crust browned fast. What now? If the crust is getting dark before the center is done, tent the loaves loosely with foil and continue baking until a skewer comes out clean.
See You at the Table
This Irish Soda Bread is a dependable go-to when you want fresh bread without the wait. The method is steady and predictable: mix, shape, bake, and then enjoy a loaf that pairs with sweet or savory accompaniments. If you give it a try, slice it warm and tell me if you kept the caraway seeds — I love hearing the small choices that make a recipe feel like home.
Happy baking, and I’ll see you at the table.
How to Make Irish Soda Bread
Equipment
- Large baking sheet
- Mixing Bowl
- Measuring Cups
- Measuring Spoons
- serrated knife
- work surface
- Cooling rack
Ingredients
Ingredients
- 4 cupsgluten-free all-purpose flour+ more for dusting
- 1 tablespoonbaking powder
- 1 teaspoonbaking soda
- 1 teaspoonsea salt
- 1 tablespooncaraway seeds
- 1 cupraisins or currantsrinsed in hot water and patted dry
- 2 1/4 cupsbuttermilk
Instructions
Instructions
- Preheat the oven to 350°F (175°C). Lightly oil a large baking sheet with olive oil or cooking spray.
- Rinse 1 cup raisins or currants in hot water and pat dry. Set aside.
- In a large mixing bowl sift together 4 cups gluten-free all-purpose flour, 1 tablespoon baking powder, 1 teaspoon baking soda, and 1 teaspoon sea salt.
- Add 1 tablespoon caraway seeds and the rinsed, dried raisins or currants to the dry ingredients. Stir until evenly distributed.
- Make a well in the center of the flour mixture and pour in 2 1/4 cups buttermilk. Stir from the center outward until a dough forms and the ingredients are incorporated into a shaggy, slightly sticky dough.
- Lightly flour a work surface (use the extra flour reserved for dusting). Turn the dough out onto the floured surface and knead briefly for about 1 minute to bring the dough together.
- Shape the dough into a single large disc, then cut it in half with a knife. With floured hands, form each half into a round disc (two small discs total).
- Place both discs on the prepared baking sheet, leaving at least 3 inches between them. Using a serrated knife, cut a 1/4-inch–deep X into the top of each disc.
- Bake in the preheated oven for 45 to 65 minutes, until the crust is golden brown and a knife or skewer inserted into the center comes out clean.
- Remove the breads from the oven and let them cool at least 20 minutes on the baking sheet or a cooling rack.
- Transfer to a cutting board and slice with a serrated knife into 1 to 1.5-inch–thick slices. Serve with butter and/or jam if desired.