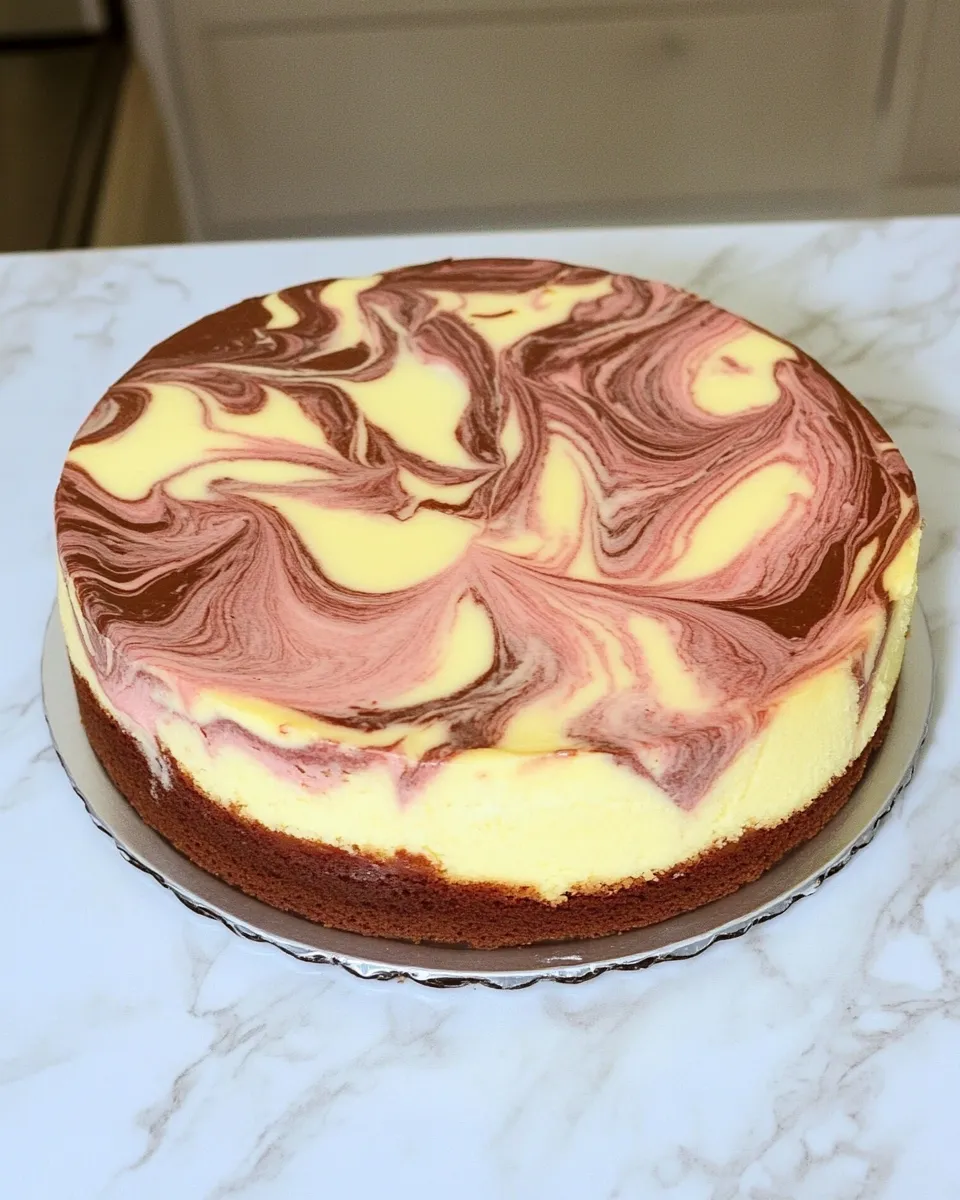
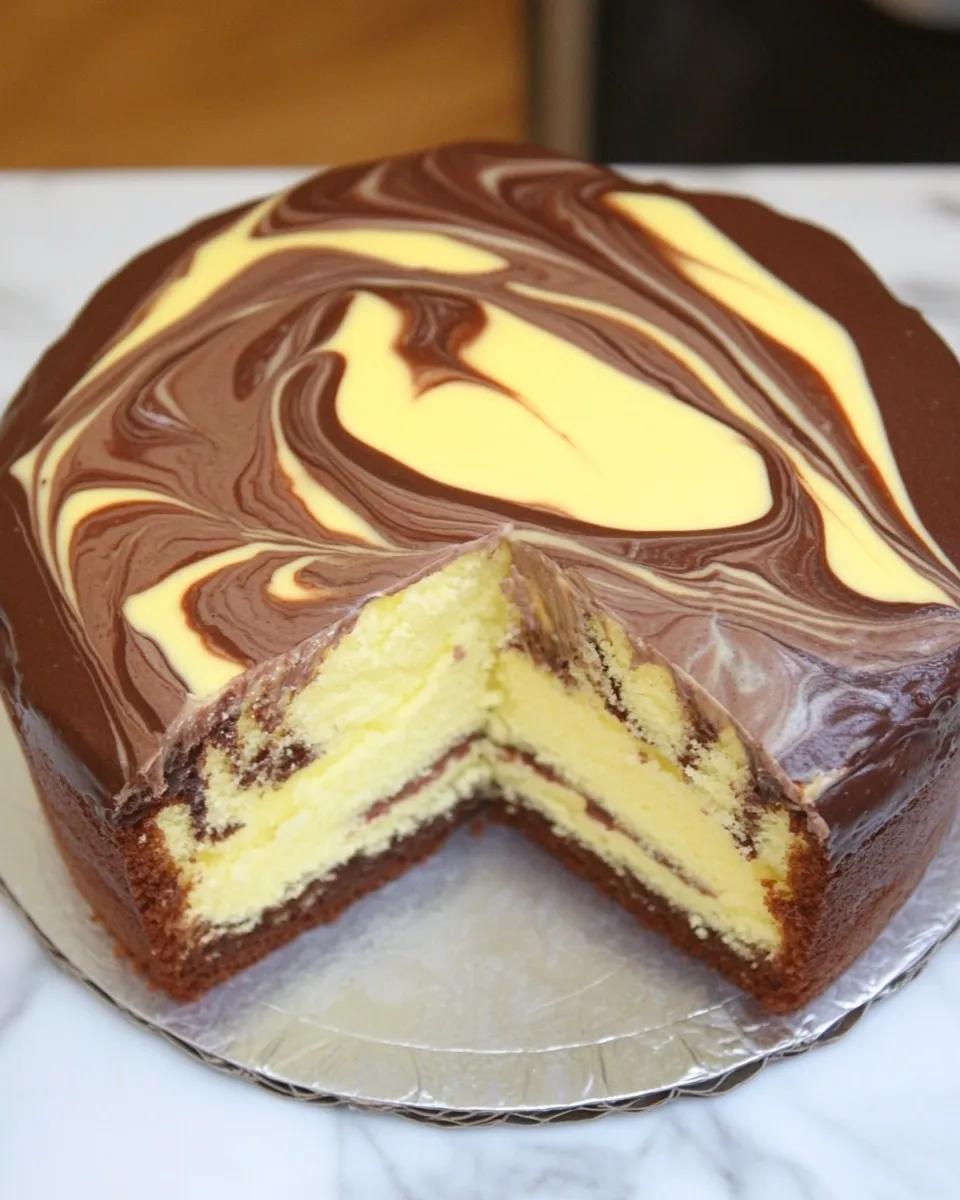
Marbling a cake turns two simple batters into something visually striking without adding complexity. I love this technique because the payoff is immediate: you slice into the cake and the interior looks like a little piece of art. It’s the kind of finish that makes a homemade cake feel special for guests or a quiet, celebratory weeknight dessert.
This post keeps things practical. I’ll walk you through why the technique works, the exact step-by-step method I use in my test kitchen, common mistakes to avoid, and a handful of ways to shift the flavors if you want to experiment. Bring two batters (a light and a dark), a pan, and a simple knife swirl—and you’re set.
If you prefer quick checklists, you’ll find them inside. If you want a deeper explanation—why dollops create cleaner marbling, how to avoid over-swirl, and what equipment matters—I’ve included that too. Let’s get to it.
Ingredient Notes
Marbling depends more on batter consistency and contrast than on exotic ingredients. You need two batters that are roughly the same thickness and one that’s visually darker than the other (commonly chocolate). Keep both batters at room temperature so they layer without sinking or separating. Measure and divide carefully—equal portions make the checkerboard layers that translate into a clear marbled pattern once swirled.
Ingredients
- 1light colored cake batter — the pale batter provides contrast and carries vanilla or other light flavors; aim for the same thickness as the dark batter.
- 1dark colored cake batter — usually chocolate or a spiced batter; use it to create the visual contrast that defines the marble.
Build Marble a Cake Step by Step
- Preheat the oven and prepare your baking pan according to your cake recipe (loaf pan, tube pan, or bundt pan). Place the light colored cake batter and the dark colored cake batter near the pan.
- Divide each batter into three equal portions so you have three portions of the light batter and three portions of the dark batter. Keep each portion in its own bowl or container.
- Layer 1 — base: Take one portion of the light colored cake batter. Using a large spoon, place dollops of this portion into the pan in a down–up–down pattern. (For a small loaf pan, place three large dollops across the bottom. For a round tube or bundt pan, place dollops around the pan in the same down–up–down sequence as you move around the pan.)
- Still on Layer 1: Take one portion of the dark colored cake batter. Place dollops of this portion into the empty spaces between the light dollops so the base of the pan forms a rough checkerboard of alternating colors.
- Layer 2: Take the second portion of the light colored batter and the second portion of the dark batter. Repeat the dollop placement to create a second checkerboard layer on top of the first, alternating colors so each dollop sits over a different color than the dollop beneath it.
- Layer 3: Repeat the process with the remaining portions (third portion of light and third portion of dark) to form a third, top checkerboard layer. You should now have three layers of alternating dollops filling the pan.
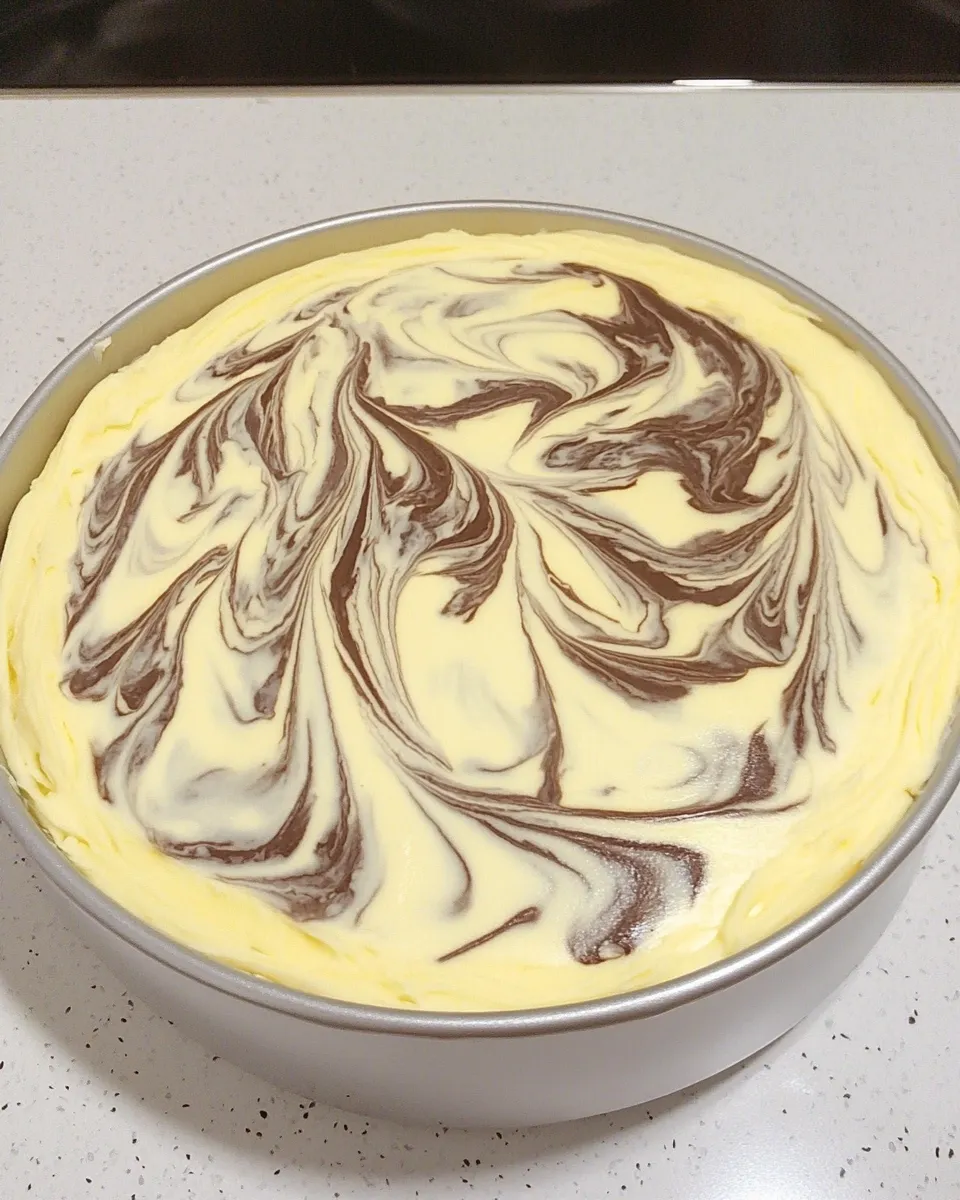
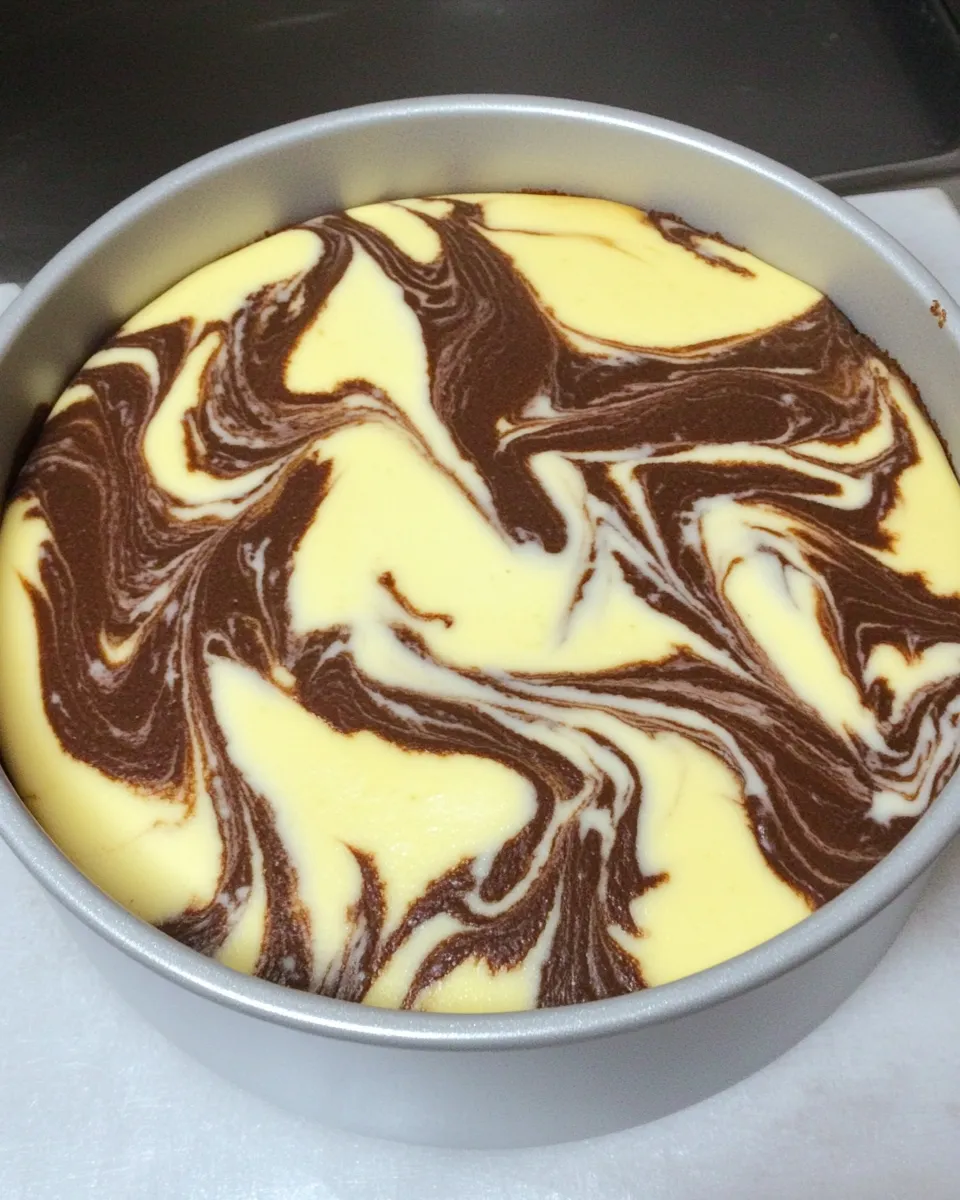
- Swirl to marble: Insert a butter knife into the batter and drag it through using rounded vertical zig-zag motions from one side of the pan to the other. Wipe the knife clean, then repeat the same zig-zag motion in the opposite direction. For a loaf pan, make long horizontal swirls; for a tube or bundt pan, make opposing zig-zags all the way around to form a chain-like swirl. Do not over-swirl — a few strokes are enough to create a marbled effect.
- Bake the cake according to your recipe’s baking instructions. Cool, slice, and enjoy the marbled interior.
Why This Marble a Cake Stands Out
What makes this approach effective is control. Dividing both batters into three equal portions and building stacked dollop layers gives you predictable contrast inside the cake. The checkerboard base translates into more visible swirls after the knife work. You aren’t relying on random pours or aggressive mixing—those often blur the two batters together and you lose the pretty ribbons.
The method also adapts to different pans. A long, horizontal swirl in a loaf shows dramatic waves when sliced. A bundt or tube pan creates circular chains of color that read like concentric ribbons. The technique emphasizes the interior pattern rather than the exterior frosting, which is ideal for a simpler finish or glazed top.
Flavor-Forward Alternatives
Swap the dark batter for different flavors without changing the technique. Cocoa is classic, but you can use coffee for mocha notes, brown butter with a touch of espresso for depth, or a spiced batter (cinnamon, nutmeg) for autumnal warmth. In the light batter, try lemon zest and a tablespoon of fresh lemon juice to brighten the flavor; the contrast between light citrus and dark chocolate is fantastic.
Don’t be afraid to flavor each batter distinctly, as long as their textures match. If you flavor the dark batter intensively, slightly adjust the sweetness in the light batter so the two balance when eaten together.
Equipment Breakdown
You need just a few essentials. No special marble tools required.
Essentials
- One appropriately sized pan (loaf, bundt, or tube) — shape changes the visual effect.
- Three small bowls per batter (for the three equal portions) or six total containers — helps keep portions tidy while you build layers.
- A large spoon for dolloping and a butter knife for swirling — the knife gives controlled ribboning without overworking the batters.
Nice-to-haves
- An offset spatula for leveling the top after swirling if you want a smooth finish for glaze or icing.
- Parchment or spray to line the pan — aids release and preserves the marble pattern on the sides.
Mistakes Even Pros Make
There are a few common missteps that kill a clean marble.
Mismatch in batter thickness. If one batter is thinner, it will sink into the other and blur the pattern. Aim for similar viscosity—if one batter sits taller on a spoon, adjust the other or add a tablespoon of flour to firm it up.
Over-swirl. A handful of deliberate strokes will make a clear marbled effect. Dragging the knife too many times creates a muddled, single-color result. Swirl with intention.
Temperature mismatch. Cold batters resist smooth layering and can set oddly while baking. Bring both to room temperature before dividing.
How to Make It Lighter
If you want a lighter cake—physically or in flavor—there are a few guaranteed moves.
- Use half butter, half oil in each batter. Oil keeps crumb tender and can make the cake feel lighter on the palate.
- Fold whipped egg whites into both batters (counted into the original recipe’s structure). That adds lift without changing the marbling steps.
- Reduce sugar slightly in both batters if you want a less sweet finish; keep reductions equal so both batters bake similarly.
Notes from the Test Kitchen
I tested this exact dollop-and-swap approach with loaf and bundt pans. The most consistent results came when both batters were spoonable but not runny—think thick pancake batter rather than pourable cake batter. When batters were too loose, the checkerboard dissolved into a nearly solid dark or pale mass during baking.
In bundt pans, make your first dollop placement closer to the outside edge; the central hole will draw batters inward during baking. In loaf pans, keep the dollops generous but spaced so the dark batter has clear gaps to fill. Watch the bake time closely: marbled cakes sometimes need a minute or two more, depending on how the batters interact and the pan material.
Prep Ahead & Store
Assemble the batters up to a day ahead and store them covered in the fridge. Bring them back to room temperature before dividing and layering. If you’ve already assembled the filled pan, you can cover it tightly and refrigerate for a few hours before baking; allow it to warm slightly on the counter for 15–20 minutes before placing it in the oven.
Store baked, cooled slices in an airtight container at room temperature for up to 3 days, or wrap and freeze for up to 2 months. Thaw overnight in the fridge, then bring to room temperature before serving for the best texture.
Ask & Learn
If something went sideways, start with the batter thickness and temperature. Tell me whether one batter sank, whether the pattern blurred, or if the center didn’t cook through. Share which pan you used. With those details I can suggest the smallest tweak—often it’s as simple as waiting a short time for the batter to warm or reducing swirl passes.
If you want visuals, try photographing each dollop stage. That helps diagnose where the pattern lost its definition. I also welcome questions about flavor swaps—tell me which flavors you like and I’ll suggest precise pairings.
Final Thoughts
Marbling a cake is a small technique that yields big visual returns. Keep your batters matched in texture, divide them precisely, layer with intention, and swirl gently. The rest is baking basics: preheat, bake to doneness, and cool properly. The result is a cake that looks much more complicated than it is—and that’s the best kind of home baking win.
Try the checkerboard dollop method with whatever two complementary batters you have on hand. It’s forgiving, adaptable, and a reliable way to make a cake that feels curated. Happy marbling—and do send a picture if you try it. I love seeing readers’ results.
How to Marble a Cake
Equipment
- baking pan (loaf, tube, or bundt)
- mixing bowls or containers
- Large spoon
- Butter Knife
Ingredients
Ingredients
- 1 light colored cake batter
- 1 dark colored cake batter
Instructions
Instructions
- Preheat the oven and prepare your baking pan according to your cake recipe (loaf pan, tube pan, or bundt pan). Place the light colored cake batter and the dark colored cake batter near the pan.
- Divide each batter into three equal portions so you have three portions of the light batter and three portions of the dark batter. Keep each portion in its own bowl or container.
- Layer 1 — base: Take one portion of the light colored cake batter. Using a large spoon, place dollops of this portion into the pan in a down–up–down pattern. (For a small loaf pan, place three large dollops across the bottom. For a round tube or bundt pan, place dollops around the pan in the same down–up–down sequence as you move around the pan.)
- Still on Layer 1: Take one portion of the dark colored cake batter. Place dollops of this portion into the empty spaces between the light dollops so the base of the pan forms a rough checkerboard of alternating colors.
- Layer 2: Take the second portion of the light colored batter and the second portion of the dark colored batter. Repeat the dollop placement to create a second checkerboard layer on top of the first, alternating colors so each dollop sits over a different color than the dollop beneath it.
- Layer 3: Repeat the process with the remaining portions (third portion of light and third portion of dark) to form a third, top checkerboard layer. You should now have three layers of alternating dollops filling the pan.
- Swirl to marble: Insert a butter knife into the batter and drag it through using rounded vertical zig-zag motions from one side of the pan to the other. Wipe the knife clean, then repeat the same zig-zag motion in the opposite direction. For a loaf pan, make long horizontal swirls; for a tube or bundt pan, make opposing zig-zags all the way around to form a chain-like swirl. Do not over-swirl — a few strokes are enough to create a marbled effect.
- Bake the cake according to your recipe’s baking instructions. Cool, slice, and enjoy the marbled interior.
Notes
You will also need: baking pan for cake batter, large spoon, butter knife.