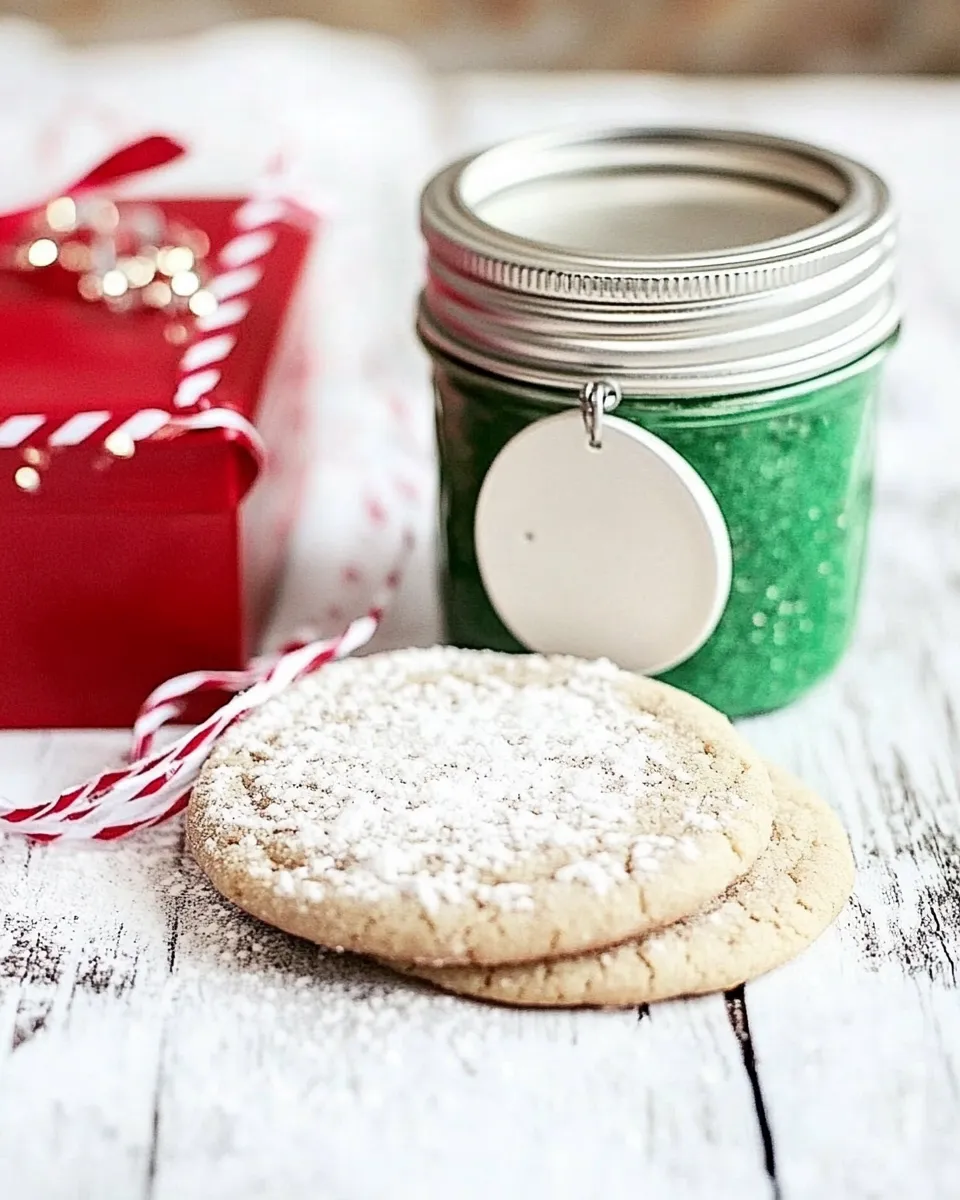
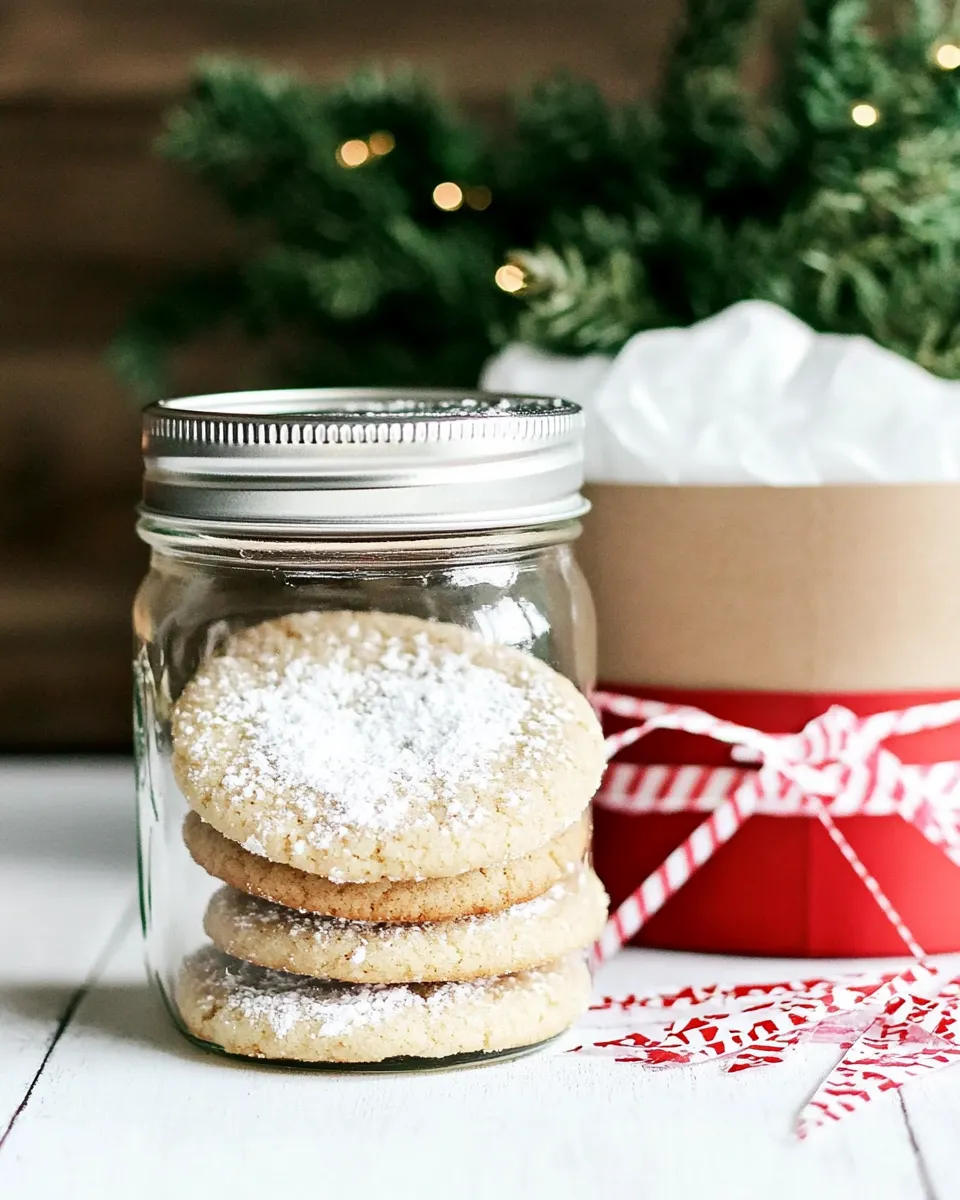
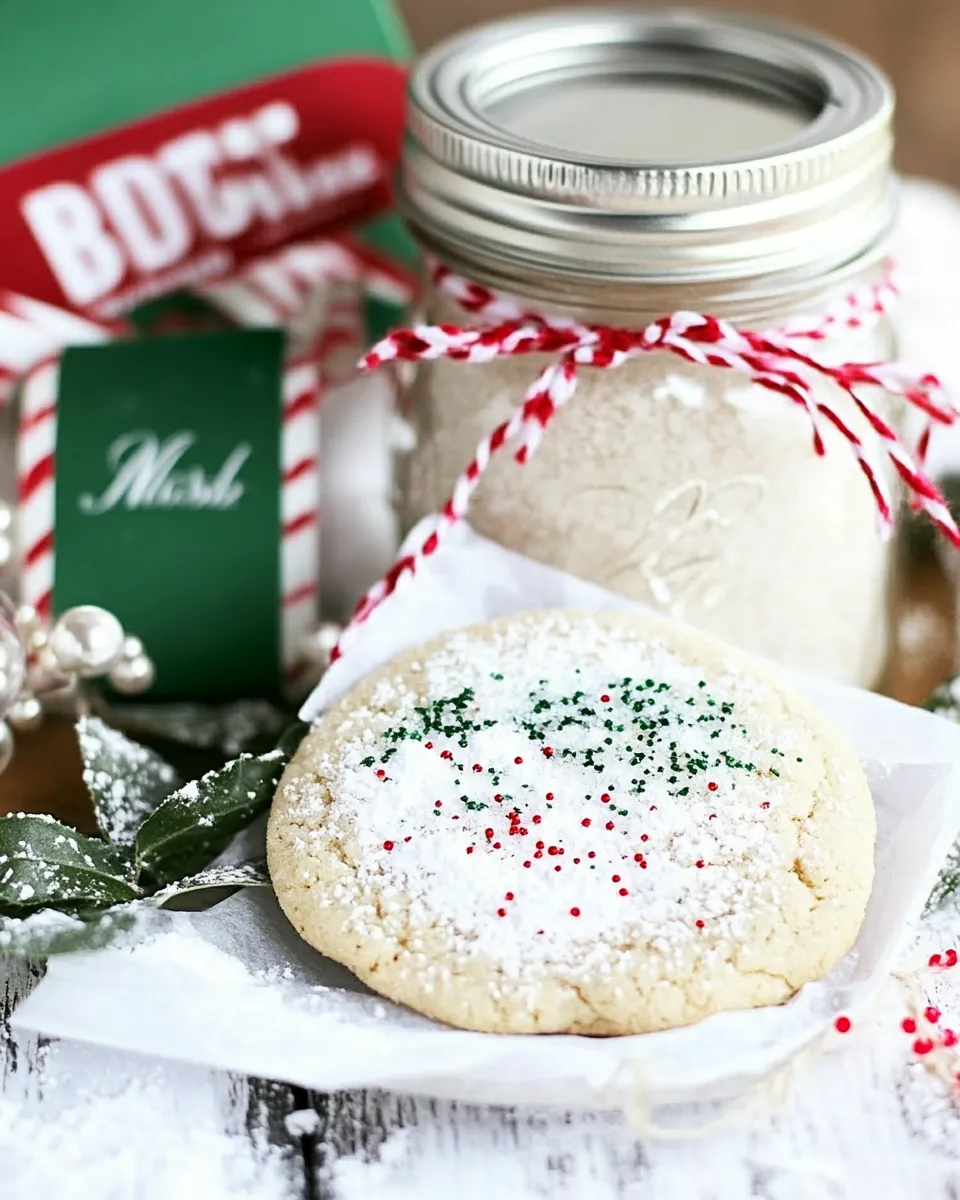
Gifting cookies is a tradition I never tire of, and mason jar cookie gifts are the little packages that make people smile before they even open them. These sugar cookie jars are simple, clean-looking, and practical — the jar carries everything, and the recipient gets a clear, bright promise of cookies to come. I like them because they’re approachable: you don’t need fancy piping or weeks of prep to give something homey.
In this post I’ll walk you through what to buy, how to assemble a mason jar sugar cookie gift, and how to turn that jar into real cookies. The instructions are intentionally straightforward so the jars can be assembled quickly for a bake sale, a teacher gift, or the neighbor who always drops by with a casserole. No fluff, just good, usable directions.
You’ll also find substitutions, gear suggestions, and a short Q&A that answers the small questions that sneak up on you mid-assembly. If you’re gifting more than one jar, read the storage and presentation tips — they’ll save you time and keep the jars looking sharp.
Ingredients
- 1 (17.5-ounce) package sugar cookie mix — the base of the jar; I use Betty Crocker, but any similar boxed sugar cookie mix sized to fit the jar will work.
- 3 tablespoons all-purpose flour — sprinkled on top to stabilize the mix and absorb moisture.
- Miniature ornaments — optional decorative touches; make sure they are food-safe or thoroughly cleaned and fully dry.
- Holiday sprinkles — for filling ornaments or topping cookies before baking.
- Miniature holiday cookie cutters — optional, for cutting shapes once the dough is formed.
- 8 tablespoons unsalted butter — 1/2 cup, melted; added when baking to bind the mix into dough.
- 1 large egg — for structure and richness.
- 1/2 tablespoon vanilla extract — for flavor; this amount is for the baking directions to be included with the jar.
What to Buy
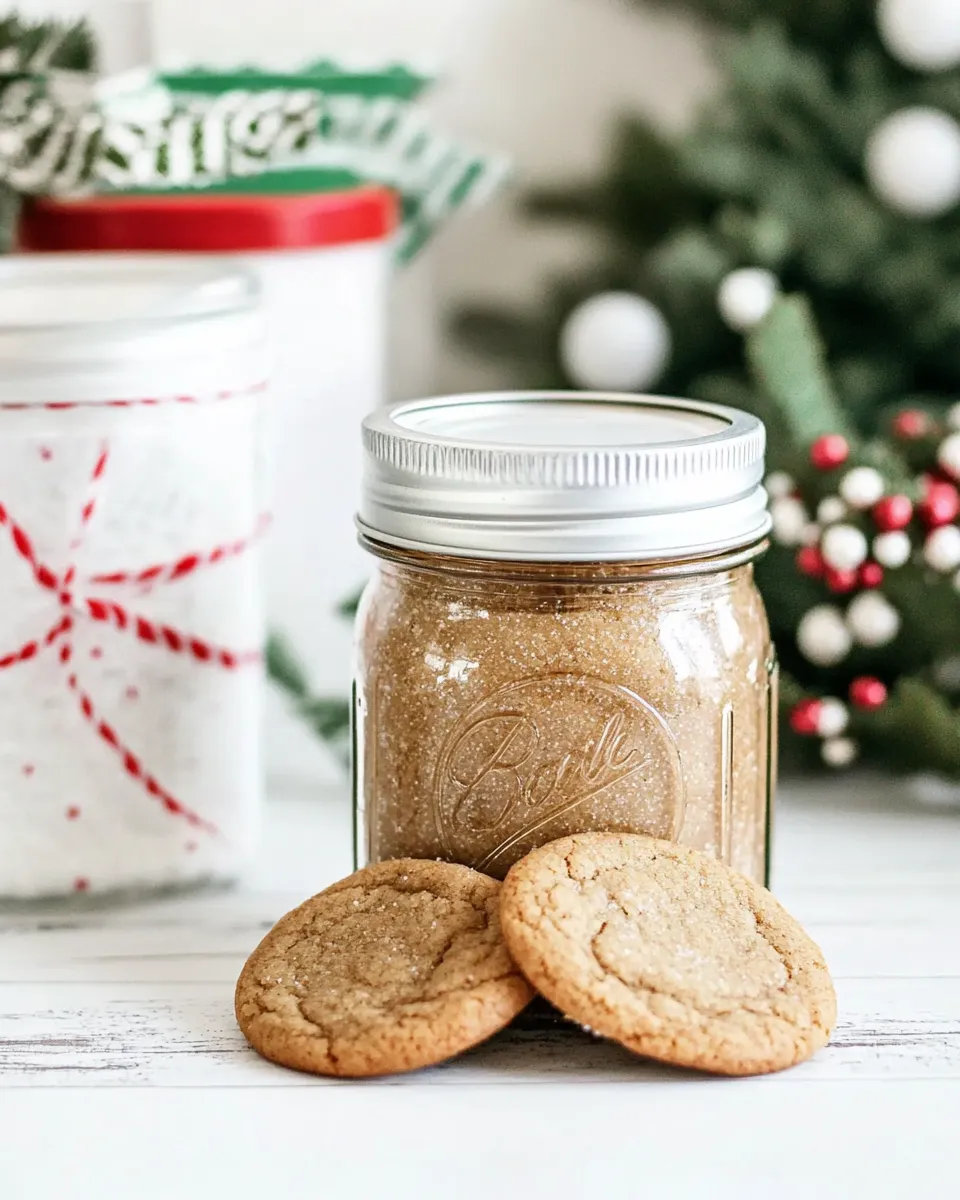
Start with the ingredients above, focusing first on the sugar cookie mix that fits comfortably into a mason jar. Standard 16–18 ounce mason jars are ideal for a 17.5-ounce package; I use 16-oz wide-mouth jars for easy filling and removal. Buy a pack of jar lids and a few ribbons or gift tags so the presentation looks intentional.
For the decorative extras, pick up holiday sprinkles and a small, clear ornament if you want to tuck sprinkles inside. Miniature holiday cookie cutters and tiny whisks are charming add-ons for the ribbon, but they’re optional. If you plan to include a printed recipe card, have card stock and a hole punch on hand so you can attach it to the jar.
Finally, keep basic baking supplies in mind if you’ll also bake the cookies: parchment paper, a sheet pan, and a cooling rack. Those are household staples for finishing the job once the jar is gifted or used.
Mason Jar Sugar Cookies: How It’s Done
- Make the sprinkle-filled ornament (optional): use a food-safe or thoroughly cleaned and completely dried clear miniature ornament. Pour some holiday sprinkles onto a small paper plate and use the plate (or a small funnel) to guide the sprinkles into the top of the ornament. Close the ornament and set aside.
- Layer the jar: dump the entire 1 (17.5-ounce) package sugar cookie mix into the mason jar. Do not compress the mix.
- Sprinkle the 3 tablespoons all-purpose flour on top of the cookie mix.
- Seal the jar tightly.
- Finish the gift jar: tie a ribbon around the jar and, if desired, attach a miniature whisk, a miniature holiday cookie cutter, and the sprinkle-filled ornament. Attach a printed copy of the recipe directions (or include the following baking directions).
- Baking directions to attach or include: Preheat the oven to 350°F.
- Empty the jar: pour the mason jar contents into a mixing bowl.
- Add the wet ingredients: add 8 tablespoons (1/2 cup) melted unsalted butter, 1 large egg, and 1/2 tablespoon vanilla extract to the bowl. Stir until the mixture is evenly combined.
- Form and cut the dough: turn the mixture onto a lightly floured surface and roll or pat it until a soft dough forms. Use miniature holiday cookie cutters (if desired) to cut shapes.
- Arrange for baking: place the cut cookies about 1 inch apart on a parchment-lined sheet pan. If desired, press holiday sprinkles on top of the cookies before baking.
- Bake and cool: bake 5–7 minutes or until the edges are light golden. Cool the cookies on the sheet pan for 2 minutes, then transfer to a cooling rack to finish cooling.
Why It’s My Go-To
This mason jar sugar cookie gift checks every practical box. It’s fast to assemble, travels well, and reads as thoughtful without requiring hours of work. People appreciate the clear presentation: they can see the mix and know exactly what they’re getting. For givers, it’s efficient — one grocery trip, one jar, and you’ve got a ready-to-gift item that still feels handmade.
It’s also versatile. The basic jar fits holiday themes, teacher appreciation, or last-minute friends. The recipe is forgiving at the baking stage: the dough comes together easily with melted butter and an egg, and the cookies bake quickly. The whole process rewards small effort with a lot of goodwill.
Ingredient Swaps & Substitutions
Stick to the jar’s ingredients when assembling the gift to keep the presentation consistent. For the cookie-baking step, there are a few safe swaps to consider:
- Butter — if you only have salted butter, use it but reduce any added table salt in other recipes you might pair with the cookies. The recipe already calls for unsalted, so expect a slightly saltier finish.
- Vanilla — you can swap pure vanilla extract for a comparable amount of imitation vanilla in a pinch; flavor will be slightly different but still pleasant.
- Sprinkles — swap colors or shapes to match the occasion. Nonpareils and jimmies behave differently in baking (some melt slightly, some hold shape); pick the type you prefer.
Gear Checklist
For the jars and gifts
- Wide-mouth mason jars (16–18 oz) — easy to fill and empty.
- Ribbon, gift tags, and small ornaments — for presentation.
- Miniature cookie cutters or tiny whisks — optional but charming.
For baking the cookies
- Mixing bowl and wooden spoon or spatula.
- Measuring spoons (for the vanilla), a small bowl for melted butter.
- Parchment-lined sheet pan and cooling rack.
- Lightly floured surface for rolling the dough.
What Not to Do
Don’t compress the cookie mix in the jar. Packing the box mix down seems tidy but it can make the jar look smaller and makes it difficult for the recipient to pour the mix out cleanly. Don’t attach anything damp or wet to the ribbon; moisture will ruin the paper recipe card and can make the ribbon look limp.
When baking, don’t overbake to get a darker color — these cookies bake quickly and should be removed when the edges are light golden. Overbaked sugar cookies lose their delicate texture. Finally, don’t forget to tell the recipient to let cookies cool on a rack; they finish firming up as they cool and slicing or touching them too soon can deform the shapes.
Dietary Swaps & Alternatives
If you need dietary-friendly options, plan ahead when assembling the jar so the recipient knows what to expect.
- Gluten-free — use a labeled gluten-free sugar cookie mix and clearly mark the jar. Gluten-free mixes can have a slightly different texture when baked, so include a note suggesting careful handling when cutting and baking.
- Dairy-free — substitute the 1/2 cup melted butter with a dairy-free stick or margarine suitable for baking, and note the swap on the recipe card so the baker knows to use that instead of butter.
- Egg-free — egg replacers are available, but they change how the dough sets. If you need an egg-free version, include a note with the suggested replacer and mixing instructions; consider labeling the jar clearly to prevent surprises.
Method to the Madness
The assembly is deceptively simple, but a few small habits make the whole process smoother. Work over a tray or a newspaper so spills are easy to sweep up. When pouring the sugar cookie mix into the jar, use the box as a spout and keep the jar steady. Add the flour on top as the stabilizer and wipe the rim clean before sealing.
When your recipient is ready to bake, the technique is straightforward: melted butter and an egg create a workable dough without chilling. Roll lightly — you want a soft dough that can be gently pressed into cutters. If the dough feels sticky, dust with a touch more flour rather than adding extra butter.
Best Ways to Store
For gifting, sealed mason jars will keep the dry mix fresh for several months if stored in a cool, dry place away from direct sunlight. If you’re making multiple jars ahead of time, store them in a box or on a shelf where they won’t be jostled and lose that neat, layered look.
After baking, store sugar cookies in an airtight container at room temperature for up to a week. To freeze, place baked cookies in a single layer on a baking sheet to freeze solid, then transfer to an airtight freezer container or bag with parchment between layers — they’ll keep well for 2–3 months.
Handy Q&A
Q: Can I use a different jar size?
A: Stick to jars that fit the full 17.5-ounce mix. Smaller jars won’t hold the full package; larger jars will look sparse unless you add filler like extra sprinkles or a small decoration.
Q: Can I pre-print the baking directions on a tag?
A: Yes — and I recommend it. A clear, concise tag with the baking steps and the oven temperature saves the recipient time and reduces the chance they’ll misplace the instructions.
Q: Will the sprinkles melt during baking?
A: Some sprinkles hold up better than others. Jimmies and larger sugar shapes may soften slightly; nonpareils usually keep a more dotted appearance. If appearance matters, press sprinkles on cookies just before baking so they set in place.
Q: Is the ornament safe near food?
A: Use ornaments that are labeled food-safe, or make sure any ornament is thoroughly cleaned and completely dry before adding edible sprinkles. Alternatively, use the ornament purely as a decorative piece attached to the ribbon rather than inside the jar.
See You at the Table
These mason jar sugar cookie gifts are a practical way to give a little celebration in a jar. The steps are quick, the presentation scales well, and the payoff — warm, cut-out cookies on a winter afternoon — is worth the few minutes it takes to layer a jar. If you make a batch for a holiday swap or a last-minute teacher gift, keep the instructions with the jar so the recipient enjoys every easy step.
If you try this, snap a photo of your jars and share what little additions you made. I love seeing the tiny ornaments and ribbon combinations people choose. Happy gifting, and happy baking.
Mason Jar Sugar Cookies
Equipment
- Wide-mouth Mason Jar
Ingredients
Ingredients
- 1 17.5-ounce packagesugar cookie mixI use Betty Crocker
- 3 tablespoonsall-purpose flour
- Miniature ornaments
- Holiday sprinkles
- Miniature holiday cookie cuttersif desired
- 8 tablespoonsunsalted butter1/2 cup melted
- 1 largeegg
- 1/2 tablespoonvanilla extract
Instructions
Instructions
- Make the sprinkle-filled ornament (optional): use a food-safe or thoroughly cleaned and completely dried clear miniature ornament. Pour some holiday sprinkles onto a small paper plate and use the plate (or a small funnel) to guide the sprinkles into the top of the ornament. Close the ornament and set aside.
- Layer the jar: dump the entire 1 (17.5-ounce) package sugar cookie mix into the mason jar. Do not compress the mix.
- Sprinkle the 3 tablespoons all-purpose flour on top of the cookie mix.
- Seal the jar tightly.
- Finish the gift jar: tie a ribbon around the jar and, if desired, attach a miniature whisk, a miniature holiday cookie cutter, and the sprinkle-filled ornament. Attach a printed copy of the recipe directions (or include the following baking directions).
- Baking directions to attach or include: Preheat the oven to 350°F.
- Empty the jar: pour the mason jar contents into a mixing bowl.
- Add the wet ingredients: add 8 tablespoons (1/2 cup) melted unsalted butter, 1 large egg, and 1/2 tablespoon vanilla extract to the bowl. Stir until the mixture is evenly combined.
- Form and cut the dough: turn the mixture onto a lightly floured surface and roll or pat it until a soft dough forms. Use miniature holiday cookie cutters (if desired) to cut shapes.
- Arrange for baking: place the cut cookies about 1 inch apart on a parchment-lined sheet pan. If desired, press holiday sprinkles on top of the cookies before baking.
- Bake and cool: bake 5–7 minutes or until the edges are light golden. Cool the cookies on the sheet pan for 2 minutes, then transfer to a cooling rack to finish cooling.
Notes
Storage
: Package everything up in a mason jar for up to 2 months. Baked cookies last at room temperature for up to 3 days.