These No Bake Oatmeal Bars are one of my go-to pantry recipes when I need something quick, filling, and kid-friendly. They come together in under 10 minutes of active time, and they don’t require an oven — just a few simple ingredients and a little patience while they chill.
I make a batch at the start of the week and slice them up for snacks, lunchbox additions, or a post-workout bite. The texture is chewy and slightly dense, with the familiar nuttiness of peanut butter and the gentle sweetness of maple syrup — comforting, not cloying.
Below you’ll find the exact ingredient list and step-by-step instructions I use every time, plus practical notes, troubleshooting tips, and a few variations to keep things interesting. No fluff, just what you need to make them turn out well.
What You’ll Need
Minimal pantry staples and a single mixing bowl. If you like, read the cook’s notes before starting — they explain which peanut butter and maple syrup choices will give you the best texture.
Ingredients
- 3 cups rolled oats — gluten-free, if necessary.
- 1 cup peanut butter — See notes.
- 1/2 cup maple syrup — See notes.
Cook No Bake Oatmeal Bars Like This
- Line an 8 x 8-inch pan with parchment paper, leaving an overhang on two opposite sides; set the pan aside.
- In a microwave-safe bowl, combine 1 cup peanut butter and 1/2 cup maple syrup. Microwave in 20–30 second intervals, stirring between intervals, until the mixture is smooth and pourable. (Or, place 1 cup peanut butter and 1/2 cup maple syrup in a small saucepan over low heat and stir until smooth and combined, then remove from heat.)
- Add 3 cups rolled oats to the peanut butter–maple mixture. Stir with a spatula until the oats are fully and evenly coated and the mixture is uniform.
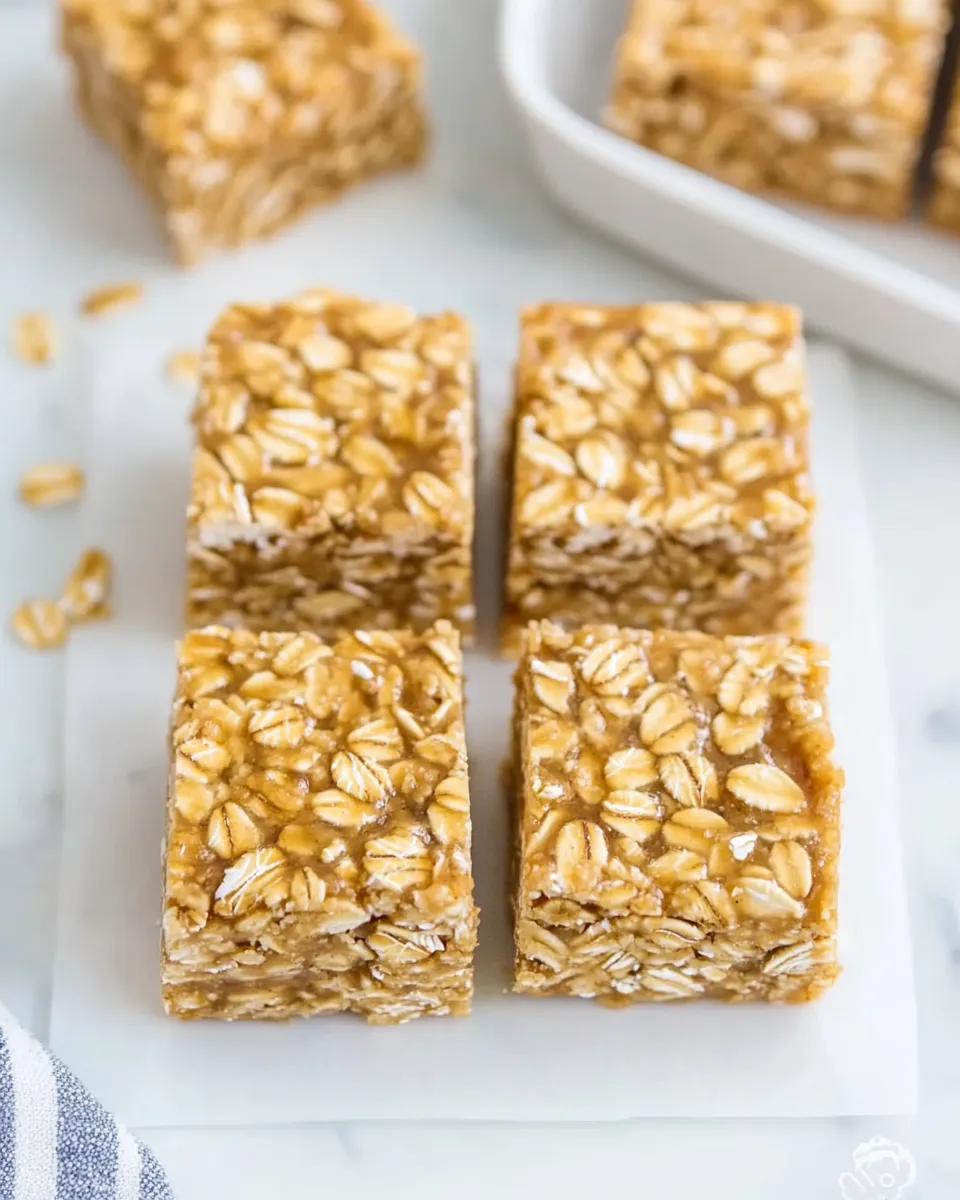
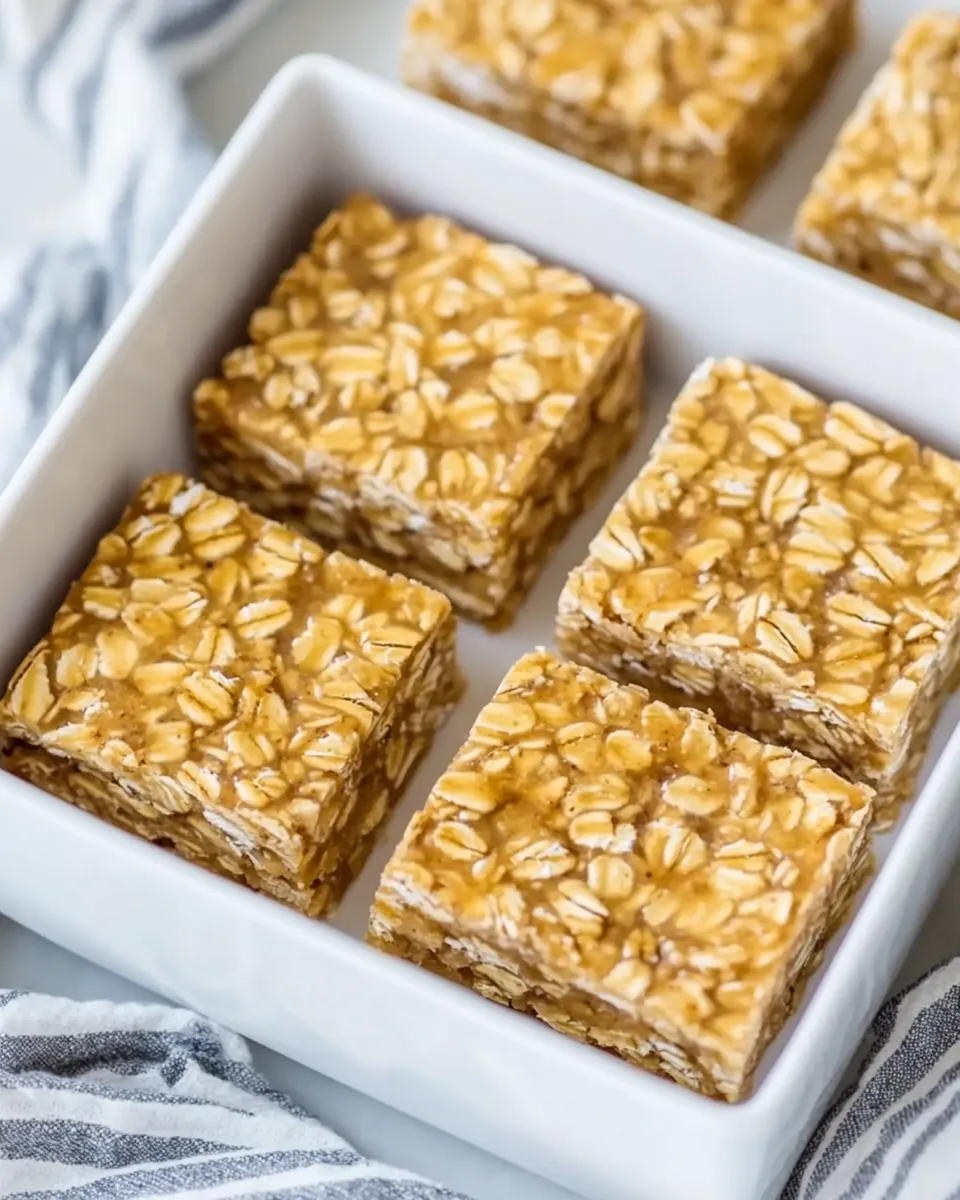
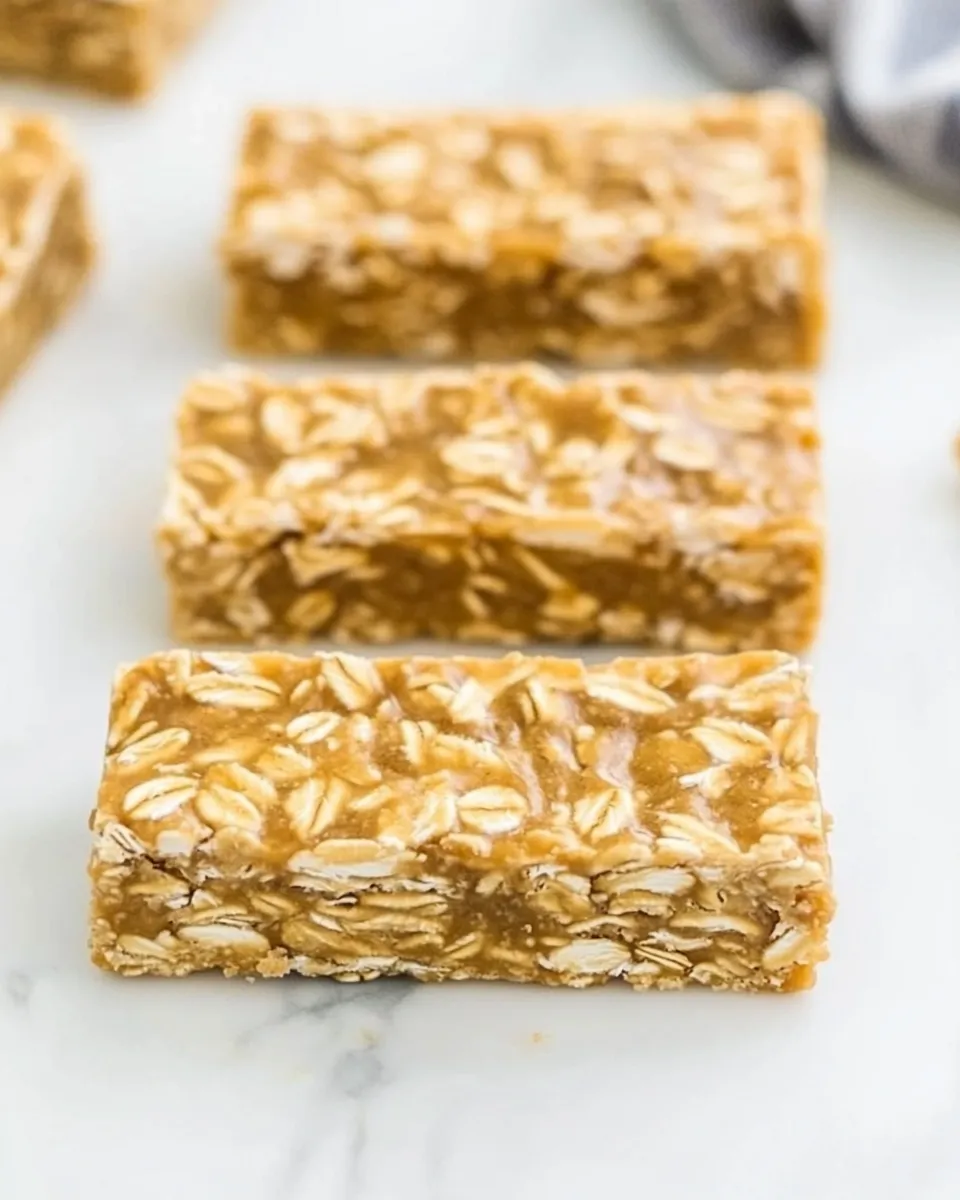
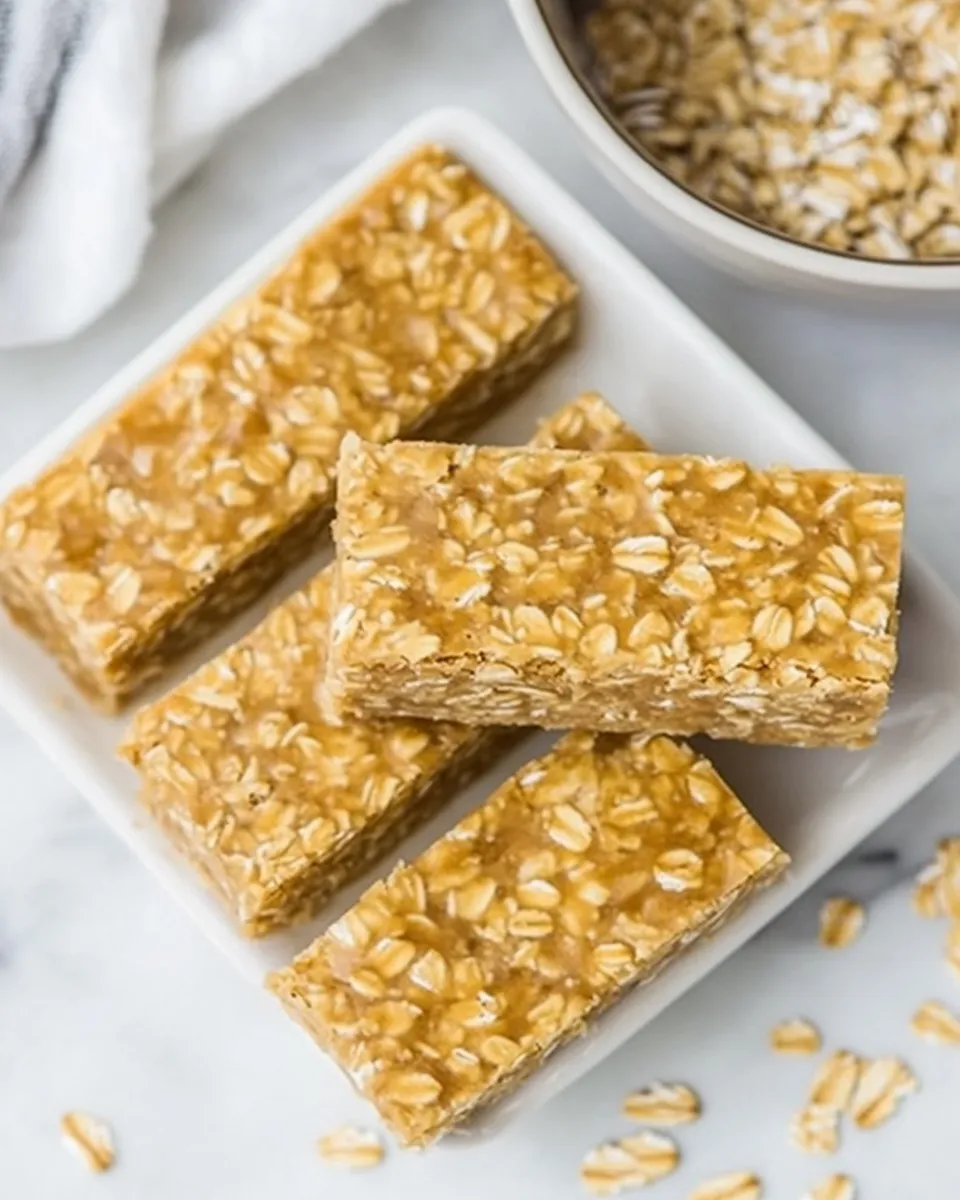
- Transfer the oat mixture into the prepared pan. Press it firmly and evenly into the pan using the back of a spatula or your hands to compact and smooth the top.
- Refrigerate the pan for at least 30 minutes, until the mixture is firm.
- Use the parchment overhang to lift the set mixture from the pan onto a cutting board, then slice into bars.
Why This No Bake Oatmeal Bars Stands Out
What makes these bars special is their simplicity. Three primary ingredients create a satisfying snack that balances chew and stickiness without overwhelming sweetness. The maple syrup keeps things naturally sweet and fluid enough to bind the oats, while the peanut butter adds richness and structure.
They’re forgiving. You don’t need perfect technique or fancy equipment. Pressing the mixture firmly and chilling are the two steps that most influence texture — do them well and the rest falls into place. Because there’s no baking, these bars stay moist and chewy rather than drying out.
Flavor-Forward Alternatives
Want to mix it up? Here are reliable swaps and additions that keep the recipe straightforward while introducing new flavors and textures.
- Crunchy vs. smooth peanut butter — use crunchy for more texture; smooth for a denser, more uniform bar.
- Nut- or seed-butter swaps — almond, cashew, or sunflower seed butter work as straight substitutes for peanut butter if you need a different flavor or nut-free option.
- Sweetener swaps — if maple syrup isn’t on hand, runny honey can work in the same volume, though flavor will change slightly.
- Toppings or mix-ins — press a handful of chocolate chips or chopped nuts into the top before chilling, or sprinkle with shredded coconut. No precise amounts needed; use what you like.
Toolbox for This Recipe
- 8 x 8-inch baking pan (or similar size)
- Parchment paper (with overhang to lift the bars)
- Microwave-safe bowl or a small saucepan
- Rubber spatula and/or spoon for stirring
- Measuring cups (1 cup and 1/2 cup)
- Cutting board and a sharp knife for slicing
- Refrigerator space to chill the pan
Errors to Dodge
There are a few predictable missteps — skip these and the bars will be exactly what you want.
- Not lining the pan — skipping parchment makes removal and slicing messy. The overhang is worth the small extra step.
- Using very runny peanut butter — natural, oil-separated peanut butter will make the mixture looser. Stir your jar well and if the mixture seems too thin, chill it briefly to firm up before adding oats.
- Under-pressing the mixture — if you don’t compact the oats, the bars will crumble. Press firmly and evenly into the pan.
- Skipping refrigeration time — cutting too soon leads to misshapen bars. Wait the full 30 minutes or longer for a clean slice.
- Overheating the peanut butter — in the microwave, heat in short intervals and stir between bursts. Overheating can cause separation or scorched flavor.
Seasonal Spins
These bars adapt well to seasonal flavors. Use the same foundation and swap in a few accents to fit the time of year.
- Autumn — fold in a pinch of warm spice blends like cinnamon and nutmeg or press a few chopped toasted pecans on top.
- Winter — stir in a small handful of dried cranberries or orange zest for brightness.
- Spring — add toasted almond slivers and a light sprinkle of shredded coconut for freshness.
- Summer — press on frozen berries (thawed and patted dry) or add a scattering of sunflower seeds for a crunchy, portable snack.
Cook’s Notes
Peanut butter notes
Natural peanut butter with separated oil will need a good stir; sometimes it behaves more liquidly. If your peanut butter is extremely loose, chill the peanut butter–maple mixture briefly so it firms before adding the oats. For a creamier, chewier bar, choose a standard commercial-style peanut butter. For stronger peanut flavor and more texture, choose crunchy.
Maple syrup notes
Use real maple syrup for the best flavor. Lighter grades give a delicate sweetness; darker grades lend a deeper caramel note. If you only have thicker syrup, warm it slightly to reach a pourable consistency before combining with the peanut butter.
Oats
Use rolled oats — old-fashioned oats — not quick oats for the best chew and structure. If you need gluten-free bars, choose oats labeled gluten-free.
Store, Freeze & Reheat
Once sliced, store the bars in an airtight container in the refrigerator for up to one week. Place parchment or wax paper between layers to prevent sticking. For longer storage, wrap bars individually and freeze in a sealed container or freezer bag for up to 2 months.
To thaw frozen bars, transfer to the refrigerator overnight or leave at room temperature for 30–60 minutes. They’re best served cool or at room temperature; reheating is unnecessary and can make them softer. If you prefer them softer, a few seconds in the microwave will take the chill off.
Popular Questions
- Can I make these vegan? — Yes, if your peanut butter and maple syrup are vegan (maple syrup is plant-based). The recipe is inherently vegan unless you add non-vegan mix-ins.
- Can I bake these instead? — This recipe is designed as no-bake. Baking would change texture and may dry them out. If you want baked oat bars, choose a recipe formulated for the oven.
- How do I get clean slices? — Chill the bars thoroughly, then use a sharp knife warmed under hot water and wiped dry between cuts for tidy edges.
- My bars are crumbly — what happened? — Most likely they weren’t pressed firmly enough or didn’t chill long enough. Make sure to compact the mixture into the pan and give it at least 30 minutes in the fridge.
- Can I add chocolate chips? — Yes. For best results, press chocolate chips into the top of the pressed mixture before chilling so they set into the bars.
Bring It Home
These No Bake Oatmeal Bars are an honest, reliable snack that fits into busy weeks with minimum fuss. Keep the base formula in your repertoire: three ingredients, one bowl, and a little chill time. Once you’ve made them once, it’s easy to customize the texture and add seasonal accents without complicating the process.
Try a batch this afternoon: line the pan, warm the peanut butter and maple syrup, stir in the oats, press, and chill. You’ll have portable bars ready for the week ahead.
No Bake Oatmeal Bars
Equipment
- 8 x 8-inch pan
- Parchment Paper
- Microwave-safe Bowl
- Small saucepan
- Spatula
- Cutting Board
Ingredients
Ingredients
- 3 cupsrolled oatsgluten-free if necessary
- 1 cuppeanut butter* See notes
- 1/2 cupmaple syrup** See notes
Instructions
Instructions
- Line an 8 x 8-inch pan with parchment paper, leaving an overhang on two opposite sides; set the pan aside.
- In a microwave-safe bowl, combine 1 cup peanut butter and 1/2 cup maple syrup. Microwave in 20–30 second intervals, stirring between intervals, until the mixture is smooth and pourable. (Or, place 1 cup peanut butter and 1/2 cup maple syrup in a small saucepan over low heat and stir until smooth and combined, then remove from heat.)
- Add 3 cups rolled oats to the peanut butter–maple mixture. Stir with a spatula until the oats are fully and evenly coated and the mixture is uniform.
- Transfer the oat mixture into the prepared pan. Press it firmly and evenly into the pan using the back of a spatula or your hands to compact and smooth the top.
- Refrigerate the pan for at least 30 minutes, until the mixture is firm.
- Use the parchment overhang to lift the set mixture from the pan onto a cutting board, then slice into bars.
Notes
Make a layered bar.Top the bars with a mixture of melted chocolate and peanut butter, then pour it over the oat mixture and let it set in the fridge.
Add dried fruit.Like raisins, dried cranberries, or dried blueberries.
Or experiment with different mix-ins.Like chopped-up chocolate, candy bars, M&Ms, or crushed cookies.
Swap the nut butter.Tryhomemade Nutella,protein cookie butter, or Biscoff cookie spread.