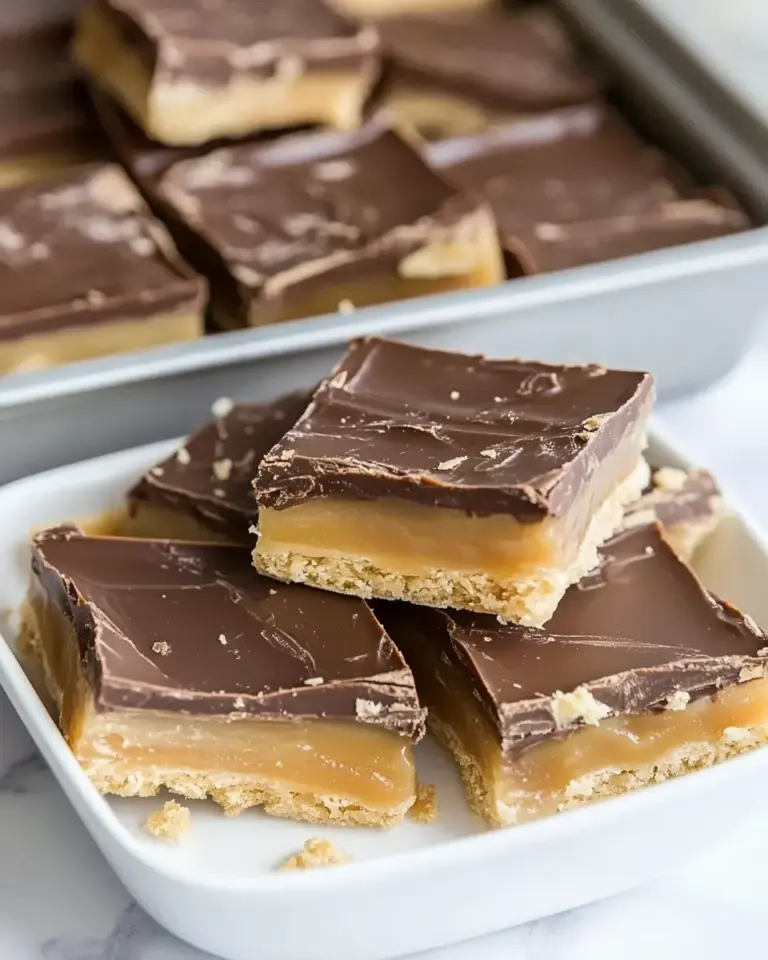
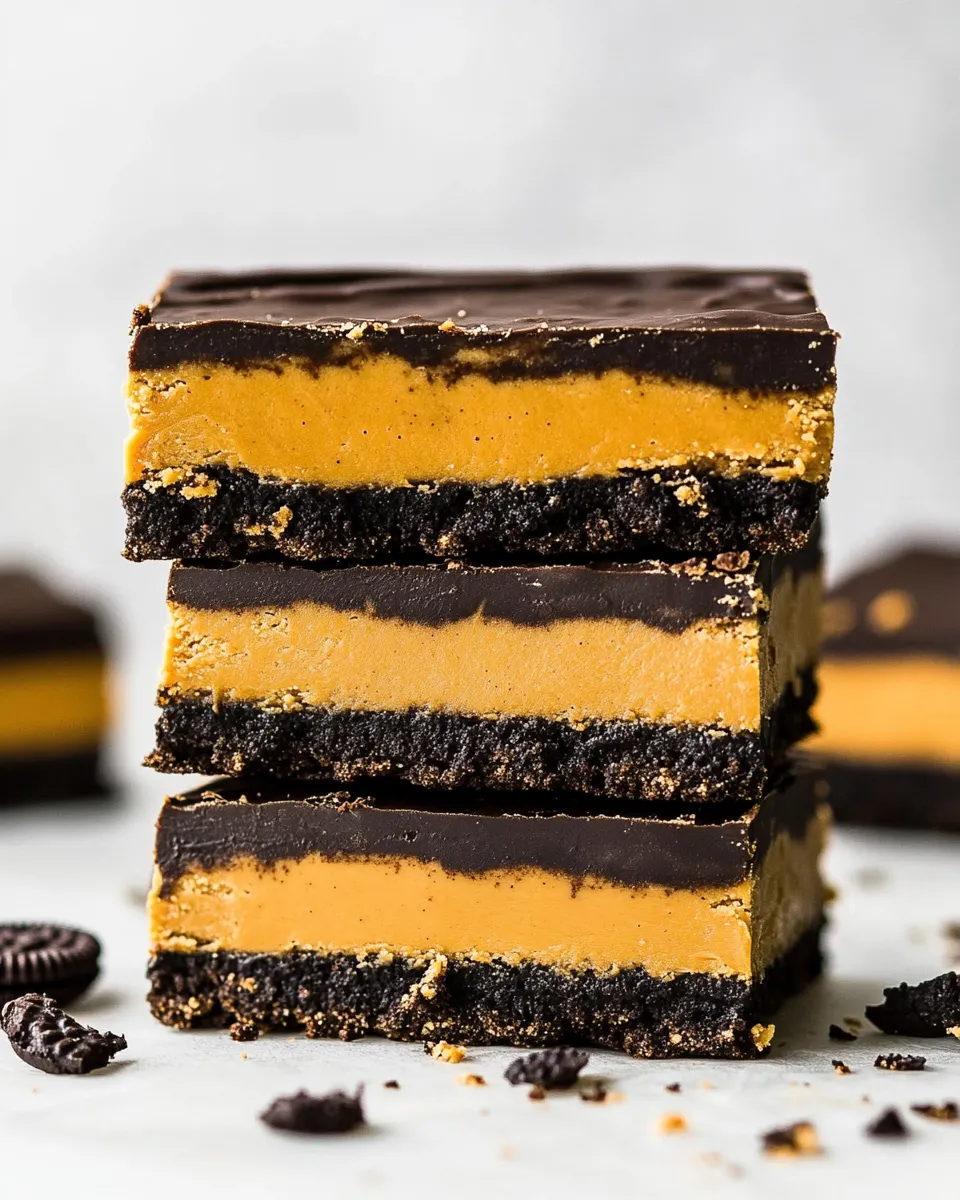
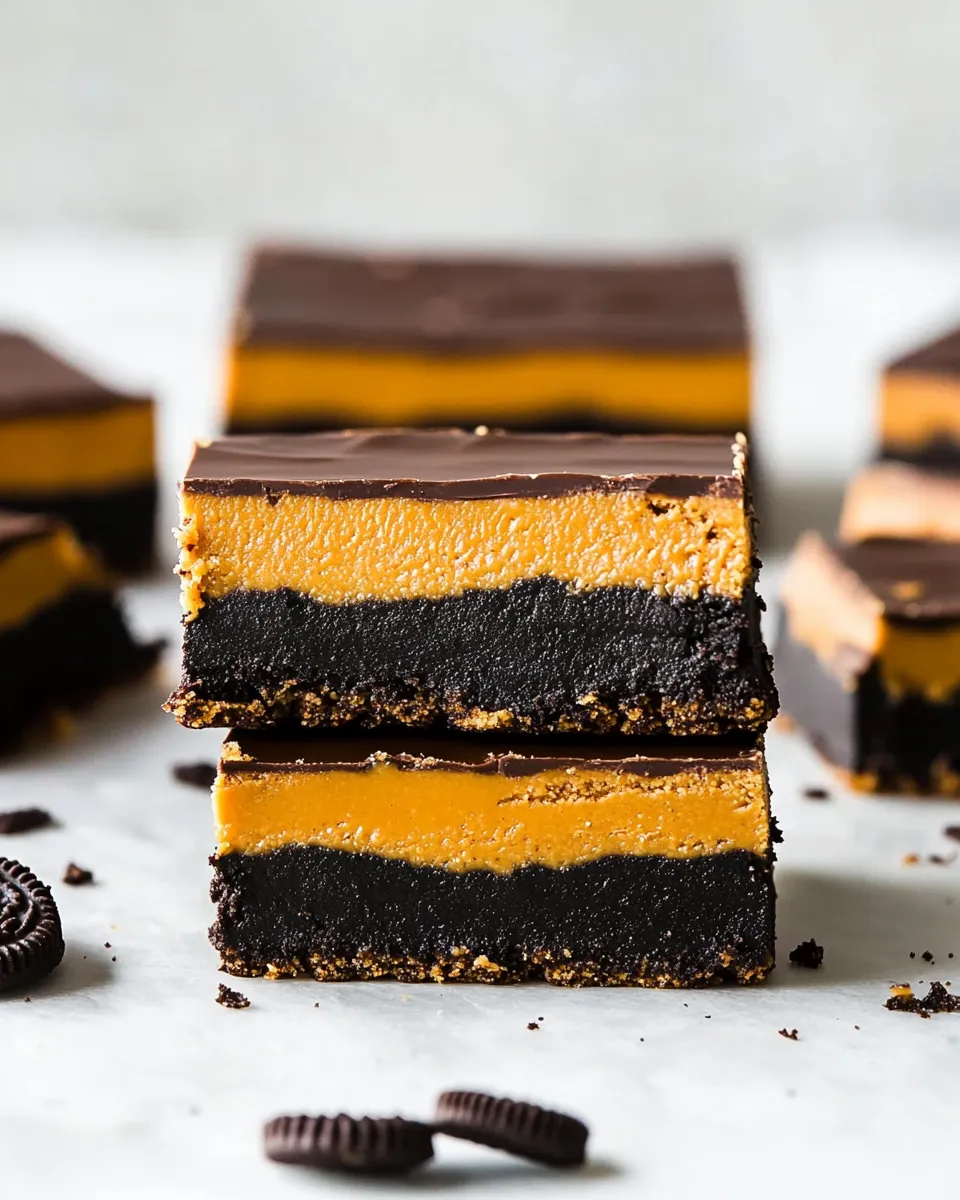
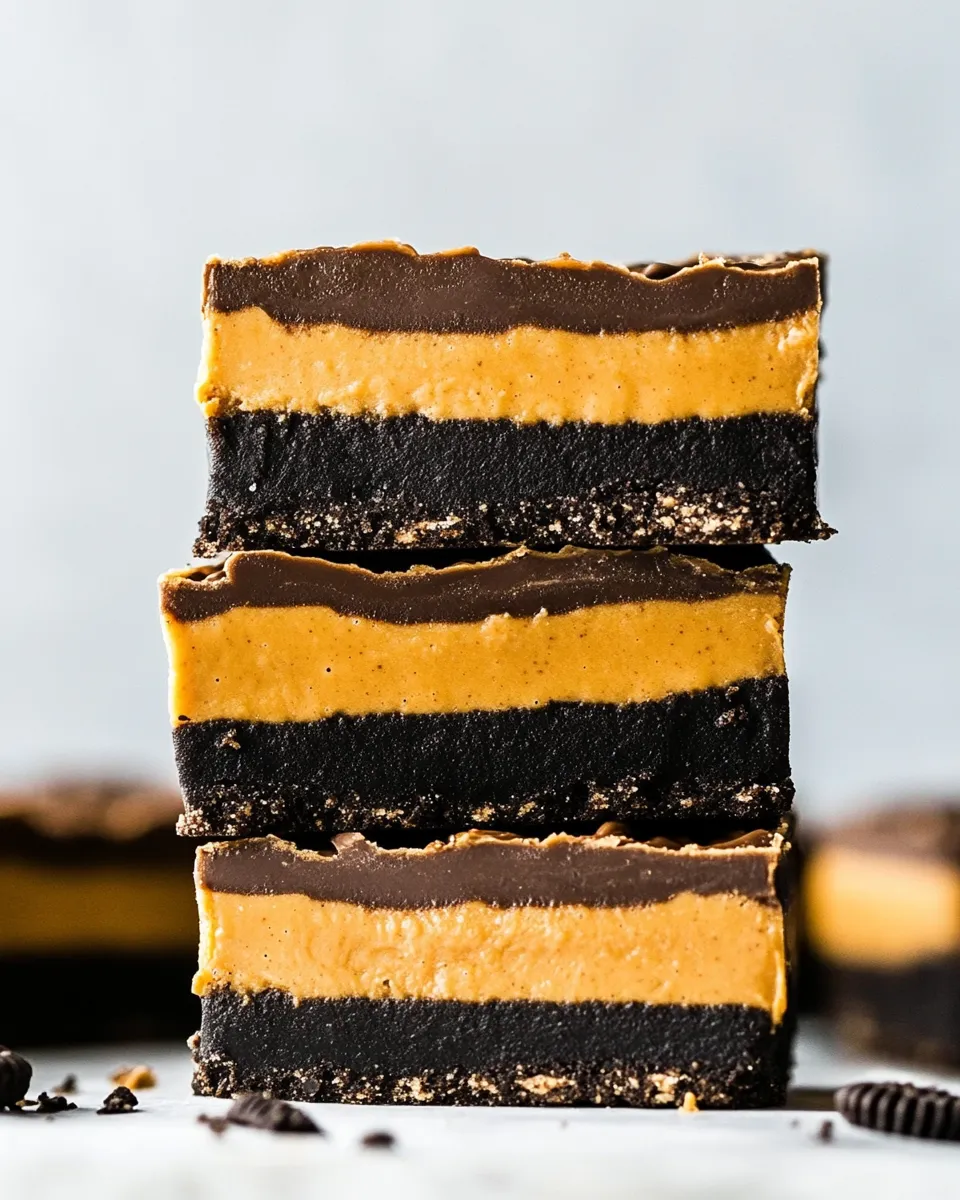
These bars are the kind of dessert I make when I want something that feels indulgent but is actually wildly simple. Crunchy Oreo crumbs form a chocolatey base, a rich peanut-butter middle follows, and a glossy chocolate-peanut butter topping finishes the whole thing. They slice cleanly, travel well, and disappear fast.
I like recipes that tell me exactly what to do and let the ingredients do the work. This one delivers: few steps, no baking, and straightforward assembly. You can make the crust, filling, and topping in about 30 minutes of active time and then chill while you tidy up.
Below you’ll find a clear ingredient list with quick tips, precise step-by-step instructions straight from the recipe, troubleshooting notes, equipment suggestions, variations by season, storage advice, and answers to the questions readers ask most often. Let’s get to it.
Ingredient Breakdown
Ingredients
- 30 Oreos, not double stuffed — The cookies make a sturdy, chocolatey crust when pulsed into crumbs; avoid double-stuffed for the correct texture and fat balance.
- 6 tablespoons salted butter, room temperature — Binds the Oreo crumbs into a pressable crust; room temperature butter incorporates faster.
- 1 cup salted butter, melted — Used in the peanut-butter layer for richness and moisture; measure after melting for accuracy.
- 2 cups graham cracker crumbs — Adds structure and a hint of honey flavor to the filling; pulse whole graham crackers for fresh crumbs.
- 2 cups powdered sugar — Sweetens and stabilizes the peanut-butter filling; sift quickly if lumpy.
- 1 1/4 cups creamy peanut butter, divided — Provides the signature peanut flavor; reserve 1/4 cup for melting with chocolate for the topping.
- 1 1/2 cups semi-sweet or milk chocolate chips — Melts into a smooth topping; use semi-sweet for balance, milk for a sweeter finish.
Step-by-Step: Oreo Peanut Butter Bars
- Line a 9×13-inch pan with parchment paper, leaving about a 1-inch overhang on two opposite sides; very lightly spray the parchment with pan spray and set the pan aside.
- Place 30 Oreos (not double stuffed) in a food processor and pulse until finely ground.
- Add 6 tablespoons salted butter (room temperature) to the Oreo crumbs and pulse until the butter is fully incorporated and the mixture holds together when pressed.
- Transfer the Oreo mixture to the prepared pan and press into an even layer using your fingers or the bottom of a flat measuring cup. Chill the crust in the freezer for 20 minutes.
- While the crust chills, melt 1 cup salted butter (use microwave or stovetop) and let it cool slightly if very hot.
- In a large bowl, combine the melted 1 cup salted butter, 2 cups graham cracker crumbs, 2 cups powdered sugar, and 1 cup of the 1¼ cups creamy peanut butter. Stir until the mixture is smooth and evenly combined.
- Remove the pan from the freezer and spread the peanut-butter filling evenly over the chilled Oreo crust. Smooth the top with a spatula.
- Reserve the remaining ¼ cup creamy peanut butter. In a heatproof bowl, combine that reserved ¼ cup peanut butter with 1½ cups semi-sweet or milk chocolate chips. Melt together until smooth—either in the microwave (stirring every 30 seconds) or over a double boiler—stirring frequently to prevent burning.
- Pour the melted chocolate–peanut butter mixture over the peanut-butter layer and spread evenly with a spatula.
- Refrigerate the assembled bars for at least 1 hour to set. Use the parchment overhang to lift the slab from the pan and cut into bars. Store leftovers in the refrigerator.
What Sets This Recipe Apart
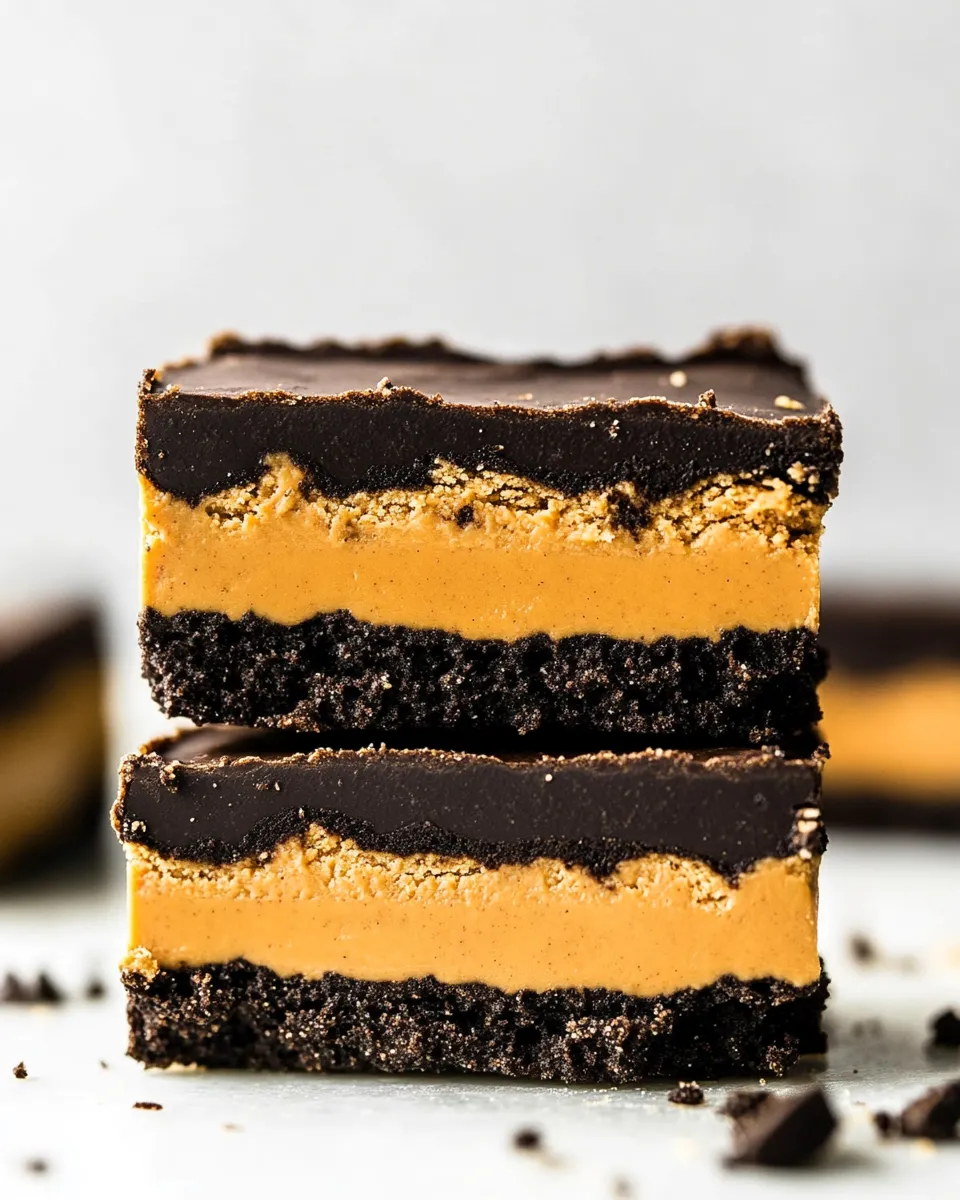
There are plenty of peanut-butter bars out there, but the Oreo base here makes a world of difference. It adds an intense chocolate punch and a slightly firmer texture than a graham-cracker crust alone. The layered approach—chilled crust, no-bake peanut filling, and a chocolate-peanut butter finish—gives you contrasting textures in each bite: crisp, dense, creamy, and silky.
This recipe is also intentionally forgiving. It relies on straightforward assembly rather than tempering chocolate or complicated doughs. If you can press, stir, and melt, you can make these bars. They look elevated but come together with basic techniques and pantry staples.
If You’re Out Of…
Running low on something? Here are practical swaps that keep the recipe working without inventing new measurements.
Oreos
If you don’t have Oreos, use any chocolate sandwich cookie of similar size and filling. The flavor profile will shift slightly, but the process and texture remain very close.
Semi-sweet or milk chocolate chips
If you prefer or only have a baking bar, chop it and melt the same weight. White chocolate will change flavor and sweetness—use sparingly if substituting.
Creamy peanut butter
Smooth almond or cashew butter can replace peanut butter for a nutty variation. The filling texture will be slightly different because of oil content, so stir until smooth and evenly combined.
Toolbox for This Recipe
Minimal tools make this an approachable bake (or rather, an unbake). Here’s what I use every time:
- 9×13-inch pan — Necessary for the specified yield and bar size.
- Food processor — Quickly turns Oreos into fine crumbs; a heavy-duty blender can also work.
- Mixing bowls — One large bowl for the peanut layer and a heatproof bowl for melting chocolate.
- Spatula or flat measuring cup — For pressing the crust evenly and smoothing layers.
- Parchment paper — Makes removal and cutting tidy; leave an overhang for easy lifting.
- Microwave or double boiler — For melting chocolate and peanut butter together safely.
Pitfalls & How to Prevent Them
These bars are forgiving, but a few things can go sideways. Here are the common issues and exactly how to avoid them.
Crumbs that don’t hold
If the Oreo crust is crumbly and won’t press together, the butter may not be fully incorporated or you didn’t press firmly enough. Pulse the crumbs with the butter until evenly coated and test by pinching a small handful; it should hold. Press the crust firmly into the pan with the bottom of a measuring cup for an even surface.
Soggy edges
Soggy edges happen when the filling is too warm when spread over the crust. Chill the crust the full 20 minutes and let any hot melted butter cool slightly before combining. This prevents melting the crust when layering.
Grainy chocolate topping
Chocolate burns easily. If you melt in the microwave, stop every 30 seconds and stir. If you use a double boiler, keep the water at a gentle simmer and stir frequently. If the chocolate seizes, you can sometimes rescue it with a small splash of vegetable oil or additional peanut butter, but keeping the heat low is the best prevention.
Variations by Season
Small swaps let you adapt these bars to fit holidays or produce seasons without changing the core method.
Winter
Add a pinch of flaky sea salt or a thin layer of salted caramel between the peanut filling and chocolate for cozy richness. Top with chopped roasted peanuts for crunch.
Spring
Fold a tablespoon of lemon zest into the peanut layer for a surprising bright note, or top the chocolate with finely chopped freeze-dried strawberries for color and tang.
Summer
Serve chilled straight from the fridge, or drizzle with melted white chocolate and top with chopped fresh berries for a refreshing contrast.
Fall
Stir a teaspoon of ground cinnamon into the peanut filling. You can also swap graham crumbs for speculoos cookie crumbs for a spiced depth.
Behind the Recipe
I simplify for real kitchens: limited bowls, minimal hands-on time, and flavors that please a crowd. The Oreo crust is a small twist that elevates the finished bar and cuts down the need for additional chocolate in the base. The layers add structure and a clean slice—important if you want them to look as good as they taste at parties or in lunchboxes.
These bars evolved from a classic no-bake peanut-butter-squares idea. Adding the Oreo base felt natural and brought a more pronounced chocolate note to balance the rich peanut butter. The chocolate-peanut butter topping ties everything together and gives a glossy, professional finish.
Storing, Freezing & Reheating
These bars keep well chilled and freeze beautifully—perfect for making ahead.
- Refrigerator: Store in an airtight container for up to 1 week. Cold bars slice cleaner.
- Freezer: Wrap the whole slab in plastic wrap, then foil, and freeze for up to 3 months. Thaw in the refrigerator overnight before slicing.
- Serving: Let refrigerated bars sit at room temperature for 5–10 minutes before serving for easier chewing; frozen-thawed bars benefit from 15–20 minutes at room temp.
Frequently Asked Questions
Below are the questions readers ask most often and straightforward answers.
Can I make these nut-free?
You could try sunflower seed butter as a substitute, but the flavor and oil content differ. If using a seed butter, stir until the texture is smooth and monitor consistency; you may need to adjust chilling times.
Can I use natural peanut butter?
Natural peanut butter separates and is runnier; it can still work but may alter set and texture. Stir natural peanut butter thoroughly and consider chilling the filling a bit longer to firm up.
Why did my topping separate?
If the peanut butter is too hot when combined with chocolate, or if the chocolate overheats, the mixture can separate. Melt gently and stir constantly until smooth. If separation happens, a touch more chocolate or a small spoon of neutral oil can sometimes bring it back together.
The Takeaway
Oreo Peanut Butter Bars are an easy, crowd-pleasing no-bake treat that balance chocolate and peanut butter with minimal fuss. The method is straightforward: press a cooled Oreo crust, build a buttery peanut filling, and finish with a melted chocolate-peanut butter layer. Chill, slice, and enjoy.
Make them for potlucks, school events, or a weekend bake to keep in the fridge. They travel well, freeze cleanly, and require no special skills—only a food processor, a spatula, and a hungry audience.
Oreo Peanut Butter Bars
Equipment
- 9x13 inch Pan
- Parchment Paper
- Food Processor
- Mixing Bowl
- Spatula
- measuring cup or flat-bottomed cup
- Microwave or double boiler
Ingredients
Ingredients
- 30 Oreos not double stuffed
- 6 tablespoonssalted butter room temperature
- 1 cupsalted butter melted
- 2 cupsgraham cracker crumbs
- 2 cupspowdered sugar
- 1 1/4 cupscreamy peanut butter divided
- 1 1/2 cupssemi-sweet or milk chocolate chips
Instructions
Instructions
- Line a 9×13-inch pan with parchment paper, leaving about a 1-inch overhang on two opposite sides; very lightly spray the parchment with pan spray and set the pan aside.
- Place 30 Oreos (not double stuffed) in a food processor and pulse until finely ground.
- Add 6 tablespoons salted butter (room temperature) to the Oreo crumbs and pulse until the butter is fully incorporated and the mixture holds together when pressed.
- Transfer the Oreo mixture to the prepared pan and press into an even layer using your fingers or the bottom of a flat measuring cup. Chill the crust in the freezer for 20 minutes.
- While the crust chills, melt 1 cup salted butter (use microwave or stovetop) and let it cool slightly if very hot.
- In a large bowl, combine the melted 1 cup salted butter, 2 cups graham cracker crumbs, 2 cups powdered sugar, and 1 cup of the 1¼ cups creamy peanut butter. Stir until the mixture is smooth and evenly combined.
- Remove the pan from the freezer and spread the peanut-butter filling evenly over the chilled Oreo crust. Smooth the top with a spatula.
- Reserve the remaining ¼ cup creamy peanut butter. In a heatproof bowl, combine that reserved ¼ cup peanut butter with 1½ cups semi-sweet or milk chocolate chips. Melt together until smooth—either in the microwave (stirring every 30 seconds) or over a double boiler—stirring frequently to prevent burning.
- Pour the melted chocolate–peanut butter mixture over the peanut-butter layer and spread evenly with a spatula.
- Refrigerate the assembled bars for at least 1 hour to set. Use the parchment overhang to lift the slab from the pan and cut into bars. Store leftovers in the refrigerator.