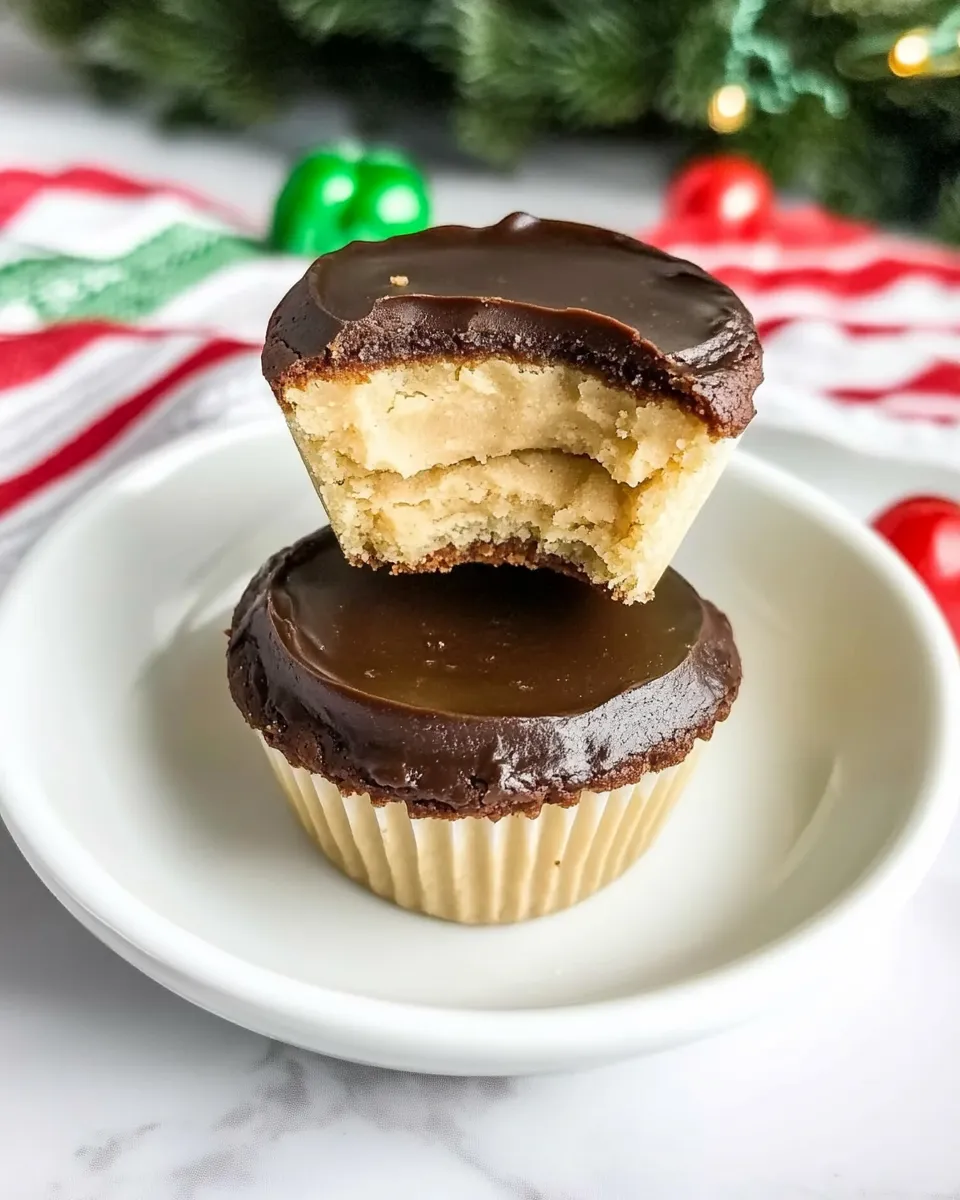
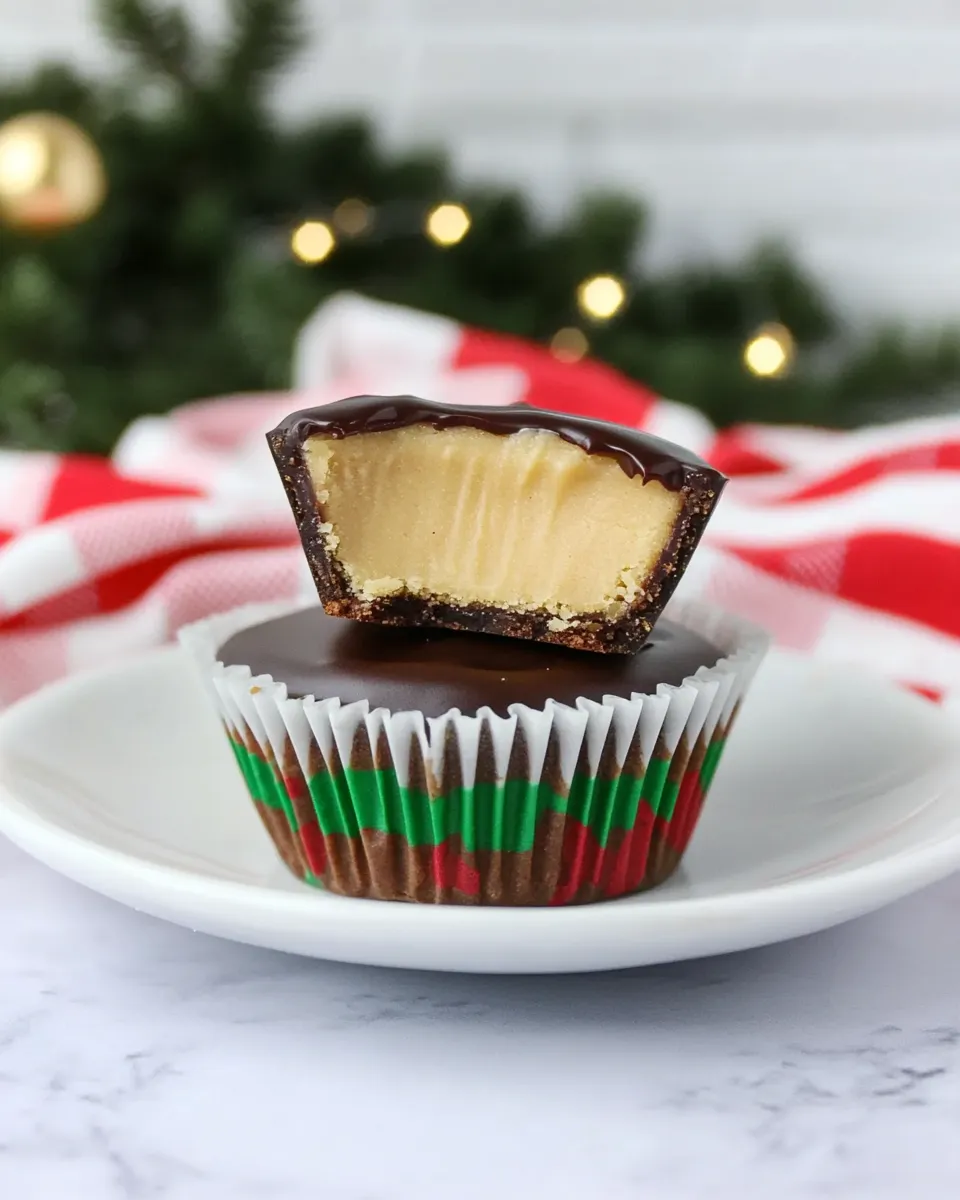
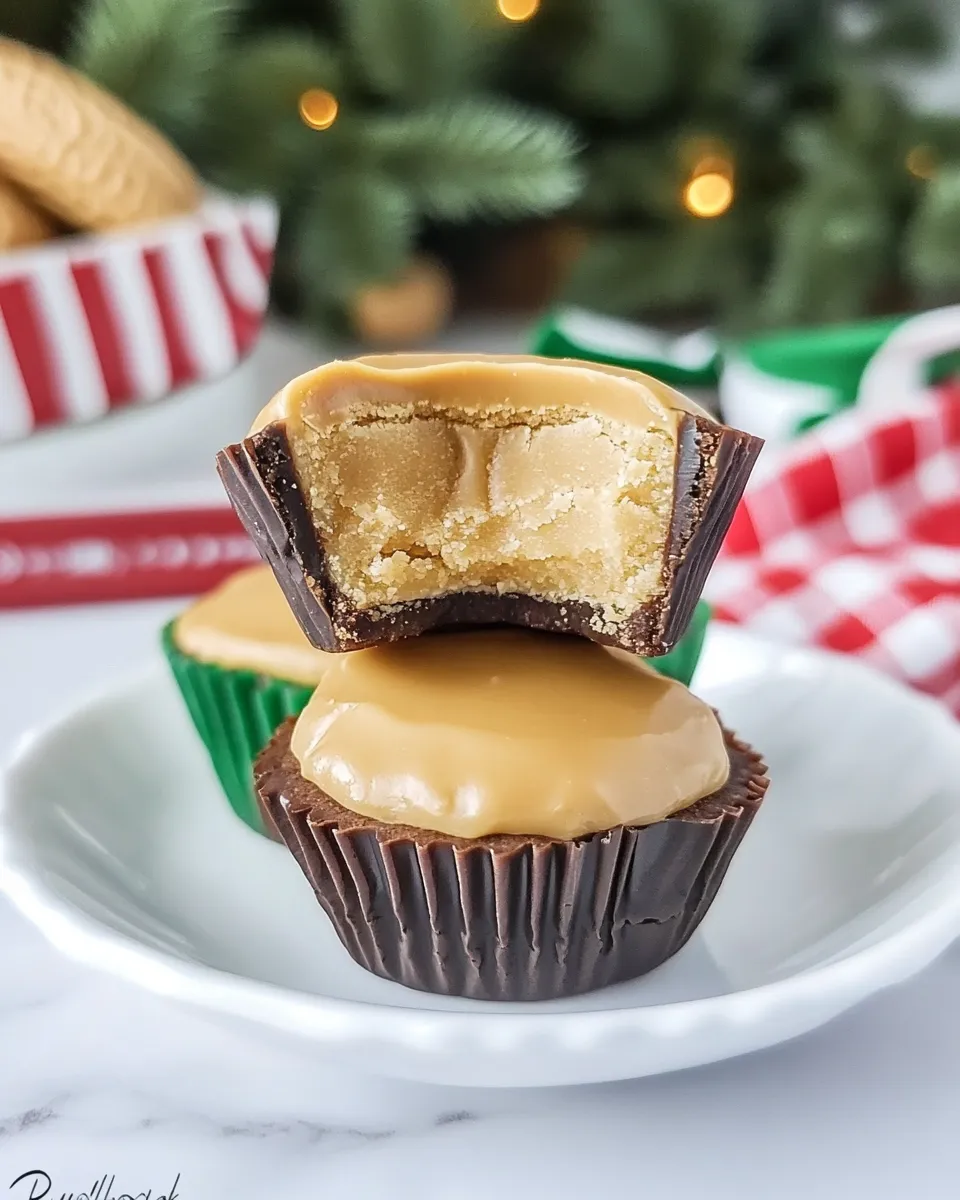
These Peanut Butter Cookie Cups are the kind of snack that disappears faster than you expect at a party. Crisp at the edges, tender and puffy on top, each cup cradles a little chocolate surprise once you press a mini candy into the warm center. They’re simple to pull together with pantry-friendly ingredients and a short oven time—perfect for an afternoon bake or a last-minute dessert.
I test this recipe a lot when I need an easy crowd-pleaser. The dough comes together in one bowl, the portioning is forgiving, and the final step—pressing in a miniature Reese’s or Rolo—feels delightfully hands-on. If you like a salty-sweet combo and little bite-sized treats, these will be on rotation.
Below you’ll find a clear shopping list, the exact ingredients and steps used in my kitchen, plus practical tips for substitutions, gear, storage, and common pitfalls. No fuss. Just straightforward directions so your batch comes out consistent every time.
Shopping List
- ½ cup butter, at room temperature — for creaming with sugars and building tender crumb.
- ½ cup sugar — for sweetness and structure.
- ½ cup brown sugar — adds moisture and caramel notes.
- ½ cup creamy peanut butter — the main flavor and fat source.
- 1 egg — binds the dough and helps lift.
- ½ teaspoon vanilla extract — flavor enhancer.
- 1 ½ cups flour — the base of the cookie dough.
- ¾ teaspoon baking soda — leavening to puff the tops.
- ½ teaspoon salt — balances sweetness.
- 48 miniature Reeses or 48 Rolo candies (or a combination) — the chocolate center.
- Festive M & M candies to garnish, optional — for a colorful finish.
- Two mini muffin tins and paper liners or a flour-oil spray — pans and liners referenced in the method.
Peanut Butter Cookie Cups, Made Easy
Ingredients
- ½ cup butter, at room temperature — softens and adds richness; cream with sugars for aeration.
- ½ cup sugar — for sweetness and slight crisping of edges.
- ½ cup brown sugar — keeps centers moist and adds depth of flavor.
- ½ cup creamy peanut butter — provides peanut flavor and tenderness.
- 1 egg — binds ingredients and contributes to structure.
- ½ teaspoon vanilla extract — rounds and lifts flavors.
- 1 ½ cups flour — the dry structure; measure gently for accuracy.
- ¾ teaspoon baking soda — gives the cookies their puff.
- ½ teaspoon salt — balances sweetness; do not omit unless needed for diet reasons.
- 48 miniature Reeses or 48 Rolo candies (or a combination) — the chocolate-peanut center; unwrap as needed before use.
- Festive M & M candies to garnish, optional — press onto the chocolate for decoration before it sets.
- Preheat oven to 375°F. Line two mini muffin tins with paper liners or grease them well with a flour-oil spray (like Bakers Joy). Set the tins aside.
- Unwrap the miniature Reeses and/or Rolos if necessary and set the candies aside.
- In a large mixing bowl, beat the ½ cup butter, ½ cup sugar, ½ cup brown sugar, and ½ cup creamy peanut butter together until light and fluffy (use an electric mixer or a wooden spoon).
- Add the 1 egg and ½ teaspoon vanilla extract to the bowl and mix until combined.
- In a medium bowl, whisk together the 1 ½ cups flour, ¾ teaspoon baking soda, and ½ teaspoon salt.
- Stir the dry ingredients into the wet ingredients with a spoon until just incorporated; do not overmix.
- Use a small cookie scoop to form 1-inch dough balls. Place one dough ball into each muffin well—do not flatten the balls.
- Bake the cookie balls for 10–12 minutes, or until the tops are puffed and the edges are set.
- Remove the tins from the oven and immediately press one miniature candy into the center of each warm cookie (if any candies are still wrapped, unwrap them before pressing). Press gently to create a cup shape without pushing the candy to the bottom.
- If using Festive M & M candies, press one M & M onto the top of each chocolate piece before the chocolate sets.
- Let the cookie cups cool completely in the pan so the chocolate firms up, then remove them from the tins and serve.
What Makes This Recipe Special
There are two simple design choices here that make these cookie cups work: the dough is dense enough to hold a candy without collapsing, yet soft enough to form a cup; and the timing—pressing the candy into warm cookies—creates a glossy, snug chocolate center. Functionally, the peanut butter brings salt and fat, which balances the sugar and supports the structure. The result is a multi-textured bite: slightly crisp edges, pillowy interior, and a melty chocolate surprise.
Texture-Safe Substitutions
If you need swaps for texture reasons, focus on equivalents that keep fat and moisture similar to the originals. A few safe approaches:
- For stickiness or spread control: use creamy peanut butter exactly as directed; chunkier nut butters change the crumb and may cause uneven baking.
- If you must replace butter, pick a block-style plant-based butter with similar water content to avoid drier or oilier results.
- For flour: a one-to-one cup-for-cup gluten-free blend is the most reliable option to maintain the cookie’s texture; you’ll still rely on the same volume of dry ingredient.
Gear Checklist
- Two mini muffin tins — the cups shape and size depend on these.
- Paper liners or a flour-oil spray — liners make cleanup and release easier.
- Electric mixer or sturdy wooden spoon — for creaming the butter and sugars.
- Small cookie scoop (1-inch) — ensures even sizing so all cups bake uniformly.
- Bowls for wet and dry ingredients — keeps assembly tidy.
Avoid These Traps
Small mistakes make big differences with this recipe. Watch for these common traps:
- Don’t overmix the dough once the flour is added. Overworking develops gluten and yields dense, tough cookies.
- Don’t press the candy too hard into the warm cookie. You want a cup, not a tunnel to the bottom—press gently.
- If the butter isn’t at room temperature, creaming won’t aerate properly. That can lead to flatter cookies.
- Using a scoop smaller or larger than 1 inch changes bake time and the cup-to-candy ratio—stick with the specified size for predictable results.
Adaptations for Special Diets
Quick notes for common dietary needs. These are high-level options—test one small batch first to confirm texture and flavor.
- Gluten-free: try a cup-for-cup gluten-free flour blend in place of the 1 ½ cups all-purpose flour; expect similar behavior but watch texture closely.
- Dairy-free: replace butter with a solid plant-based butter that’s intended for baking and keep the same quantity; the dough will be similar in handling.
- Nut allergies: this recipe centers on peanut butter, so avoid if there’s a peanut allergy. For a non-peanut option, look for an appropriate allergen-free spread designed for cookies—but swap cautiously and test since flavor and fat content differ.
- Egg-free: commercial egg replacers or flax/chia “eggs” can work as binding agents; start with the equivalent binding amount recommended by the replacer’s package and expect differences in lift and texture.
What Could Go Wrong
Here are failure modes and how to fix them:
- Cookies collapse after baking: likely over-proofed dough or too soft a pan surface. Make sure butter was creamed properly and the dough wasn’t overmixed. Also check oven temperature with an oven thermometer; low heat can cause collapse.
- Candies sink to the bottom: that means the dough was too soft or you pressed too forcefully. Press gently and stop when you feel the top give.
- Candies don’t adhere or chocolate cracks: if you remove the cookies too early, the chocolate may not set properly. Let them cool completely in the pan so chocolate firms up.
- Uneven baking between pans: rotate tins mid-bake if your oven has hot spots, and use identical pans for consistent results.
Storage & Reheat Guide
Store cooled cookie cups in a single layer in an airtight container at room temperature for up to 3 days. If the environment is warm and the chocolate softens, keep them in the refrigerator—but bring to room temperature for 20–30 minutes before serving so the cookie softens and the chocolate becomes more pleasant to bite into.
To refresh slightly stale cups, warm them in a 300°F oven for 3–5 minutes; let cool briefly before serving. Avoid microwaving for reheating as the chocolate can over-soften unevenly and the cookie texture may degrade.
Frequently Asked Questions
Can I freeze these?
Yes. Freeze fully cooled cookie cups in a single layer on a sheet until firm, then transfer to a freezer-safe bag or container. They’ll keep well for up to one month. Thaw at room temperature before serving.
Can I use natural peanut butter?
Natural peanut butter has higher oil separation and a looser texture, which can make the dough slightly softer and spread more. If you use it, chill the dough briefly before portioning or reduce other added liquid in your kitchen that day. Expect a slightly different crumb.
Do I have to use mini candies?
The recipe is sized for miniature candies so each cookie cup holds one. Larger candies will push through the cookie or require using larger muffin wells. Stick to mini candies for the intended balance.
Final Bite
Peanut Butter Cookie Cups are unpretentious and effective: just a handful of ingredients, one pan, and a small finishing move. They travel well, please kids and adults alike, and are forgiving enough for home bakers at any skill level. Make a tray for a potluck and you’ll be asked for the recipe. Or bake a batch as a small, satisfying project that delivers big comfort.
If you try them, tell me whether you went with Reeses, Rolos, or a mix—and whether you added an M & M on top for color. Happy baking.
Peanut Butter Cookie Cups
Equipment
- mini muffin tins
- Paper liners
- flour-oil spray
- Mixing Bowls
- Electric Mixer
- Wooden Spoon
- Cookie Scoop
- Oven
Ingredients
Ingredients
- 1/2 cup butter at room temperature
- 1/2 cup sugar
- 1/2 cup brown sugar
- 1/2 cup creamy peanut butter
- 1 egg
- 1/2 teaspoon vanilla extract
- 1 1/2 cups flour
- 3/4 teaspoon baking soda
- 1/2 teaspoon salt
- 48 miniature Reeses or 48 Rolo candies or a combination
- Festive M & M candies to garnish optional
Instructions
Instructions
- Preheat oven to 375°F. Line two mini muffin tins with paper liners or grease them well with a flour-oil spray (like Bakers Joy). Set the tins aside.
- Unwrap the miniature Reeses and/or Rolos if necessary and set the candies aside.
- In a large mixing bowl, beat the ½ cup butter, ½ cup sugar, ½ cup brown sugar, and ½ cup creamy peanut butter together until light and fluffy (use an electric mixer or a wooden spoon).
- Add the 1 egg and ½ teaspoon vanilla extract to the bowl and mix until combined.
- In a medium bowl, whisk together the 1 ½ cups flour, ¾ teaspoon baking soda, and ½ teaspoon salt.
- Stir the dry ingredients into the wet ingredients with a spoon until just incorporated; do not overmix.
- Use a small cookie scoop to form 1-inch dough balls. Place one dough ball into each muffin well—do not flatten the balls.
- Bake the cookie balls for 10–12 minutes, or until the tops are puffed and the edges are set.
- Remove the tins from the oven and immediately press one miniature candy into the center of each warm cookie (if any candies are still wrapped, unwrap them before pressing). Press gently to create a cup shape without pushing the candy to the bottom.
- If using Festive M & M candies, press one M & M onto the top of each chocolate piece before the chocolate sets.
- Let the cookie cups cool completely in the pan so the chocolate firms up, then remove them from the tins and serve.