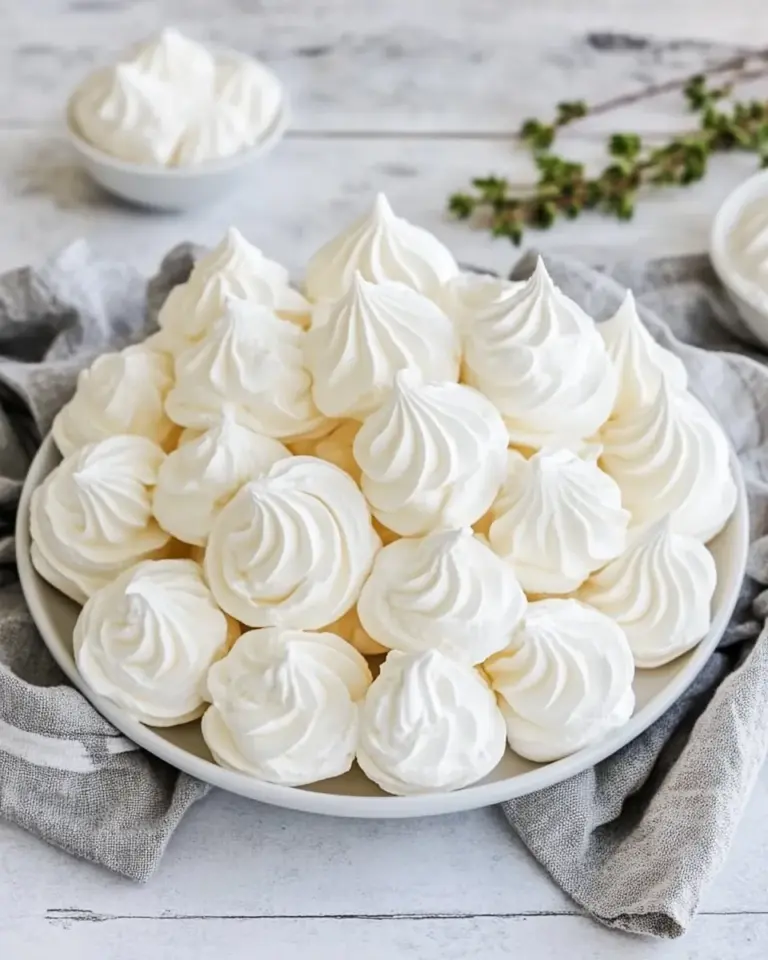
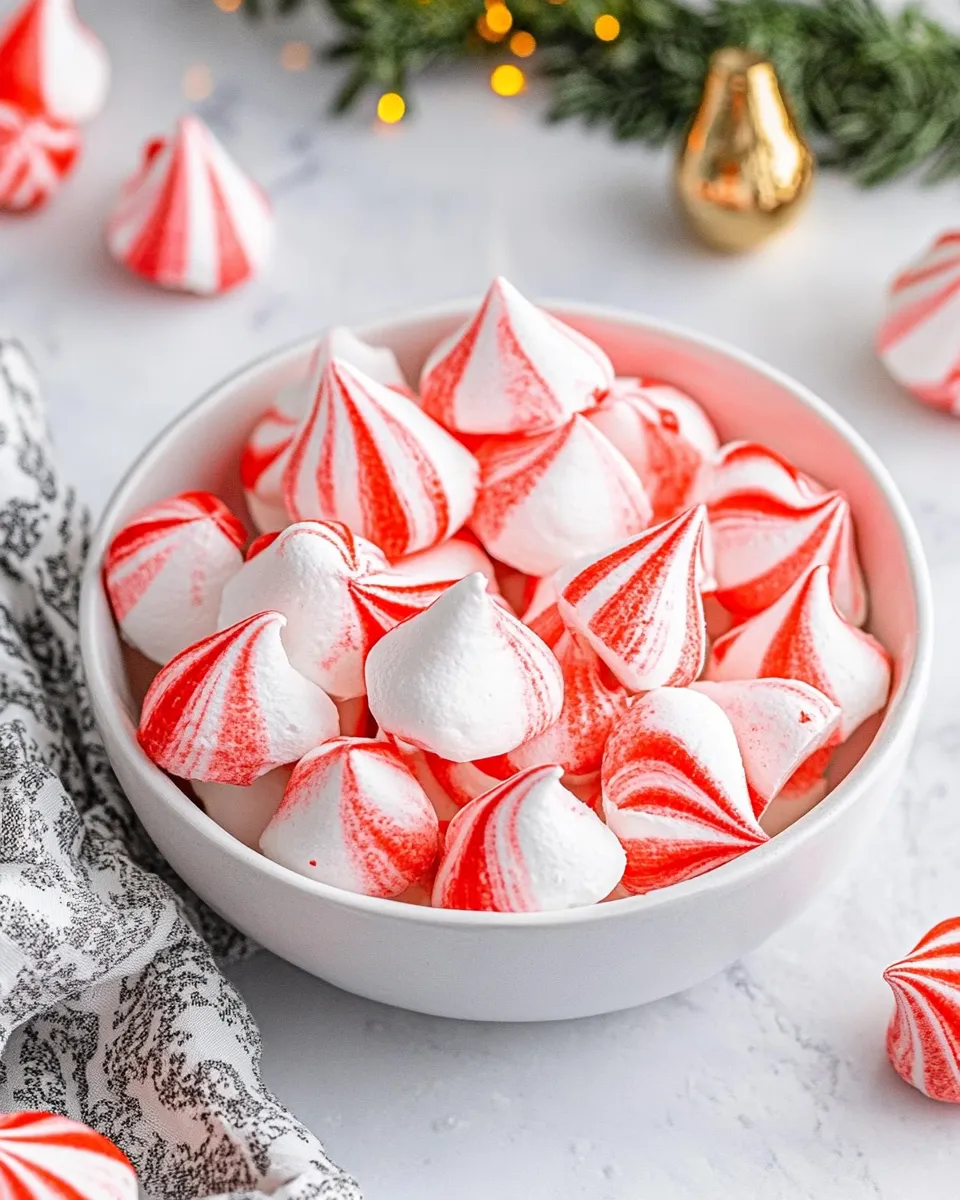
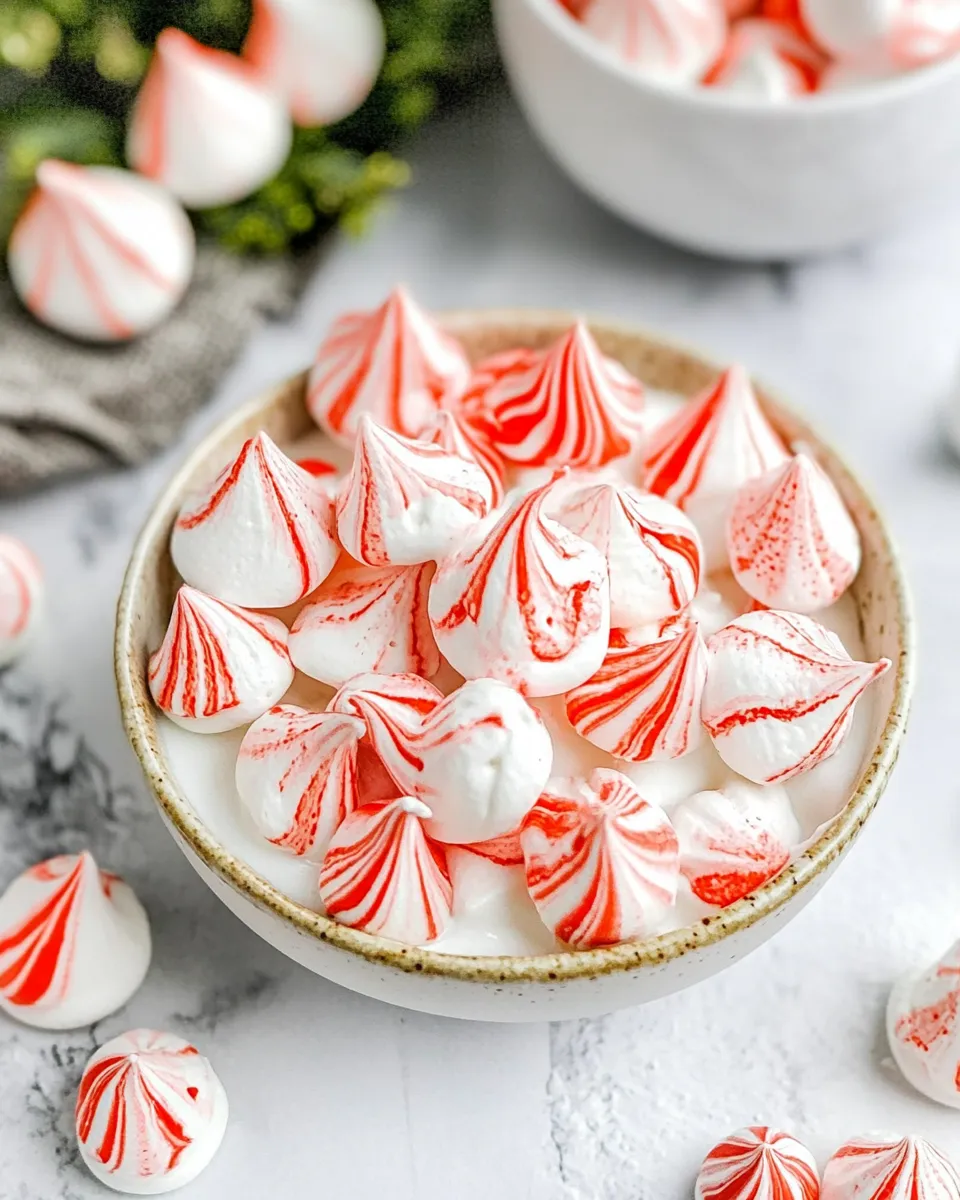
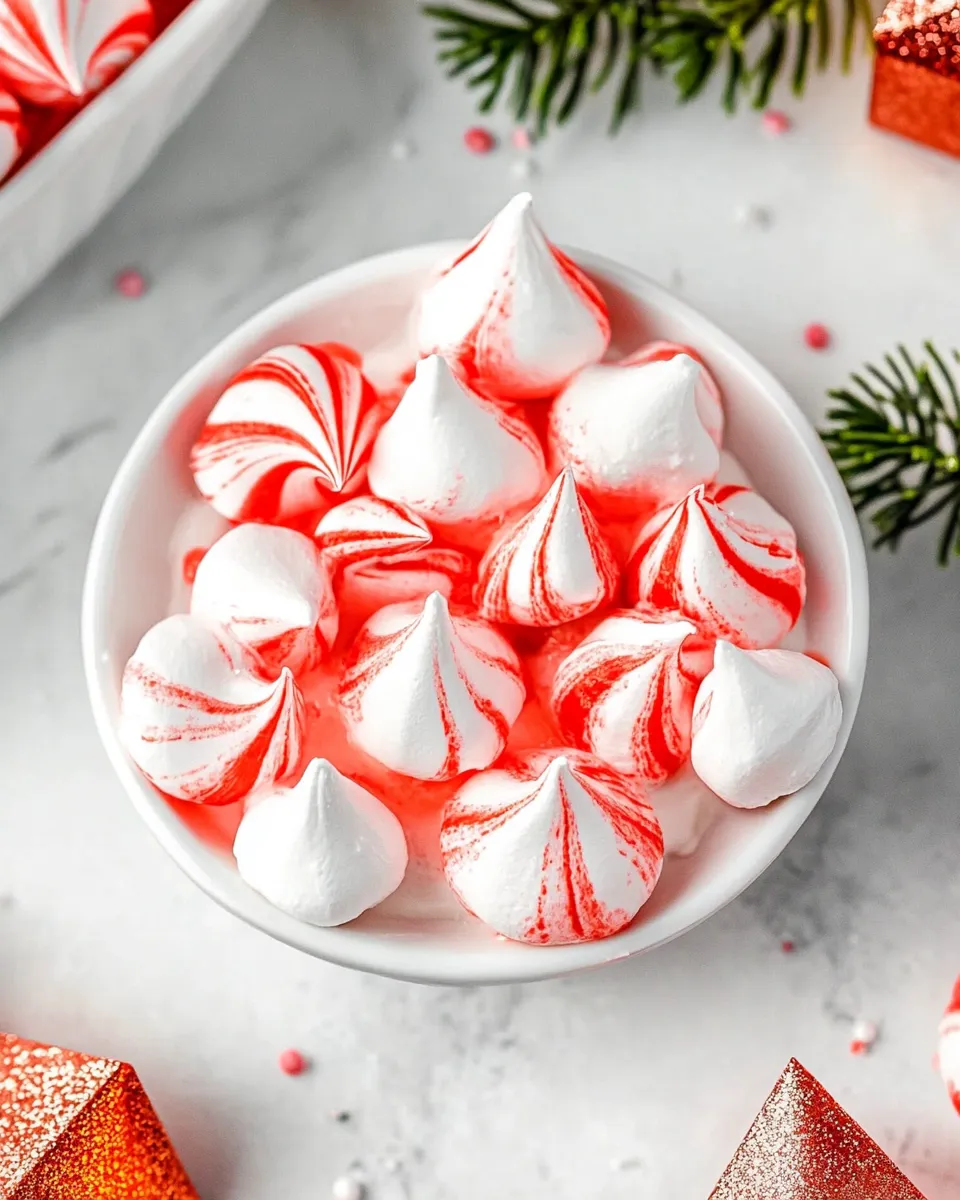
These peppermint meringue kisses are one of those small, elegant treats that feel special even when you serve a handful from a simple jar. They’re crisp on the outside, light and almost marshmallowy inside, and the peppermint keeps them bright and festive—perfect for holiday trays, gifts, or a delicate after-dinner bite. I make them when I want something that looks thoughtful without hours of fuss.
The method is straightforward but precise. Temperatures, whisking time, and handling matter. Follow the steps and you’ll be rewarded with glossy, pale meringues streaked with a festive red ribbon. I’ll walk you through the ingredients, the exact method, sensible swaps, the tools I rely on, and common pitfalls so you can skip the mistakes I made the first few times.
Read through the whole post once before starting. Meringues are forgiving in flavor but exacting in technique. With a timer, a good whisking setup, and patience during the bake and cooldown, you’ll get consistent results.
What We’re Using
This recipe uses classic meringue building blocks: egg whites and sugar, lifted into glossy peaks and flavored with peppermint. The red gel gives the kisses their candy-cane look. Below are the exact ingredients and short notes on their roles.
Ingredients
- 1 ½ cups granulated sugar — Provides structure and sweetness; dissolve fully for smooth, stable meringue.
- 6 large egg whites — The primary structure; room temperature works best for volume.
- ¼ teaspoon lemon juice — A small acid stabilizer to help the whites hold their shape.
- 1 pinch salt — Enhances flavor and balances sweetness.
- ½ teaspoon vanilla extract — Adds background warmth and complexity.
- 1 teaspoon peppermint extract — The signature flavor; use a quality extract to avoid bitterness.
- Red gel food coloring — For the striped effect; gel concentrates color without thinning the meringue.
Make Peppermint Meringue Kisses: A Simple Method
- Preheat the oven to 200°F and line two baking sheets with parchment paper.
- Place about 1 inch of water in a medium saucepan and bring to a slight simmer over medium-low heat.
- In a heatproof bowl, combine the 6 large egg whites and 1 ½ cups granulated sugar. Whisk briefly just to break up the sugar and combine.
- Set the bowl over the simmering water so the bowl does not touch the water (double boiler). Whisk constantly until the sugar has dissolved and the mixture reaches 140°F on an instant-read thermometer.
- Remove the bowl from the heat. Fit the bowl onto a stand mixer with the whisk attachment.
- Whip the egg white mixture on medium-high speed until soft peaks form (peaks that bend over), then add ¼ teaspoon lemon juice, 1 pinch salt, ½ teaspoon vanilla extract, and 1 teaspoon peppermint extract.
- Continue whipping on high speed until stiff, glossy peaks form and the meringue pulls away slightly from the sides of the bowl (peaks should stand straight up). This can take about 10–15 minutes.
- Prepare a piping bag: either snip the end for a round tip or fit a large star tip. Use a toothpick to draw three vertical lines of red gel food coloring up the inside of the piping bag to create red stripes when you pipe.
- Spoon the meringue into the prepared piping bag and twist the top closed. Fill the bag no more than halfway to two-thirds full to maintain control while piping.
- Pipe four small dots of meringue under the four corners of each parchment-lined sheet to anchor the paper.
- Pipe quarter-sized kisses: hold the bag close to the parchment, pipe a small dot, then slow the flow and lift the bag up to form the classic kiss peak. Leave about 1/2 inch between kisses and continue filling the sheet, working steadily.
- Bake the meringues for 1½ to 2 hours, until the outsides are crisp to the touch.
- Turn off the oven and leave the pans inside until completely cool to the touch. Once fully cooled, remove the pans from the oven.
- Gently lift the meringues from the parchment. Store in an airtight container or serve immediately. Do not refrigerate or leave uncovered to avoid the meringues becoming tacky or weepy.
Why You’ll Love This Recipe
These kisses are a small project with a rewarding result. They look impressive but require only pantry staples and a bit of patience. The peppermint extract gives a clear, seasonal flavor that pairs beautifully with the pure sweetness of the meringue. The little red stripes add a homemade, festive touch that makes them giftable.
They’re also low-effort to portion and present: no cutting, no messy fillings, and they travel well if stored correctly. If you want to add a pop on a dessert plate, three of these with a chocolate drizzle create a refined look in seconds.
Swap Guide
- Extract swap: If peppermint isn’t your thing, replace the peppermint extract with more vanilla or 1/2 teaspoon almond extract. Note: different extracts vary in strength—start small.
- Coloring options: Use other gel colors for themed events. Gel coloring won’t change meringue texture like liquid dyes can.
- Sugar alternatives: This method depends on granulated sugar. Powdered sugar won’t behave the same because of cornstarch; if you want a finer texture, pulse granulated sugar briefly in a blender—but keep the measured amount the same.
- Flavor additions: Fold in a small amount of finely grated orange zest or a drop of citrus extract for a bright twist, but add sparingly so you don’t unbalance the structure.
Recommended Tools
- Stand mixer with whisk attachment — A strong motor gives consistent volume and saves arm fatigue.
- Heatproof mixing bowl — For the double boiler step; stainless steel or glass works fine.
- Instant-read thermometer — To check the sugar/egg white mixture reaches 140°F accurately.
- Piping bag and tip or snip — A large round or star tip gives different finished textures; a snip creates simple domes.
- Parchment paper and baking sheets — Essential to prevent sticking and to allow the meringues to dry properly.
- Toothpick — For drawing the gel stripes inside the piping bag.
Learn from These Mistakes
Here are the missteps that most often derail an otherwise perfect meringue:
- Using cold egg whites: They whip better at room temperature. If you forget to bring them out, the meringue may take much longer to reach stiff peaks.
- Undissolved sugar: If sugar isn’t fully dissolved in the double boiler step, you’ll get a grainy texture and unstable peaks. Test by rubbing a small amount between fingertips—no grit should be felt.
- Over-whipping or under-whipping: Under-whipped meringue won’t hold peaks; over-whipped can become dry and break. Watch for glossy, stiff peaks that stand straight.
- Opening the oven too early: Let the meringues cool inside the oven completely. Early removal can cause cracking or hollowness.
- Storing incorrectly: Refrigeration or leaving uncovered invites moisture and makes meringues tacky. Keep them airtight at room temperature.
Seasonal Ingredient Swaps
Small swaps make these kisses work year-round.
- Winter holidays: Stick with peppermint and red—classic and festive.
- Valentine’s Day: Use pink gel instead of red and add a drop less peppermint for a gentler profile.
- Spring and Easter: Swap peppermint for lemon zest and add a pale yellow stripe for a bright, floral note.
- Autumn: Try a touch of cinnamon or a very small amount of molasses-flavored extract in place of peppermint for warmth (use sparingly).
Cook’s Commentary
I learned to respect the slow bake and cool. The low oven and the long cooling period are not optional; they gently dry out the meringue so you get that crisp shell and tender interior. Also, piping technique determines how pretty your kisses look. Keep the bag fairly full but not overloaded, and practice a couple of test kisses on a spare sheet to get the rhythm of piping and lifting.
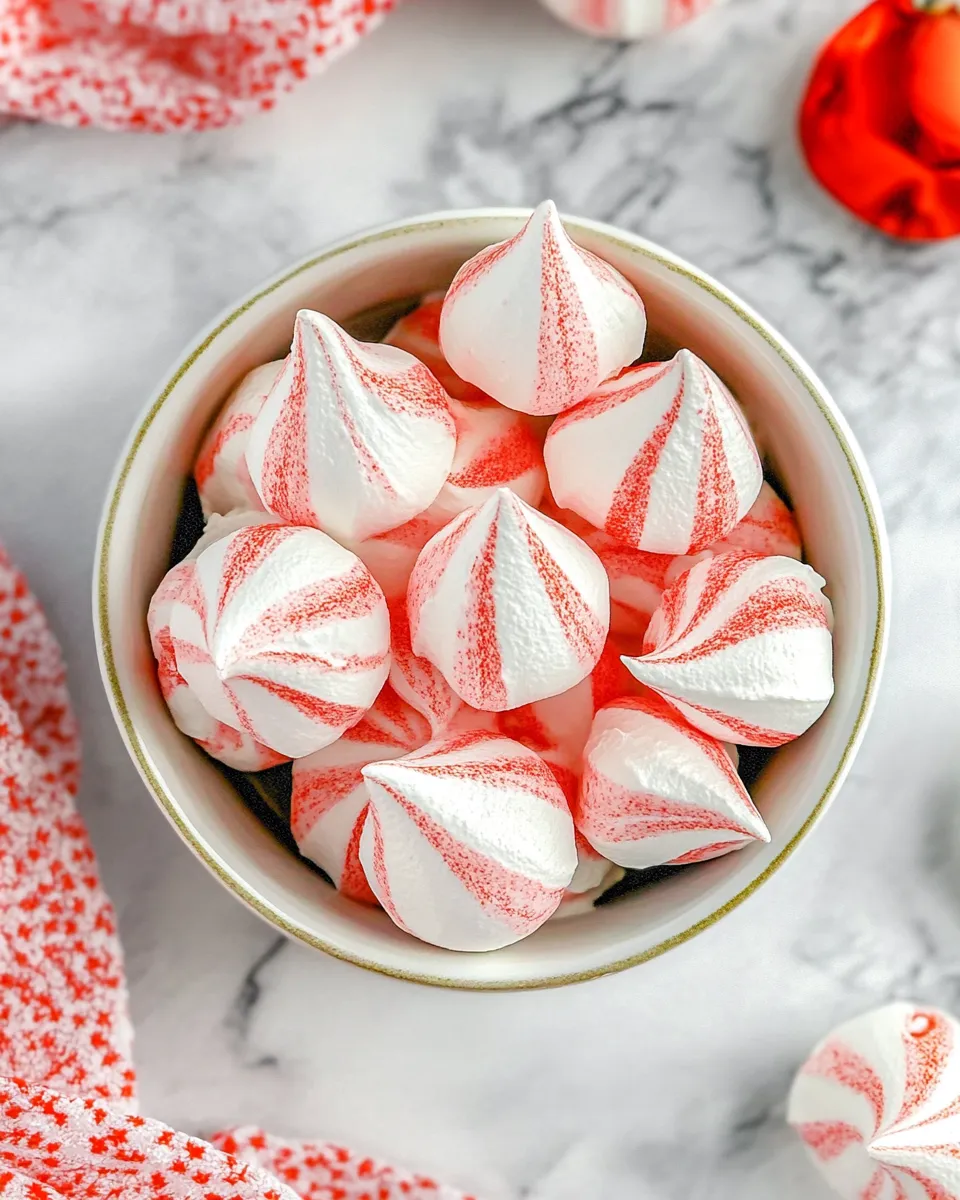
The striped effect is more forgiving than it looks. The gel won’t run into the meringue if you draw the lines carefully inside the bag. A little irregularity gives them charm—if every stripe is identical, they can look machine-made. Aim for an organic handmade look.
Keep-It-Fresh Plan
Store fully cooled meringues in an airtight container at room temperature. Layer them between sheets of parchment if stacking. Do not refrigerate; the fridge’s moisture will soften them. Also avoid storing them near hot or humid appliances—excess moisture is the enemy.
If you need to keep them longer than a week, freezing is an option. Place them in a single layer in a freezer-safe container separated by parchment. Thaw at room temperature in the sealed container to prevent condensation forming on the meringues. Once thawed, use within a day for best texture.
Handy Q&A
Can I make the meringues ahead? Yes. Make and store them in an airtight container at room temperature up to a week. Gift them in a lined box for 2–3 days at most for best texture.
Why did my meringues crack? Rapid temperature changes or opening the oven during the drying time can cause cracks. Cool them in the turned-off oven until they are completely cool to avoid this.
Why are my meringues sticky? Humidity is the usual culprit, as is improper storage. Keep them sealed and at room temperature away from moisture. Avoid making them on very humid days if possible.
Can I use liquid food coloring? You can, but gel color is preferred because it adds color without altering the moisture balance of the meringue.
Wrap-Up
Peppermint Meringue Kisses are a small project with a big payoff. They require a little technique—gentle heat, steady whisking, and patient cooling—but the steps are straightforward and repeatable. Once you master the basic method, you can riff on flavors and colors for every holiday or gathering. Make a batch, keep them dry, and they’ll brighten a plate or a package of gifts with very little fuss.
If you try them, I’d love to hear how your kisses turned out—texture, flavor, and whether you kept the stripes red or tried a different color. Happy piping.
Peppermint Meringue Kisses
Equipment
- Oven
- Baking Sheet
- Parchment Paper
- Saucepan
- Heatproof bowl
- stand mixer with whisk attachment
- Whisk
- Instant Read Thermometer
- Piping Bag
- star tip or round tip
- Toothpick
Ingredients
Ingredients
- 1 1/2 cupsgranulated sugar
- 6 large egg whitesroom temperature
- 1/4 teaspoonlemon juice
- 1 pinchsalt
- 1/2 teaspoonvanilla extract
- 1 teaspoonpeppermint extract
- Red gel food coloring
Instructions
Instructions
- Preheat the oven to 200°F and line two baking sheets with parchment paper.
- Place about 1 inch of water in a medium saucepan and bring to a slight simmer over medium-low heat.
- In a heatproof bowl, combine the 6 large egg whites and 1 ½ cups granulated sugar. Whisk briefly just to break up the sugar and combine.
- Set the bowl over the simmering water so the bowl does not touch the water (double boiler). Whisk constantly until the sugar has dissolved and the mixture reaches 140°F on an instant-read thermometer.
- Remove the bowl from the heat. Fit the bowl onto a stand mixer with the whisk attachment.
- Whip the egg white mixture on medium-high speed until soft peaks form (peaks that bend over), then add ¼ teaspoon lemon juice, 1 pinch salt, ½ teaspoon vanilla extract, and 1 teaspoon peppermint extract.
- Continue whipping on high speed until stiff, glossy peaks form and the meringue pulls away slightly from the sides of the bowl (peaks should stand straight up). This can take about 10–15 minutes.
- Prepare a piping bag: either snip the end for a round tip or fit a large star tip. Use a toothpick to draw three vertical lines of red gel food coloring up the inside of the piping bag to create red stripes when you pipe.
- Spoon the meringue into the prepared piping bag and twist the top closed. Fill the bag no more than halfway to two-thirds full to maintain control while piping.
- Pipe four small dots of meringue under the four corners of each parchment-lined sheet to anchor the paper.
- Pipe quarter-sized kisses: hold the bag close to the parchment, pipe a small dot, then slow the flow and lift the bag up to form the classic kiss peak. Leave about 1/2 inch between kisses and continue filling the sheet, working steadily.
- Bake the meringues for 1½ to 2 hours, until the outsides are crisp to the touch.
- Turn off the oven and leave the pans inside until completely cool to the touch. Once fully cooled, remove the pans from the oven.
- Gently lift the meringues from the parchment. Store in an airtight container or serve immediately. Do not refrigerate or leave uncovered to avoid the meringues becoming tacky or weepy.