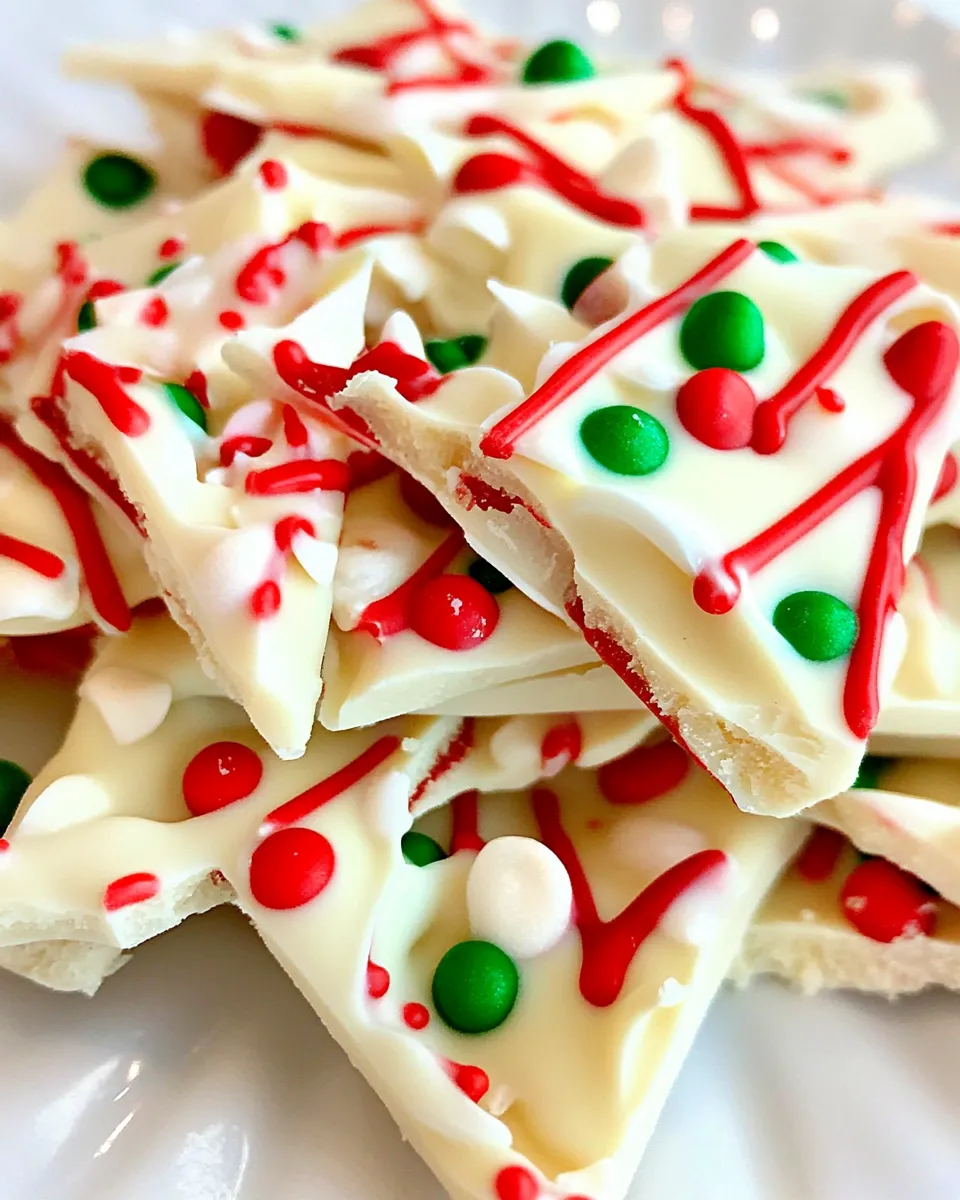
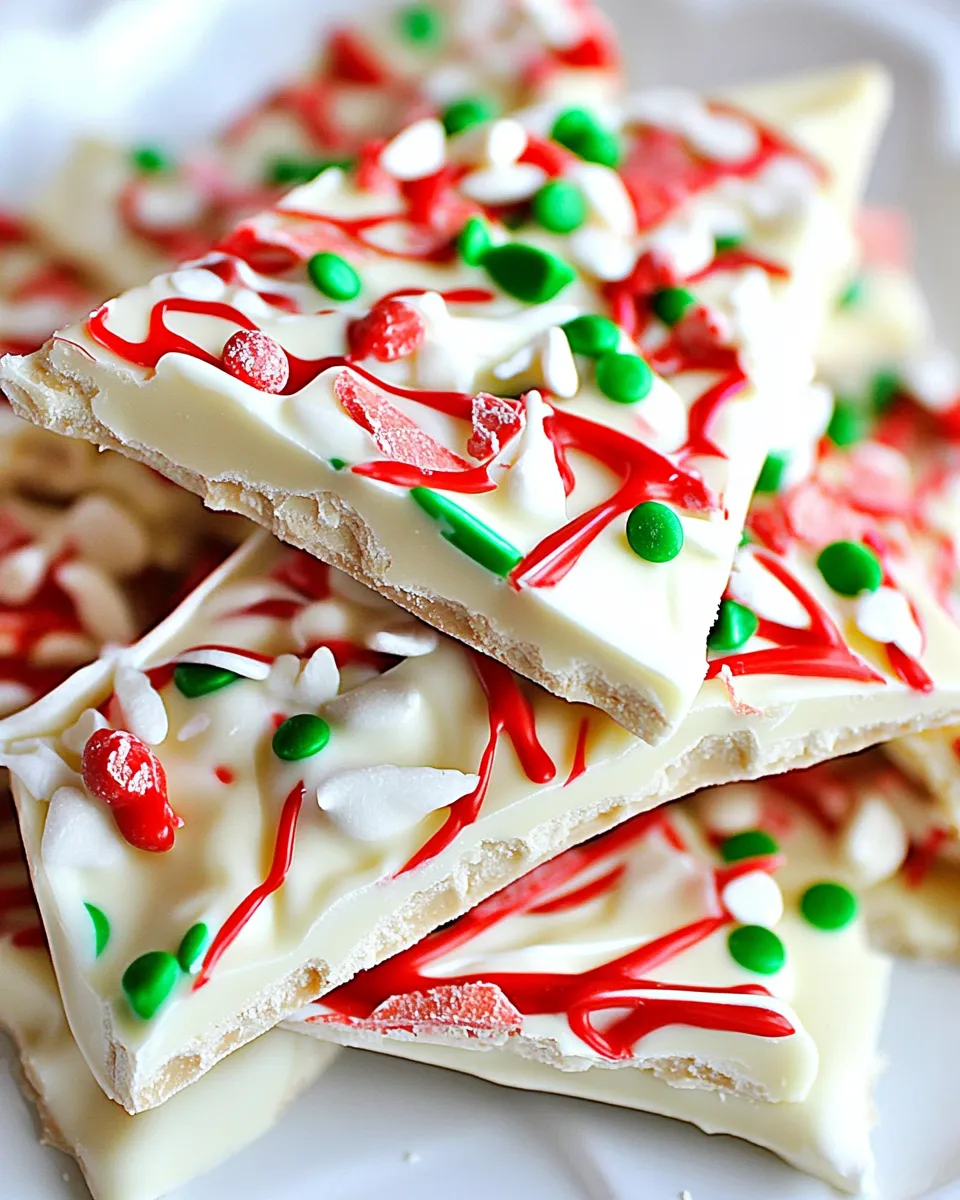
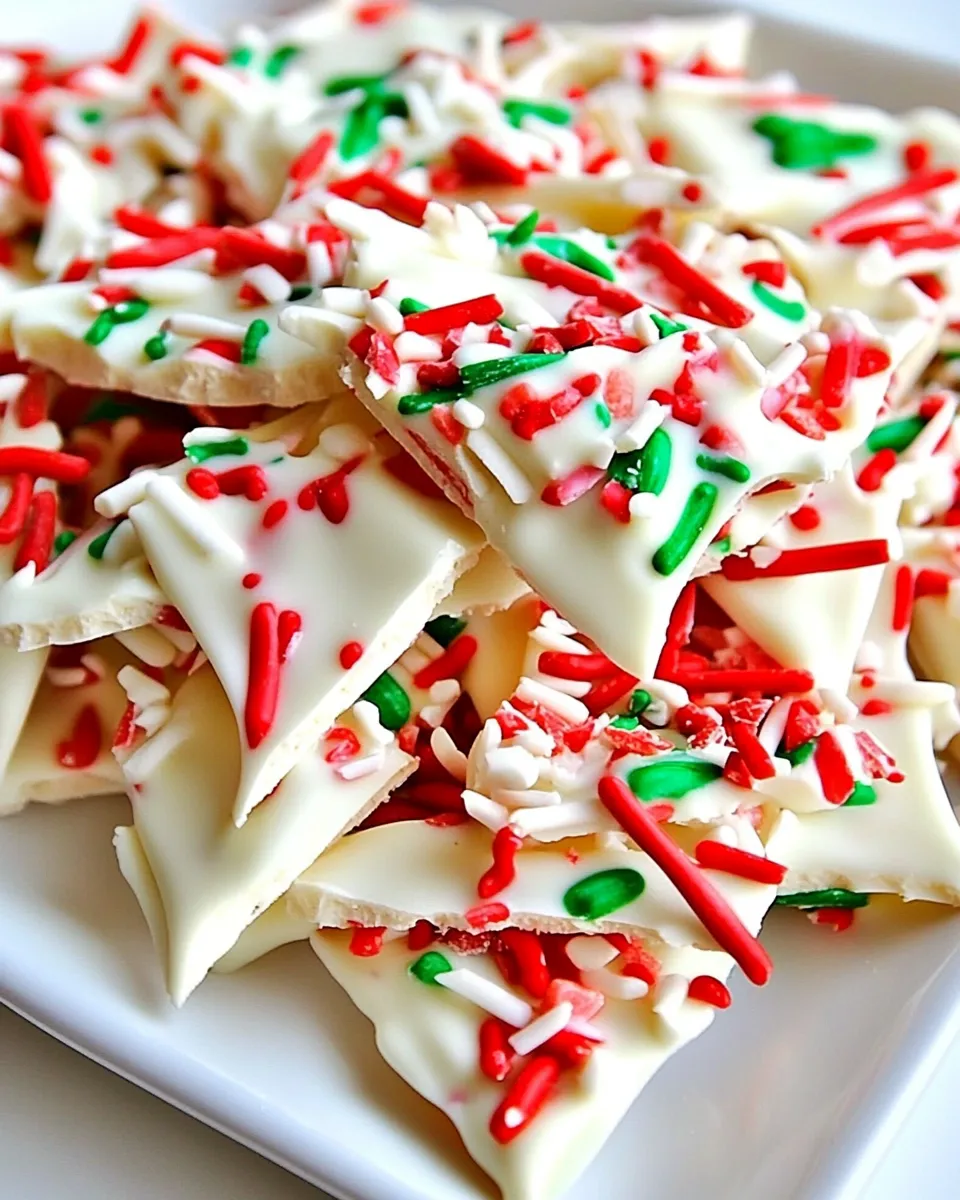
White Chocolate Bark is the kind of recipe I reach for when I need a last-minute hostess gift, a quick party plate, or a festive snack to tuck into cookie boxes. It’s more forgiving than it looks: the marbling and the crunch come together fast, and most of the “work” is waiting for the chocolate to set. You don’t need tempering skills or a candy thermometer—just a few minutes of attentive melting and a steady hand for the swirls.
I like this version because it uses bright white candy melts for a consistently smooth, very-white base, plus two small amounts of colored melts to create swirls. The technique is simple: melt, spread, pipe spirals, drag a knife to marble, and top with sprinkles. The result looks ornate but is ready in under an hour from start to finish, with very little hands-on time.
Below you’ll find everything you need: an ingredients list with quick tips, step-by-step instructions taken in order from the tested method, equipment, troubleshooting, and ideas for adapting the recipe. If you want a festive treat that still feels effortless, this bark is one to keep in your rotation.
The Essentials
Yield: Dependent on how thinly you spread the base — a single baking sheet makes a handful of large pieces or many smaller shards. Active time: about 15–20 minutes. Total time: allow 15–60 minutes depending on how you let the bark set; refrigeration can shorten setting time. Skill level: beginner-friendly.
Why this works: bright white candy melts create a reliably smooth canvas that accepts colored melts well. The piping-in-bags method gives control over the spirals without special tools. Dragging a knife creates an elegant marbled pattern—simple motion, big payoff.
Ingredients
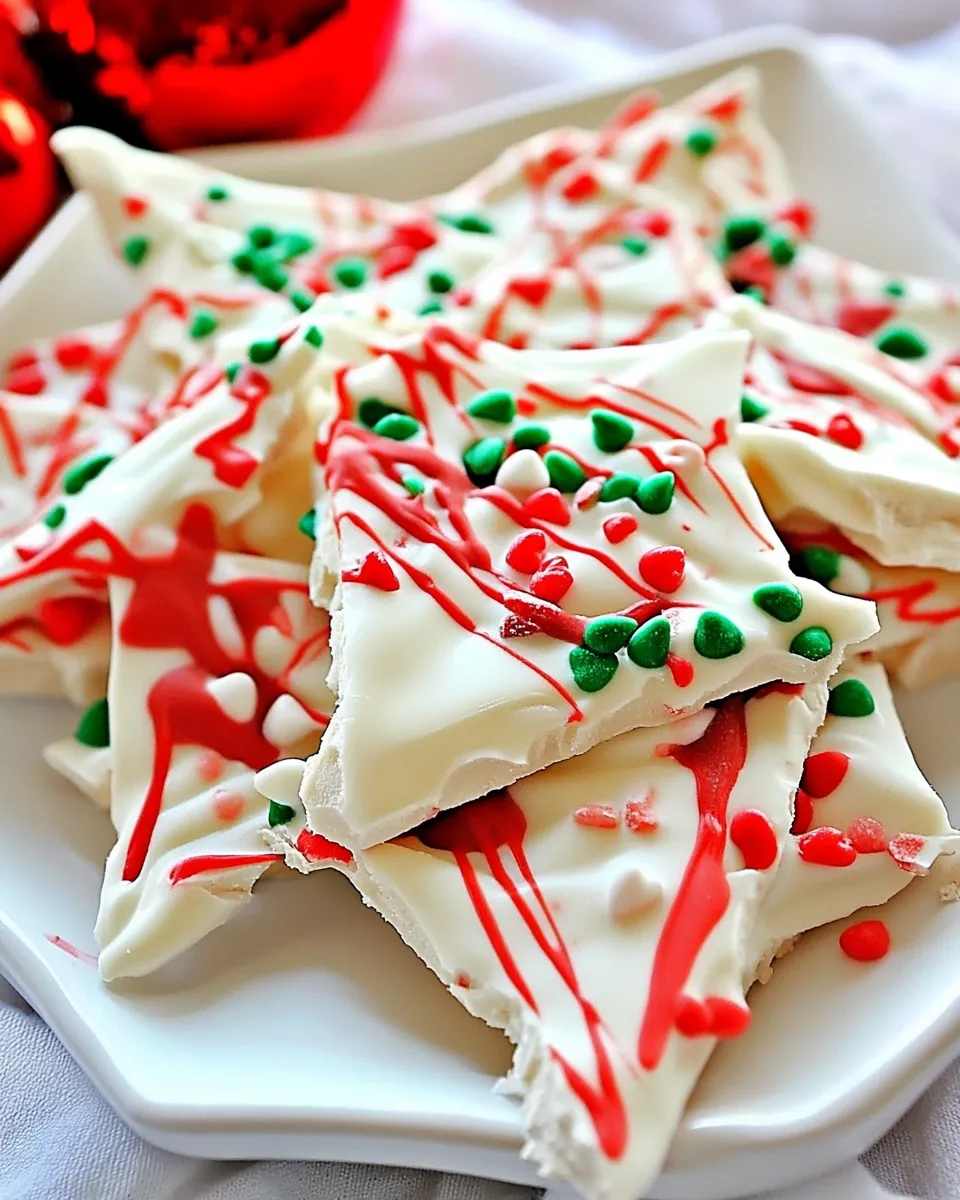
- 12 oz bright white candy melts — the base; choose a bright white to get clean contrast with the colors. Keep the bowl warm so it stays spreadable.
- 2 tbsp dark green candy melts — for the green spiral; a little goes a long way for visual impact.
- 2 tbsp red candy melts — for the red spiral; use vivid red for a holiday look or swap for another color if you prefer.
- holiday sprinkles — for texture and color on top; sprinkle immediately after marbling so they set into the surface.
From Start to Finish: White Chocolate Bark
- Line a baking sheet with parchment paper and set aside.
- Place the 12 oz bright white candy melts in a microwave-safe bowl. Microwave at 50% power for 60 seconds, stir, then return to the microwave at 50% power and heat and stir as needed until the white melts are completely smooth. Keep the bowl warm.
- Put the 2 tbsp dark green candy melts into a resealable sandwich bag (do not seal). Put the 2 tbsp red candy melts into a separate resealable sandwich bag (do not seal).
- Microwave the bags on 50% power for 30 seconds. Carefully remove (bags will be hot), knead each bag to distribute the heat, flip the bags, then return them to the microwave and continue heating and kneading until each color is completely melted and smooth.
- Seal each bag and snip a very small corner off one tip of each bag to make a piping hole.
- Working quickly, spread the melted bright white candy onto the prepared parchment to an even thickness of about 1/8″ using a spatula.
- Starting at the center of the white layer, squeeze the dark green bag to pipe a spiral line outward. Repeat with the red bag to pipe a second spiral over the white (next to or over the green spiral as desired).
- Use a clean, dry knife to drag through the spirals to create marbled swirls (for example, drag the knife from the center outward in several radiating lines). Wipe the knife between passes if it becomes clogged.
- Immediately sprinkle the holiday sprinkles evenly over the surface.
- Let the bark stand at room temperature until fully hardened. If you need it to set quickly, place the baking sheet in the freezer for up to 5 minutes.
Why This Recipe Belongs in Your Rotation
It’s fast: the hands-on portion is short, and most time is passive while the chocolate sets. It’s visually impressive: a little marbling and a sprinkle of decorations make a bakery-style-looking treat without fuss. It’s flexible: scale up to fill trays for parties or make small batches for gift boxes. And it’s forgiving: if a knife swipe looks messy, a few extra swirls or more sprinkles will hide imperfections.
Finally, it’s kid-friendly for assembly jobs (piping and sprinkling) and adult-friendly for presentation. Whether you pack it in a cello bag for neighbors or serve it on a cookie platter, bark has wide appeal.
International Equivalents
Depending on where you shop, “bright white candy melts” can also be labeled as candy coating, confectionery melts, or candy wafers. They’re designed to melt smoothly and set with a sheen, which is why this recipe specifies them. If you can’t find branded candy melts locally, look for white confectionery coating in the baking aisle—anything made for melting and molding will give similar results.
The technique—melting, piping color into a white base, dragging for marbling, and sprinkling—works the same no matter the brand or local name. The key is that the colored melts are a similar formulation so they pipe and set without seizing.
Before You Start: Equipment
- Standard baking sheet and parchment paper (nonstick and stable work best).
- Microwave-safe bowl for melting the white melts.
- Two small resealable sandwich bags for piping colored melts.
- Spatula or offset spatula to spread the white chocolate to an even 1/8″ thickness.
- Sharp knife for dragging through the spirals to marble.
- Optional: a clean towel or oven mitts to protect hands when handling hot bags.
Avoid These Mistakes
Common pitfalls and how to fix them
- Overheating the melts — heat at 50% power and stir frequently. Heat in short bursts; residual heat finishes the job.
- Piping holes that are too large — snip a very small corner so the color lines are thin and controllable.
- Waiting too long to marble — the colored spirals should be manipulated while the white base is still fluid; if the surface skins over, the colors won’t blend.
- Sprinkles after the surface sets — add sprinkles immediately after marbling so they adhere.
- Using a wet knife — always work with a clean, dry knife; moisture causes streaks or seizing in confectionery melts.
Customize for Your Needs
Color swaps are the easiest customization: choose different colored candy melts to match a theme. You can make a pastel variation for spring, bold primary colors for a kids’ party, or metallic-sparkle sprinkles for a New Year’s treat.
If you need smaller or larger pieces, change the thickness slightly or break the bark differently once set. Thinner spreads will yield more, crisp pieces; a thicker spread makes chunkier shards. For gifting, consider breaking into uniform pieces and placing them in cellophane bags with a ribbon.
Pro Perspective
From a professional viewpoint, temperature control and timing are everything here. Melts set quickly once the surface cools—keep materials warm, and work efficiently. Use a shallow, wide bowl for melting the white melts so the surface area helps the chocolate stay fluid and is easier to stir. Keep a towel nearby to catch drips when you’re snipping and piping.
Presentation tip: if you want clean edges for a gift box, cut the bark into a neat rectangle while it’s still slightly warm but fully set—this prevents crumbly breaks. If you prefer rustic shards, simply break along natural lines once fully hardened.
Leftovers & Meal Prep
Storage: Keep the bark in an airtight container at cool room temperature for up to 1–2 weeks, depending on the humidity in your area. If you live in a warm climate, store it in the refrigerator to prevent softening; bring to room temperature before serving to restore the best texture and flavor.
Make-ahead: You can make this several days in advance for parties or gifts. Layer pieces with parchment between them to prevent sticking. Avoid long-term freezing; freezing can sometimes change the texture of the candy melts, so only freeze if you plan to use the bark in baked goods later.
Helpful Q&A
Q: Can I melt these on the stovetop instead of the microwave?
A: Yes. Use a double boiler or a heatproof bowl over simmering water, stirring until smooth. Keep the water at a gentle simmer and make sure no steam or water gets into the melts.
Q: What if my colored melts are too thick to pipe?
A: Knead the bag after short microwave bursts to distribute heat; if necessary, warm the bag briefly again at 50% power in very short increments. Make sure your piping hole is not too large—too big a hole will make the color spread out uncontrollably.
Q: Can I use white chocolate bars instead of candy melts?
A: White chocolate bars behave differently because of cocoa butter content; they may be less forgiving and can seize if overheated. If using bar chocolate, tempering or careful low-heat melting is recommended to get a glossy set.
Q: How do I get really sharp marbling lines?
A: Pipe moderately thin spirals and use a thin, straight-edged knife to drag from center outward in quick, steady strokes. Wipe the knife between passes to avoid dragging clumps.
Before You Go
If you try this White Chocolate Bark, tag a friend who’d love the quick win, or tuck a few pieces into a box and deliver smiles. The technique is small but the results look deliberate and special—perfect for holidays, gatherings, or a simple weeknight treat. Bookmark this page; once you’ve made one batch, you’ll see how little effort it takes to make something pretty and crowd-pleasing.
Want more no-fuss sweets with big presentation? I’ve got a short list of similarly simple treats you can make with minimal tools and maximum payoff—just reach out and I’ll share them next.
White Chocolate Bark
Equipment
- Baking Sheet
- Parchment Paper
- ziplock baggies
Ingredients
Ingredients
- 12 oz.bright white candy melts
- 2 tbspdark green candy melts
- 2 tbspred candy melts
- holiday sprinkles
Instructions
Instructions
- Line a baking sheet with parchment paper and set aside.
- Place the 12 oz bright white candy melts in a microwave-safe bowl. Microwave at 50% power for 60 seconds, stir, then return to the microwave at 50% power and heat and stir as needed until the white melts are completely smooth. Keep the bowl warm.
- Put the 2 tbsp dark green candy melts into a resealable sandwich bag (do not seal). Put the 2 tbsp red candy melts into a separate resealable sandwich bag (do not seal).
- Microwave the bags on 50% power for 30 seconds. Carefully remove (bags will be hot), knead each bag to distribute the heat, flip the bags, then return them to the microwave and continue heating and kneading until each color is completely melted and smooth.
- Seal each bag and snip a very small corner off one tip of each bag to make a piping hole.
- Working quickly, spread the melted bright white candy onto the prepared parchment to an even thickness of about 1/8" using a spatula.
- Starting at the center of the white layer, squeeze the dark green bag to pipe a spiral line outward. Repeat with the red bag to pipe a second spiral over the white (next to or over the green spiral as desired).
- Use a clean, dry knife to drag through the spirals to create marbled swirls (for example, drag the knife from the center outward in several radiating lines). Wipe the knife between passes if it becomes clogged.
- Immediately sprinkle the holiday sprinkles evenly over the surface.
- Let the bark stand at room temperature until fully hardened. If you need it to set quickly, place the baking sheet in the freezer for up to 5 minutes.
Notes
How to Store Chocolate Bark
Can be stored on the counter at room temp in an air-tight container or ziplock back for up to 2 weeks. Store in fridge for up to a month.
Please see the full article for additional topping suggestions.