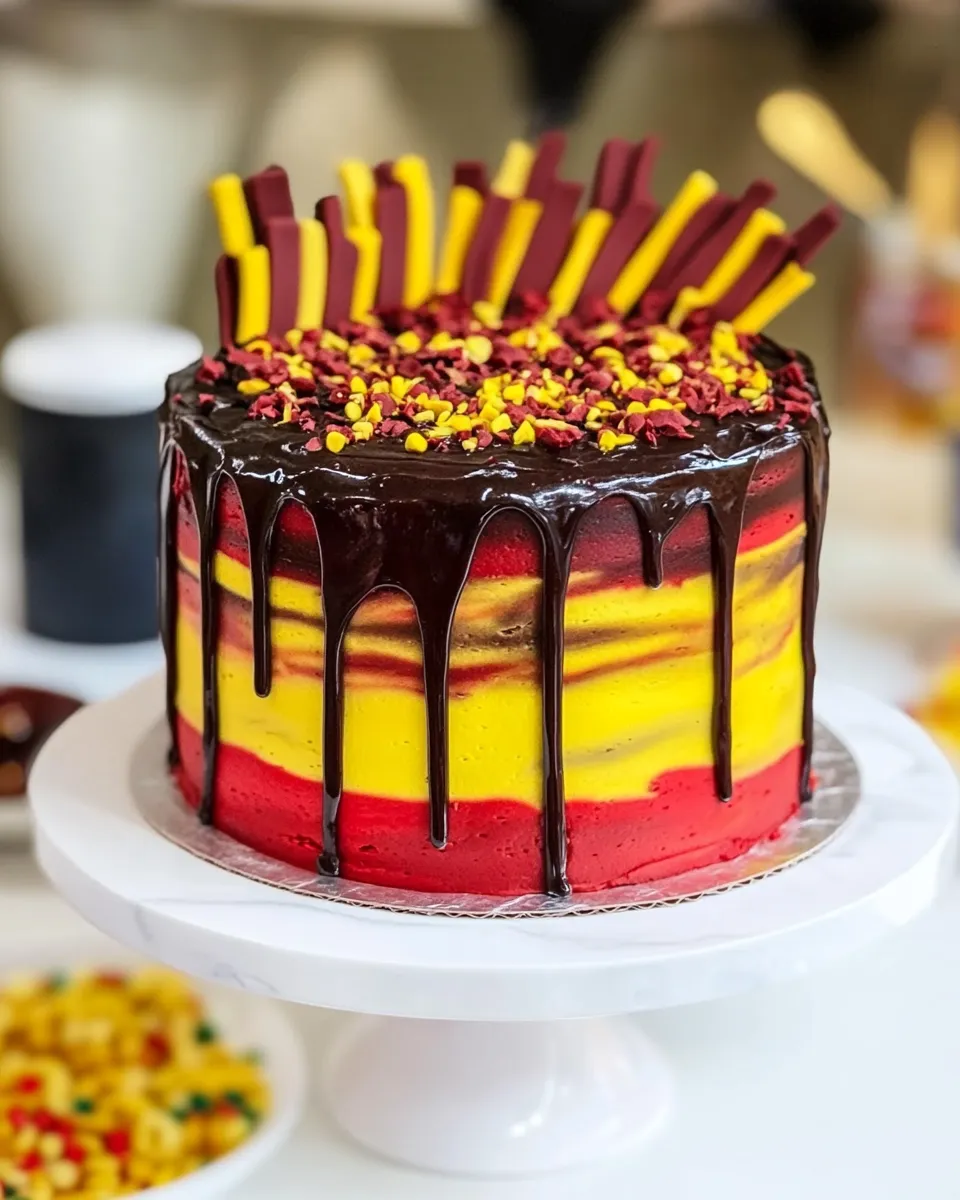
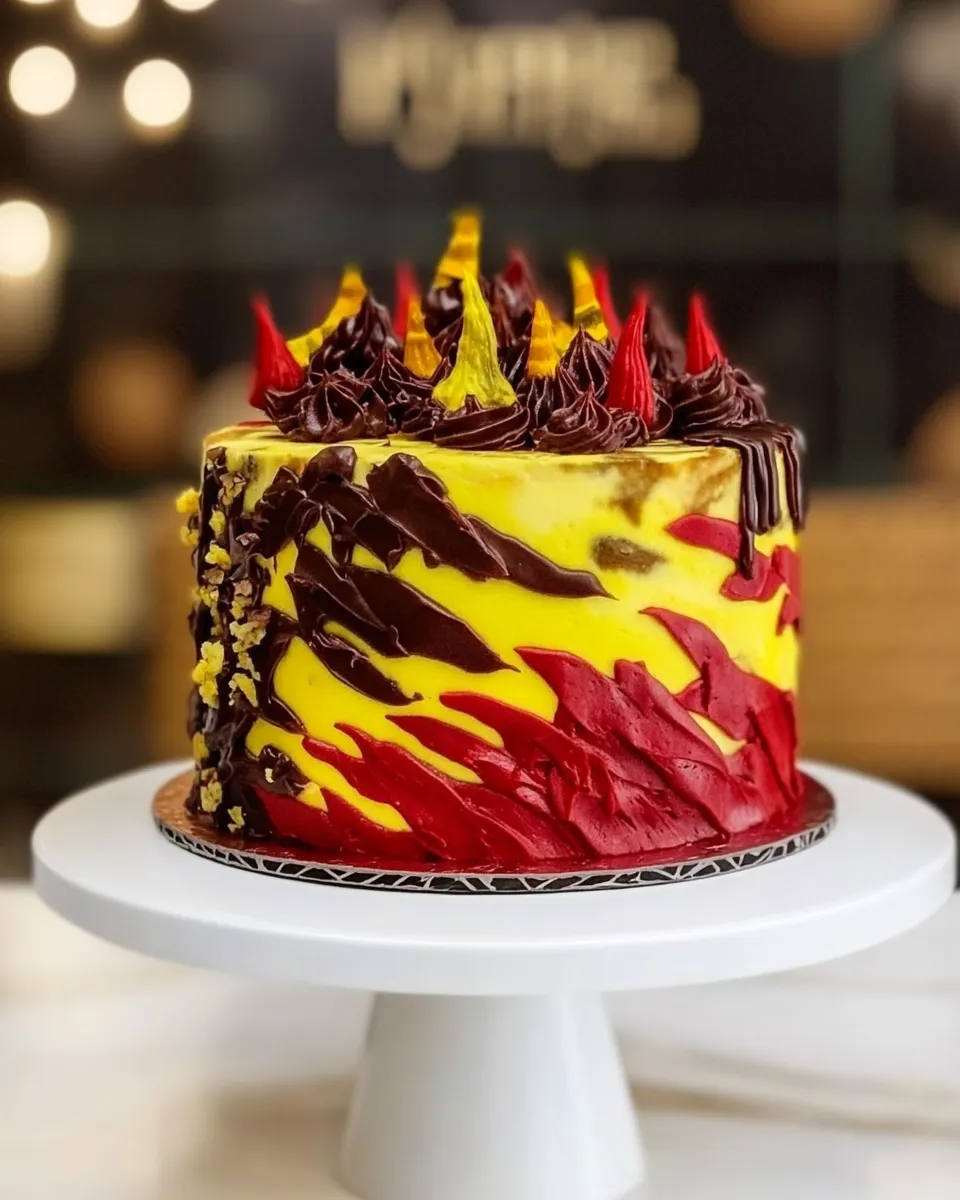
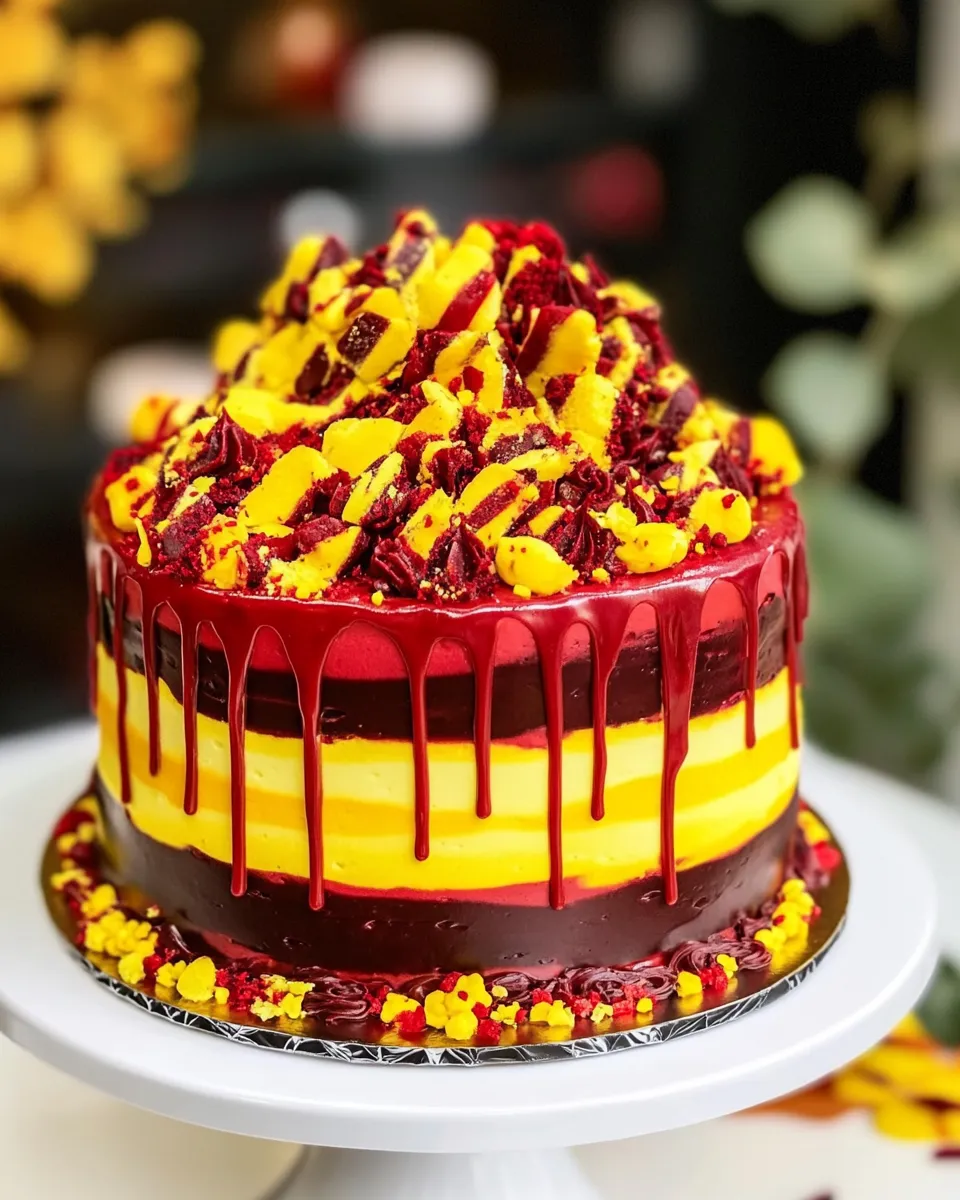
If you’ve ever wanted to celebrate your love for the magical world of Harry Potter, then this Harry Potter Cake is the perfect treat! Picture a whimsical cake that captures the essence of Hogwarts, complete with enchanting colors and a taste that will whisk you away to Diagon Alley. Whether you’re hosting a birthday party, a themed movie night, or just want to indulge in a sweet creation, this cake is a delightful way to channel your inner wizard.
Why Harry Potter Cake is Worth Your Time
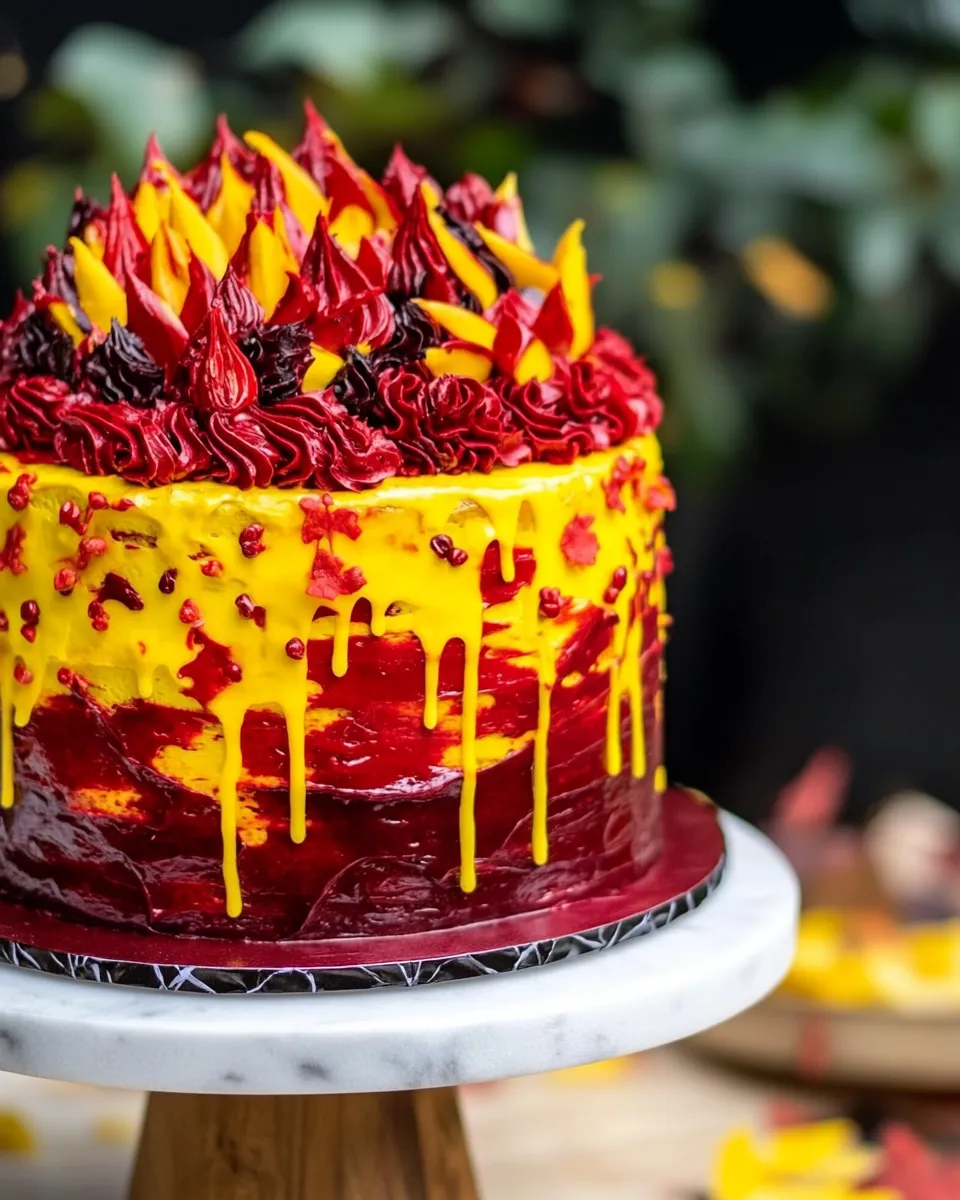
The charm of this Harry Potter Cake lies not only in its vibrant colors and whimsical design but also in its simplicity. With a few basic ingredients and a pinch of creativity, you can conjure up a cake that is sure to impress both young witches and wizards and adults alike. It’s moist, flavorful, and the perfect canvas for your decorating dreams. Plus, the joy of diving into a cake inspired by a beloved series makes every bite even sweeter!
What’s in the Bowl
To create this magical cake, you will need the following ingredients:
- 3 cups all-purpose flour
- 2 cups sugar
- 1 teaspoon salt
- 2 teaspoons baking soda
- 2 teaspoons white vinegar
- 2 teaspoons vanilla extract
- 1/2 cup + 2 tablespoons vegetable oil
- 2 cups water
- 1/4 teaspoon yellow food coloring
- 1/4 teaspoon red food coloring
- 6 cups powdered sugar
- 2 cups softened butter
- 2 teaspoons vanilla extract
- 1/4 cup heavy whipping cream
- 1/2 teaspoon red food coloring
Essential Tools for Success
Before you start baking your Harry Potter Cake, gather the following tools to ensure a smooth baking experience:
- Mixing bowls – For combining your ingredients.
- Measuring cups and spoons – Accurate measurements make a difference!
- Whisk – For blending wet and dry ingredients.
- Spatula – Great for scraping down bowls and folding in ingredients.
- 9-inch round cake pans – To bake your cake layers.
- Cooling rack – Essential for cooling your cakes evenly.
- Offset spatula – Perfect for frosting your cake smoothly.
Make Harry Potter Cake: A Simple Method
Now that you have your ingredients and tools ready, let’s dive into making this enchanting cake!
Step 1: Preheat the Oven
Preheat your oven to 350°F (175°C). This ensures that your cake will bake evenly and rise perfectly.
Step 2: Prepare the Cake Pans
Grease and flour your 9-inch round cake pans. This will help prevent the cake from sticking once it’s baked.
Step 3: Mix the Dry Ingredients
In a large mixing bowl, whisk together the all-purpose flour, sugar, salt, and baking soda until well combined. This step ensures that your dry ingredients are evenly distributed.
Step 4: Combine the Wet Ingredients
In another bowl, mix together the water, vegetable oil, white vinegar, and vanilla extract. Make sure everything is well combined.
Step 5: Bring It Together
Gradually pour the wet mixture into the dry ingredients, stirring gently until just combined. Be careful not to overmix, as this can lead to a tougher cake.
Step 6: Add Color
Divide the batter into two bowls. In the first bowl, add the yellow food coloring and mix well. In the second bowl, mix in the red food coloring. This will give you two vibrant colors to work with.
Step 7: Layer the Batter
In your prepared cake pans, alternate spooning the yellow and red batter to create a marbled effect. Use a knife or toothpick to swirl the colors together for a magical look.
Step 8: Bake
Place the pans in the preheated oven and bake for 25-30 minutes or until a toothpick inserted into the center comes out clean.
Step 9: Cool the Cakes
Once baked, remove the cakes from the oven and let them cool in the pans for 10 minutes. Then, transfer them to a cooling rack to cool completely.
Step 10: Prepare the Frosting
While the cakes are cooling, make the frosting. In a large bowl, beat the softened butter until creamy. Gradually add the powdered sugar and mix until well incorporated. Pour in the heavy whipping cream and vanilla extract, and beat until fluffy. For a pop of color, incorporate the red food coloring until you achieve your desired shade.
Step 11: Frost the Cake
Once the cakes are completely cooled, place one layer on a serving plate. Spread a layer of frosting on top, then add the second layer. Frost the top and sides of the cake, smoothing it out with the offset spatula.
Step 12: Decorate
This is where your creativity can shine! You can add edible glitter, themed decorations, or even little figurines to reflect the magical world of Harry Potter.
Swap Guide
If you’re looking to customize your Harry Potter Cake, here are some ingredient swaps you can consider:
- Flour: Use gluten-free all-purpose flour for a gluten-free version.
- Vegetable oil: Substitute with coconut oil or melted butter for a different flavor.
- Sugar: Use coconut sugar or a sugar alternative like Stevia for a healthier option.
- Heavy whipping cream: Use coconut cream for a dairy-free frosting.
Notes from the Test Kitchen
- Make sure your ingredients are at room temperature for a smoother batter.
- Don’t skip the cooling process; frosting a warm cake can lead to melting and sliding.
- Feel free to adjust the food coloring to create your own magical shades!
- This cake can be made a day in advance; just store it in an airtight container to keep it fresh.
Store, Freeze & Reheat
To store your Harry Potter Cake, keep it in an airtight container at room temperature for up to 3 days. If you want to extend its life, you can freeze it. Wrap the cooled cake layers tightly in plastic wrap and store them in a freezer-safe bag for up to 3 months. To reheat, let the cake thaw in the refrigerator overnight, and then bring it to room temperature before serving.
Common Questions
Can I use different colors for the cake?
Absolutely! Feel free to experiment with different food coloring to match your favorite house colors or any theme you desire.
How can I make the cake more chocolatey?
For a chocolate variation, replace 1 cup of all-purpose flour with 1 cup of cocoa powder. This will give the cake a rich chocolate flavor!
Is this cake suitable for kids?
Yes! This Harry Potter Cake is kid-friendly, and the vibrant colors and fun decorations make it a hit with children.
How do I prevent the cake from sticking to the pan?
Ensure that you grease and flour your pans thoroughly. You can also line the bottom with parchment paper for added protection against sticking.
If you loved making this Harry Potter Cake, consider trying out these other magical baking projects:
Let’s Eat
Now that you’ve created your very own Harry Potter Cake, it’s time to slice it up and enjoy! Gather your friends and family, and share this delicious creation that celebrates the magic of Harry Potter. With its vibrant colors, delightful flavors, and whimsical charm, this cake is sure to be a memorable centerpiece for any occasion. So grab your wand, or rather, your fork, and dig in!
Harry Potter Cake
Equipment
- Mixing Bowls
- Measuring cups and spoons
- Whisk
- Spatula
- 9-inch Round Cake Pans
- Cooling rack
- Offset spatula
Ingredients
Cake Ingredients
- 3 cups all-purpose flour
- 2 cups sugar
- 1 teaspoon salt
- 2 teaspoons baking soda
- 2 teaspoons white vinegar
- 2 teaspoons vanilla extract
- 1/2 cup + 2 tablespoons vegetable oil
- 2 cups water
- 1/4 teaspoon yellow food coloring
- 1/4 teaspoon red food coloring
Frosting Ingredients
- 6 cups powdered sugar
- 2 cups softened butter
- 2 teaspoons vanilla extract
- 1/4 cup heavy whipping cream
- 1/2 teaspoon red food coloring
Instructions
Baking the Cake
- Preheat your oven to 350°F (175°C). This ensures that your cake will bake evenly and rise perfectly.
- Grease and flour your 9-inch round cake pans. This will help prevent the cake from sticking once it’s baked.
- In a large mixing bowl, whisk together the all-purpose flour, sugar, salt, and baking soda until well combined. This step ensures that your dry ingredients are evenly distributed.
- In another bowl, mix together the water, vegetable oil, white vinegar, and vanilla extract. Make sure everything is well combined.
- Gradually pour the wet mixture into the dry ingredients, stirring gently until just combined. Be careful not to overmix, as this can lead to a tougher cake.
- Divide the batter into two bowls. In the first bowl, add the yellow food coloring and mix well. In the second bowl, mix in the red food coloring. This will give you two vibrant colors to work with.
- In your prepared cake pans, alternate spooning the yellow and red batter to create a marbled effect. Use a knife or toothpick to swirl the colors together for a magical look.
- Place the pans in the preheated oven and bake for 25-30 minutes or until a toothpick inserted into the center comes out clean.
- Once baked, remove the cakes from the oven and let them cool in the pans for 10 minutes. Then, transfer them to a cooling rack to cool completely.
Making the Frosting & Decorating
- While the cakes are cooling, make the frosting. In a large bowl, beat the softened butter until creamy. Gradually add the powdered sugar and mix until well incorporated. Pour in the heavy whipping cream and vanilla extract, and beat until fluffy. For a pop of color, incorporate the red food coloring until you achieve your desired shade.
- Once the cakes are completely cooled, place one layer on a serving plate. Spread a layer of frosting on top, then add the second layer. Frost the top and sides of the cake, smoothing it out with the offset spatula.
- This is where your creativity can shine! You can add edible glitter, themed decorations, or even little figurines to reflect the magical world of Harry Potter.
Notes
- Make sure your ingredients are at room temperature for a smoother batter.
- Don’t skip the cooling process; frosting a warm cake can lead to melting and sliding.
- Feel free to adjust the food coloring to create your own magical shades!
- This cake can be made a day in advance; just store it in an airtight container to keep it fresh.